Monday, December 1, 2014

My New Favorite Meal - Spinach Artichoke Smothered Potatoes

I'm a sucker for spinach artichoke dip. When I learned that artichokes were one of the most nutritious things available at the grocery store, I didn't waste a minute; I whipped up a batch ASAP.
But there was a  problem - I normally eat this with tortilla chips, but all of that extra salt and questionable oils nagged at my health-foodie conscience. Then one night as the kids were begging for baked potatoes for supper, and I was reaching into the fridge for the sour cream, I saw the jar of dip standing next to it, and the lightbulb went on. This was the happy result (I use boiled potatoes now instead of baked, simply because they can be ready faster):
(No, I didn't photoshop that picture - my potatoes are purple! Why? Well, according to Jo Robinson in Eating on the Wild Side (which I reviewed here), purple potatoes are much higher in anthocyanins than white-fleshed varieties. (What are anthocyanins, you ask? "Anthocyanins are a type of flavonoid, a class of compounds with antioxidant effects. Found naturally in a number of foods, anthocyanins are the pigments that give berries, red onions, kidney beans, pomegranates, and grapes their rich coloring. In addition to acting as antioxidants and fighting free radicals, anthocyanins may offer anti-inflammatory, anti-viral, and anti-cancer benefits." Click here for more of the science behind this claim.) Robinson also recommends not peeling your potatoes - not only do the skins contain 50% of the antioxidant activity in the entire potato, its high fiber content slows the digestion of starch and sugar, giving the potato a lower glycemic value. Of course, if your potatoes aren't organic, then by all means peel them - potatoes are among the most heavily sprayed produce on the market. In addition to eating the skins, she also recommends eating them with a type of fat (no prob with this recipe!) and chilling them for 24 hours after they've been cooked (oops- forgot that part tonight!) to further lower their glycemic index.)
(If you're interested, my potatoes are the All Blue variety - I bought my seed potatoes at Jung's in Steven's Point this spring.)


But enough about my purple potatoes, here's the recipe:  
Spinach Artichoke Dip
1 10-oz package frozen spinach
1 7.5-oz jar marinated artichokes, drained and chopped
1/4 cup butter
1 clove garlic (or more)
8 oz cream cheese
8 oz sour cream
1/2 cup Parmesan cheese
1/2 cup mozzarella cheese
Salt and pepper to taste
Melt butter and sautee onion and garlic. Add spinach and cook until heated through. Stir in other ingredients and heat to bubbling.
This can be made ahead, or simply spooned over your prepared potatoes. Bake at 400 degrees for about 20 minutes.

If your husband complains that there's no meat in this dish, feel free to add some bacon! I doubt he'd argue with that. ;)

Tuesday, November 25, 2014

Our First Try at Rabbit Processing

My very relieved (and a bit disheveled) rabbit raiser
We did it! The day we've been dreading finally came, and after all it wasn't so bad (thanks, I think, to our previous chicken butchering experience - we knew what it would take mentally to "do the deed", so it was just adjusting to the different anatomy.) This was the make-or-breaker for my son's rabbit-raising enterprise, and he managed it extremely well (I should have said "he" did it rather than "we" - he did all the work, I was just the cheerleader/instruction reader). We're both still in the grips of the "we were dreading this ordeal and now it's over" euphoria, very pleased with a job well done!
~~~~~~~~
I can't recommend the book Butchering by Adam Danforth highly enough  It has very detailed instructions, including color photographs, so you know exactly what to expect. My son read and re-read the rabbit section of this book preparing for today, and it helped immensely in giving him confidence.

 Click on the picture of the book or the link in the text to view a full description on Amazon.com. 
Disclaimer: if you purchase the book (or another item) after following the link above, I will receive a small commission from the sale. Thank you for your support!

Friday, July 25, 2014

An Even Simpler Way to Strain Honey

Yesterday I harvested honey for the second time this year, and tried a new and simpler way to strain it. I simply scrape open the comb on each side with a fork (not completely mashing it, as I'd done before), then suspend it in a gallon-sized jar in a jelly bag (seam side out, for easier cleaning, and secured with a rubber band (I used one from some broccoli I bought at the grocery store - they're nice and thick). I top it all off with a plate to keep bugs out).
I leave it in a warm place for a day or so (until it stops dripping), then pour the honey into smaller jars for storage. Since I want to save the wax, too, I take the comb out of the jelly bag and heat it in a double boiler, just until melted. Then I pour it into my silicone muffin pan and let it cool for a few hours.
(Tip: if you wipe out your double boiler pan while it's still warm, the wax will come out fairly well. Better yet, after your wax is cooled (so you can weigh it), mix up a batch of lip balm in the pan - the oils will make it much easier to wipe clean!)
Once the wax hardens, I pop it out of the muffin pan. Usually, there will be some honey on the bottom of the cavity, since not all of it dripped out during the jelly bag stage. I'll save that in a separate container for baking, since it was already heated (I like to keep the rest raw).
I generally also have a layer of pollen on the bottom of each wax piece. I simply scrape this off with a knife and freeze it (I use it as a protein supplement for my chickens in the winter).

Friday, July 11, 2014

Add Sourdough Starter to Your Pancakes

I learned recently that you can add extra sourdough starter to your pancake or waffle recipes - as much or as little as you want (although I wouldn't go more than 50%). This is a great way to use starter that's not up to full strength (either a new starter, or one you're reviving from freezing or dehydrating), or if you haven't had a chance to bake in a while and you just have too much. I made a batch of cornmeal pancakes today, with a recipe that called for 2 cups of flour (I used sprouted whole wheat) and 2 cups of cornmeal (I used masa harina) and added about 1 cup of starter (I didn't measure, I just dolloped it into the pancake batter and stirred it in). They turned out wonderfully!

I've done this with other pancake and waffle recipes, too, and they always turn out great.

Homestead Cuteness

It's been a busy spring, so I'm sorry I haven't posted in a while, but hopefully you'll forgive me because I have a ton of cute pictures to share! Here's what's been keeping us so busy:
In January, my 11 year old daughter Hannah bought two Angora rabbits from a friend of ours. They were sisters, one all white named Lily and one grey named Clover.
All was going well until April, when we got a call from the friend we'd bought them from saying that she had discovered one of the girls from that same litter had suddenly shown itself to be a boy! The litter was nearly a year old by then, so they should definitely have been easily recognizable much earlier. Just to be sure, our friend came over and checked Hannah's bunnies, and gave us the all-clear. They were still both girls.

A week or so later, I checked again, just to be sure. I'd never sexed a rabbit before, but I figured it wouldn't hurt to check, and there, even to my inexperienced eye, were definite male parts. Lily was actually Lyle!

Thus began Clover Watch 2014. Was she pregnant? Was she getting cranky from hormones, or was it just spring fever? Was that nest-building, or just moving stuff around? How many days was it since we separated them? What's the gestation period for a rabbit, again?

Hannah did the math, and wrote on the calender, "If Clover doesn't kindle by now, she's not pregnant." Apparently we need to work on her math skills, because a week later, on May 20th, we found 8 baby bunnies in the nest box! Two were stillborn, but the 6 remaining bunnies were big and healthy.

Those babies are almost 7 weeks old now, and so unbelievably cute!
But wait - there's more. This all started because my 13 year old son Sam wanted to raise meat rabbits. My husband and I had promised him on his birthday in October that we would get him set up with his first set of rabbits, feed, and cages. After some discussion, however, we all agreed it would be best to wait until spring, so we could start breeding them right away.

In mid-May, my sister-in-law found a New Zealand buck for sale and bought him for us. We picked him up and brought him home, and Sam promptly named him Paul Furgussen Fluff.
Sam and Paul
Paul is a great rabbit - very calm and even tempered (he just sniffed at our dog when she came up to check him out, and doesn't mind when Sam picks him up and plays with him). He's also a big boy - 10 pounds at least.

But a buck isn't much good without a doe, so we went on the hunt for a couple of girl rabbits to bring home for him. We found a Craigslist ad for some Californian does about an hour from our house, and the price was right, so we bought them. And so Asher and Bunny joined our little farm (Sam wanted his rabbits named after the great Sumerian king, Ashurbanipal, thus Asher, Bunny, and Paul - get it? I love my homeschooled geeks!)
The woman we bought the does from said that they had already be exposed to a buck (her own New Zealand), so they might actually be pregnant already. Double score! If they were, we could keep a doeling from each of those litters and have 4 breeding does without worrying about inbreeding. Sam's Rabbit Ranch was off and running!

Sure enough, last week Bunny kindled, and Sam had his first litter of 10 baby bunnies. No signs yet if Asher is pregnant (there's a week left in her possible gestation period), so we'll just have to wait and see.

But bunnies aren't the only cute babies running around the yard - we also had a very successful hatch in our incubator this spring, so we have 33 mixed-breed chicks just starting to feather out:
This picture is from the day they hatched, so it's a little out of date
And our order of 100 Cornish Cross chicks arrived at the post office on Wednesday:

And to top it all off, we brought home two new kittens on Sunday:
Hazel and Chestnut
This may be the cutest summer ever!

Monday, July 7, 2014

Honey harvest!

I started my bee check this afternoon by looking through the plastic window on the side of my Kenyan-style top bar hive. I was glad I did - the girls had drawn comb on all but one of the bars! I ran back to the house to grab a pot for the honey comb I intended to harvest, and then got to work. I started in the back, figuring that would be where the honey was, with the brood closer to the front. It didn't take me long to figure out I had that backwards! The back combs had almost no honey and lots of brood. So I checked the front frames, and found all honey with no brood! Score!
Unfortunately, the girls were drawing down their comb crooked, so I ended up breaking some comb, but I cleaned up my mess and it worked out fine. I harvested about 7 frames before I found brood and stopped there. That means the hive is still about 2/3 full of in-use comb; I'll have to keep an eye on it to make sure they don't fill up again and swarm.

In the Warre hive, the prospect wasn't so cheerful. When I lifted off the quilt, I saw only the same few frames of drawn comb that had been there when I checked the hive at the end of May. There were plenty of bees for that amount of comb, but not nearly what there should have been at this time of year. I'm worried that this whole hive may end up being a loss. I have no idea why one is thriving while the other is struggling; last year it was the other way around! I just don't know what to make of it.

For now, I'll just leave the Warre alone and hope it rebounds. My best guess is that they re-queened at the end of May (when I saw the queen cells) and are just starting to build their numbers back up. If there weren't a queen at all, there would be no bees left by now, so at least I can rest easy on that score.

I never thought raising bees would add so much drama and suspense to my life! Who needs to watch soap operas? Ha!

Friday, May 30, 2014

First Bee Check of the Year

Well, I did it - I decided to give beekeeping another shot, and so I bought two more packages of bees on May 10th and brought them home. I fed them honey water in jar feeders (which I later learned might not have been the best idea) and pollen patties, and they seemed to be off to a good start. I've been meaning to get back and check on them, but with the crazy busy-ness of spring, I haven't been able to get out there.

I finally had a chance to check on the bees this morning. I have to admit, I'm very confused. The Warre hive had only 3 frames of drawn comb, and on two of them I found queen cells! Obviously, the bees aren't overcrowded, since they haven't even started on the 5 empty frames, but just in case I added the extra box of frames I'd been planning to add anyway. I'm thinking it might be wise to set up a bait box/swarm trap somewhere in the yard, too, just to hedge my bets. My best guess is that the queen was weak or even died, and so they're raising a new one to replace her - which would mean no swarm, and hopefully at least a small crop of honey once they get settled down again with a new queen.

In the top-bar Kenyan-style hive, they had 7 frames drawn out, with plenty of room to expand in the box. There were a lot of brood cells, and plenty of pollen and uncapped honey (and even some capped honey already!) There were, however, quite a few bulgy brood cells, which I'm hoping are just drones and not just oddly formed queen cells (the strange goings-on in the Warre hive got me nervous!)

Even more nerve-wracking is that we'll be out of town for the weekend for my cousin's wedding - so I'll be wondering all weekend if my $100 investment in that package of bees is going to fly away and leave me honey-less! I never thought I'd be such a nervous mother over a hive of bees!

Tuesday, April 8, 2014

What a difference a warm spring day makes!

On Sunday morning, 99% of my yard was still covered in snow, some more than a foot deep. Then Sunday, Monday, and today all topped 50 degrees F, and this is what I found outside this afternoon:
The first leaves of spinach are uncurling from last year's "dead" plants (remember, this was under snow just two days ago!)
The walking onions are sending up new green leaves, too (sorry about the wire in the foreground; I have a chicken tractor parked over this garden bed).
These are rhubarb stalks pushing up from the ground (this bed has actually been snow-free for about a week now; it's on a south-facing slope.)
And although these aren't edible, they are the first blooming thing after a very long and very cold winter, and they make me happy (these are in a bed next to the house, so they've been snow-free for about a week, too).

A quick google search, just to make sure, informed me that I was wrong: some crocus ARE edible - in fact, the ridiculously expensive spice saffron is harvested from a particular kind of fall-blooming crocus! You learn something new every day!


Saturday, April 5, 2014

Honeybee Heartbreak

I went out to clean out the beehives this afternoon (now that the snow is only ankle deep rather than thigh deep!) and, as expected after this long, cold winter, found them all dead. I opened up the top bar hive first, and found the combs mostly empty - maybe three or four bees head-first in the comb, but it was bone-dry and quite brittle. When I lifted out the 5 or so frames with comb on them, I found a drift of dead bees on the floor of the hive. It was heartbreaking, but I was determined to make the best of it, so I saved the wax and scooped the dead bees into a bucket to feed to the chickens.

Then I went to the Warre hive. This had been by far the stronger hive, so I had hoped that, if one of the hives could pull through the winter, it would be this one. The frames were stuck fast with propolis, so I had to use my hive tool to pry them loose. When I pulled the first frame loose, I could have cried. Most of the combs had dead bees in them, head-first, as if they died desperately trying to scavenge the last droplet of honey. But it got worse. By the second or third frame I noticed that both the wax and the frames had mold on them. I soon realized that I wouldn't be able to use any of the wax, and that it wouldn't be wise to feed the dead bees to the chickens. Not only that, but the entire hive - a $350 investment - was likely ruined and no longer usable.

So now I'm stuck with the dilemma - do I cancel my order of bees for this spring, try to build my own hive (I found instructions online, which look do-able), or bite the bullet and buy all new? Or is there some way to salvage my old hive? Buying new isn't really an option - we were hoping to get new windows for the house this year (some weird spots appeared in ALL of them, between the panes, last summer), so we don't really have extra money. Building my own isn't exactly going to be cheap, either (and, knowing my carpentry skills, not as good quality). So I'm left with either salvaging what I have (if I lay everything out in the sunlight, will that be enough to sanitize it, or will the mold spores always be there, waiting for the humid breath of thousands of tiny bodies to revive it?) or - I hate to even think of it - should I just give up on beekeeping?

Friday, March 28, 2014

Healthy Homemade Chocolate Bars (or hearts, or chips, or . . .)


Every once in a while I get a hankering for some chocolate (who doesn't?) Instead of running to the grocery store and buying something made with soy, refined sugar, emulsifiers, and who knows what else, I whip some of this up in my double-boiler at home. It's even safe for my friends who can't have dairy, eggs, or gluten. Pure and simple goodness!

Or if you want something a little more fancy, you can add in any number of extras - almonds, coconut flakes, mint swirls, dried cranberries - whatever floats your boat!

Healthy Homemade Chocolate
1/2 cup coconut oil (I prefer this brand) (butter also works great)
1/3 cup honey (more or less, depending on how dark you like your chocolate) (maple syrup is good, too)
1/2 cup cocoa powder (I prefer this brand)
dash sea salt
Melt all together gently in a double boiler, stirring very well (or it will separate, leaving all of the honey on the bottom and VERY bitter chocolate on the top! I know this from sad experience! ) Pour into molds and cool (I usually put mine in the freezer because I'm impatient and I want to eat some right away!) 

One great thing about this recipe is that if you mess this up, you can just re-melt it and try again - add more honey, stir it up better if it separates, etc.

This batch makes about the same amount as five 1.55-oz candy bars. 

Because they don't have any added stabilizers, these chocolates will melt at about 76 degrees (the temperature your coconut oil melts), so you may want to store these in the refrigerator.

Monday, March 24, 2014

Honey-Sweetened Dried Cranberries

Here's another pantry staple that I've been wanting to make at home for a while. The ones in the store are almost always sweetened with sugar and coated with vegetable oil - both of which I'd prefer to avoid, so when I found a recipe (in The Complete Book of Small Batch Preserving) I was overjoyed. I adapted it to use honey instead of sugar, and it worked great (although the finished product is more sticky than what I'm used to, but I presume that's because I don't add any oil).

Homemade Honey-Sweetened Dried Cranberries
makes 3/4 cup (I always double or even quadruple the batch)
2 cups fresh (or frozen) cranberries
1/4 cup honey
Cut cranberries in half and place in medium bowl, stir in honey. Cover and let stand 24 hours, stirring occasionally. Drain off liquid. Place cranberries on a baking sheet and place in a 100 degree F oven for 24 hours (I use my dehydrator),
Store in an airtight container.

The Perfect Salad Dressing

In another of my "well, duh" moments, I discovered last night that mixing salsa (fermented, of course!) and sour cream make for the best lettuce topper ever! I think the kids still prefer ranch (salsa's a little to spicy for them) but I'm hooked!

Ooh, and if you add an avocado - perfection!

Friday, March 7, 2014

Incubator Success!

Ever since I first got chickens, I've been dreaming of hatching my own hens' eggs. I've tried getting breeds known for going broody (Orpingtons, twice!) and even buying bantams that had hatched out their own chicks before (only one ever set (Millie) and she got eaten 2 days before the eggs would have hatched. That was heartbreaking!) So when The Instigator (aka Mama Hen) told me that my niece wanted an incubator for her birthday, I told her I'd chip in for whatever she decided to purchase, if she agreed to hatch out some eggs for me.
She chose the Hovabator #1583 (the circulating air model) and also purchased the automatic egg turner and thermometer/hygrometer, for a total of $175. I was very skeptical that it would work - I'd tried to use one of those foam incubators before, with no success (to be fair, I'd been given it for free, it was definitely used (dirty), and it didn't have the fan. It turned out the thermostat didn't work, and even after I replaced it, I couldn't get the unit to keep a constant temperature.) But I still gave her 40 eggs to hatch out, figuring you never know, it might work!

And work it did! 21 days after we dropped off the eggs, the kids and I were back at her house for the weekend, eagerly waiting for "our babies" to make their appearance. On the drive over, she'd texted me that the first egg had pipped, and it hatched completely shortly after we arrived.
It was the most exciting, nerve-wracking, joyful experience I've had since I delivered my own children. All weekend, we waited, holding our breath as another chick would start "unzipping" her shell (yes, I called them all girls, hoping for mostly pullets!) and urging her on as she gave the final push and emerged from the shell. All day and night the sound of chirping came from the back bedroom (I don't know how my niece got any sleep in there!) and though the kids were running around and having fun with their cousins, I kept stealing back to the incubator to check on the chicks. As each chick hatched, we would remove it from the incubator and put it in a "first brooder" box to dry off under a heat lamp, so it wouldn't knock the other eggs around so much. Then, once it was dry and rested, we would move it to the main brooder with its siblings.

Halfway through the first day, I knew I was hooked, and went on Amazon to order my own incubator. I got the exact same setup she had (why mess with what works?), and as soon as it arrived I started another setting of eggs. 
My daughter added some incubator graffiti when I wasn't looking!
It was extremely simple to use. I set everything up, then made sure that the incubator kept a steady 99.5 degrees (Farenheit). I added water into the reservoir, put the eggs in the turner, and closed it up. Other than adding water anytime the humidity went below 40%, I didn't do anything (other than watch anxiously and dream of fluffy little chicks!)

(I highly recommend Anna Hess' ebook Permaculture Chicken: Incubator Handbook - exactly the information I needed, giving me confidence and peace of mind. Well worth the $2.99!)

On day 19, I removed the turner and set the eggs onto the wire floor, then closed everything back up again. Right on schedule, the first egg began to rock, and soon I saw a tiny hole in one of the shells. Before long, she was pecking a ring around the top of the shell, and her sisters were starting to crack their shells, too. At 11:00 at night I was awakened by the sound of LOUD chirping - the first chick had hatched! 7 more had pipped, and were peeping and wiggling inside their shells. The hatch had officially begun!
Exhausted babies!
For the next two days, I was on a non-stop "chick high" running back to the incubator over and over to see how things were progressing. By Sunday morning, there were 25 chicks, and by the end of the day 27 of the 41 eggs had hatched (I'd gotten 23 from the first batch at Mama Hen's, and 25 from the second batch she hatched out for me - about a 60% (25 out of 41) hatch rate - not too bad!)

It wasn't until about Tuesday, when the "chick high" had faded, that I realized that those 77 adorable little fluffballs would grow into full-sized chickens very quickly. Now where was I going to put them all?!
My "babies" at three months old, in the new chicken run my husband put up for me
This post added to Old-Fashioned Friday, the 104 Homestead Blog Hop Farmgirl Friday, and the Homestead Barn Hop.

Tuesday, February 18, 2014

Book Review: Great Garden Companions


Great Garden Companions by Sally Jean Cunningham
Great Garden Companions: A Companion-Planting System for a Beautiful, Chemical-Free Vegetable Garden by Sally Jean Cunningham

I've been fascinated lately with the idea of permaculture, and one of the basic and easy to implement pieces of that idea is companion planting. If you've read Rosalind Creasy's Edible Landscaping, you know there's a lot that can be done to make gardens both more productive and more beautiful. Add a little "Carrots Love Tomatoes" - which lists which vegetables do well with which (according to various old wives' tales and anecdotes, not necessarily backed up with solid facts)  - and you're really getting started. Then add in some Lasagne Gardening (building easy, fertile raised beds), a touch of Rodale's Encyclopedia of Organic Gardening (listing different vegetables and how to grow them, as well as identifying garden pests and how to deal with them), John Jeavon's How to Grow More Vegetables Than You Ever Thought Possible on Less Land Than You Can Imagine ("bio-intensive" gardening in wide rows rather than single-crop rows), and Good Bugs for Your Garden, and you're well on your way. Or you could just read this book, get the basic information you need, and actually have time to get outside and do it!

I was particularly impressed by the fact that this book is so practical - this is what she actually does in her own garden (not just theoretical ideas, or second-hand passed-down principles), and she details exactly what you can do to get the same results. She includes diagrams of her garden - how she pairs up plants in each bed (and why), how she works in crop rotation, and how you can adapt her plans to your own situation.

This book focuses heavily on attracting beneficial insects to your garden, which in the author's experience drastically reduces pest problems in her vegetables, as well as increasing pollination. One of her favorite ways of doing this is to include flowers and herbs that attract these beneficials (and which also look and/or taste wonderful!)

Another benefit of companion planting is that it simplifies weed control - with plants covering all of the bed, short plants mixed with tall ones, etc., it leaves little room for weeds. And since there is such a variety of plants, they each give and take different nutrients, making it a much more balanced system.

I can't wait until it warms up enough for me to put this book to work in my garden!

Note: I was not payed to review this book, I just really love it! But if you click on any of the links above and buy a book at amazon.com, I will receive a small commission from the sale. Thank you for your support!

Saturday, February 15, 2014

Brew Your Own Kombucha in 10 Easy Steps

Besides being fun to say, kombucha is also tasty, bubbly, and full of probiotic goodness. It's a great source of B vitamins, antioxidants, and glucaric acids - and it's really easy to make at home!

I took a lot of convincing, but I'm now a true kombucha convert. My first experience was not a good one - a friend of mine let me try some of her homemade batch, but it was unflavored and apparently pretty strong, and I didn't like it at all. I don't like caffeinated tea generally (as opposed to herbal tea, which I love), and I'm sure that contributed to my dislike.

I put off trying it again for a long time (my sister-in-law, Mama Hen, has been trying to get me to give it a second chance for about a year now). My unwillingness was strengthened by the fact that you need to make it with white sugar (apparently natural sweeteners like honey or maple syrup won't work). I learned, however, that in the fermenting process the sugar is digested by the Symbiotic Colony Of Bacteria and Yeast (or SCOBY - basically the "starter", which looks kind of like a mushroom or jellyfish floating on the top of your tea. Kinda weird, but kinda cool, too, in a food-nerdy kind of way). So I started to consider trying it again.
My SCOBY

But there was still the problem of the taste. Quick to defend her beloved beverage, Mama Hen showed me that kombucha can be easily flavored with whatever you like. While I was staying with her one weekend, I tried some of her ginger flavored kombucha, and I was converted. I liked it, and what's more, the kids liked it! I asked her how hard it was to make, and she immediately said, "It's easy! Let me show you! I'll even give you a SCOBY to take home with you!"

And so it began. When I got home, I found a message from Mama Hen saying she'd just tried making blueberry flavored kombucha, and that her family loved it - so that's the flavor I tried for my first batch (it helped that I had blueberries already on hand). The kids loved it; so much, in fact, that by the time I got out my camera, this was all that was left of the gallon I'd made:
Kombucha
1. Boil 4 cups of uncholrinated water
2. Steep 2 Tablespoons of green or black tea (cannot be a decaffeinated variety! And yes, it must be real tea, not an herbal infusion) for 5-7 minutes
3. Strain out tea into one gallon glass jar
4. Mix in one cup of white sugar
5. Top off jar with cold, unchlorinated water, leaving at least an inch of headspace
6. Make sure that the jar of sugar water isn't too hot, then gently pour in the SCOBY with its incubator liquid
7. Cover with a cloth or coffee filter, secured with a rubber band (especially in the summer - fruit flies LOVE this!) and place your jar in a dark place (like a cupboard) for 7-10 days (longer if your fermenting spot is cool, or if you want a bolder flavor. You can brew it up to 30 days. Check the flavor by inserting a straw under the SCOBY, capping with your finger, pulling out the straw, and then tasting)
8. Remove your SCOBY and 1-2 cups of tea as an incubator for your next batch (or just brew up another batch and put your SCOBY back to work!)
9. Add flavoring to your finished kombucha - my favorite is blueberry; just add 1/4 cup of blueberry juice to your gallon of kombucha. Other flavor ideas: cranberry, ginger, or anything else you think would be good! You can certainly pour your kombucha in to smaller jars and flavor each one differently. Feel free to experiment!
10. (Optional) You can do a second ferment, leaving your flavored jars in a dark place for another two or three days for extra probiotic goodness.

Enjoy!

Thursday, February 13, 2014

Egg-celent Article on the Price of Selling Eggs

I ran across this article this morning and thought it would be a good one to share here. If you're already selling eggs, or only dreaming of raising chickens one day, it's good to have a handle on the real cost of raising top-quality eggs in your back yard. Of course, for me, raising my own laying flock is more about boosting my kids' health and nutrition (you can't buy eggs as good as mine in any store!) than about economics, but it's still good information. I found his comments to be spot-on, with a few minor adjustments for local organic feed costs in my area.

Here's the blurb from the top of the article:
"Josh shares the facts and figures of raising pasture-raised, free-range, organic-fed hen eggs. It's math that can really help you understand your inputs and what you should be charging for that dozen of eggs you collect from your chickens."
Valdale-Farm-Eggs-1005-300x199
Small Farm "Egg-onomics" from On Pasture
http://onpasture.com/2013/12/02/small-farm-egg-onomics/

Brownies ala My Husband

My husband is a genius.
"You know those awesome Maple Syrup Brownies you make? Why don't you put a layer of Healthy Fudge on top, like a frosting?"

Yup, he's a genius. Especially where chocolate is concerned.

Wednesday, February 5, 2014

Don't Skip the Nutribalancer!

I've been tempted to leave out the Nutribalancer from my home-mixed chicken feed, but I learned the hard way that it's not such a good idea. Our bag ran out mid-January, and it was a week before we could get more. In the meantime, my flock stopped laying altogether! Thankfully, a few days after we started mixing in the Nutribalancer again, they started right up again, and we're almost back to our normal egg totals. Lesson learned!

Monday, January 20, 2014

Home-mixed No GMO Corn and Soy Free Chicken Feed (that won't break the bank!)


I keep seeing posts online for homemade chicken feed, and I always click hopefully on the links, only to find that they all seem to have a dozen different ingredients (that I can't find locally) which would cost about five dollars a pound to mix. I don't know about you, but even considering the importance I put on quality food (that's why I raise my own chickens, after all!) I can't afford that. With my 40-odd bird flock, that would break the bank pretty quick!

So I finally sat down and did a little research into what a basic, simple-to-mix ration needed to have, and came up with the recipe below. I was a little scared to share my recipe right away, in case there was any glaring nutritional deficiency that might show up later (I'd hate to give bad advice and perhaps harm someone's animals!) but I'm happy to report that my girls have been living on this ration for five months now and happily laying that whole time (even through the sub-zero weather we've been getting lately) so I think it's safe to share.

This is still going to be more expensive than the feed from my local Farm & Fleet store (which I believe is still around $13 for a 50-pound bag), and even than the organic feed I was buying (which, last August, was about 43 cents a pound). But that feed relied heavily on soy and corn, both of which make me uncomfortable from a nutritional standpoint. Plus the fact that I had to drive an hour and a half one way to get it (and we always seemed to run out at the busiest times in my schedule!)

So I started making my own. It's important, whenever changing feed for your animals, to make the change gradually, mixing in a little more of the new feed each day, until you phase out the old ration completely. A sudden change of feed isn't good for any animal.

The Cheerful Agrarian's Homemade Chicken Feed
(this makes enough for about 10 hens)
2 cups wheat
1 cup oats or barley (I mix the two, to total 1 cup)
1 cup black oil sunflower seed
1/2 cup flax
2 Tbsp Fertrell Nutribalancer
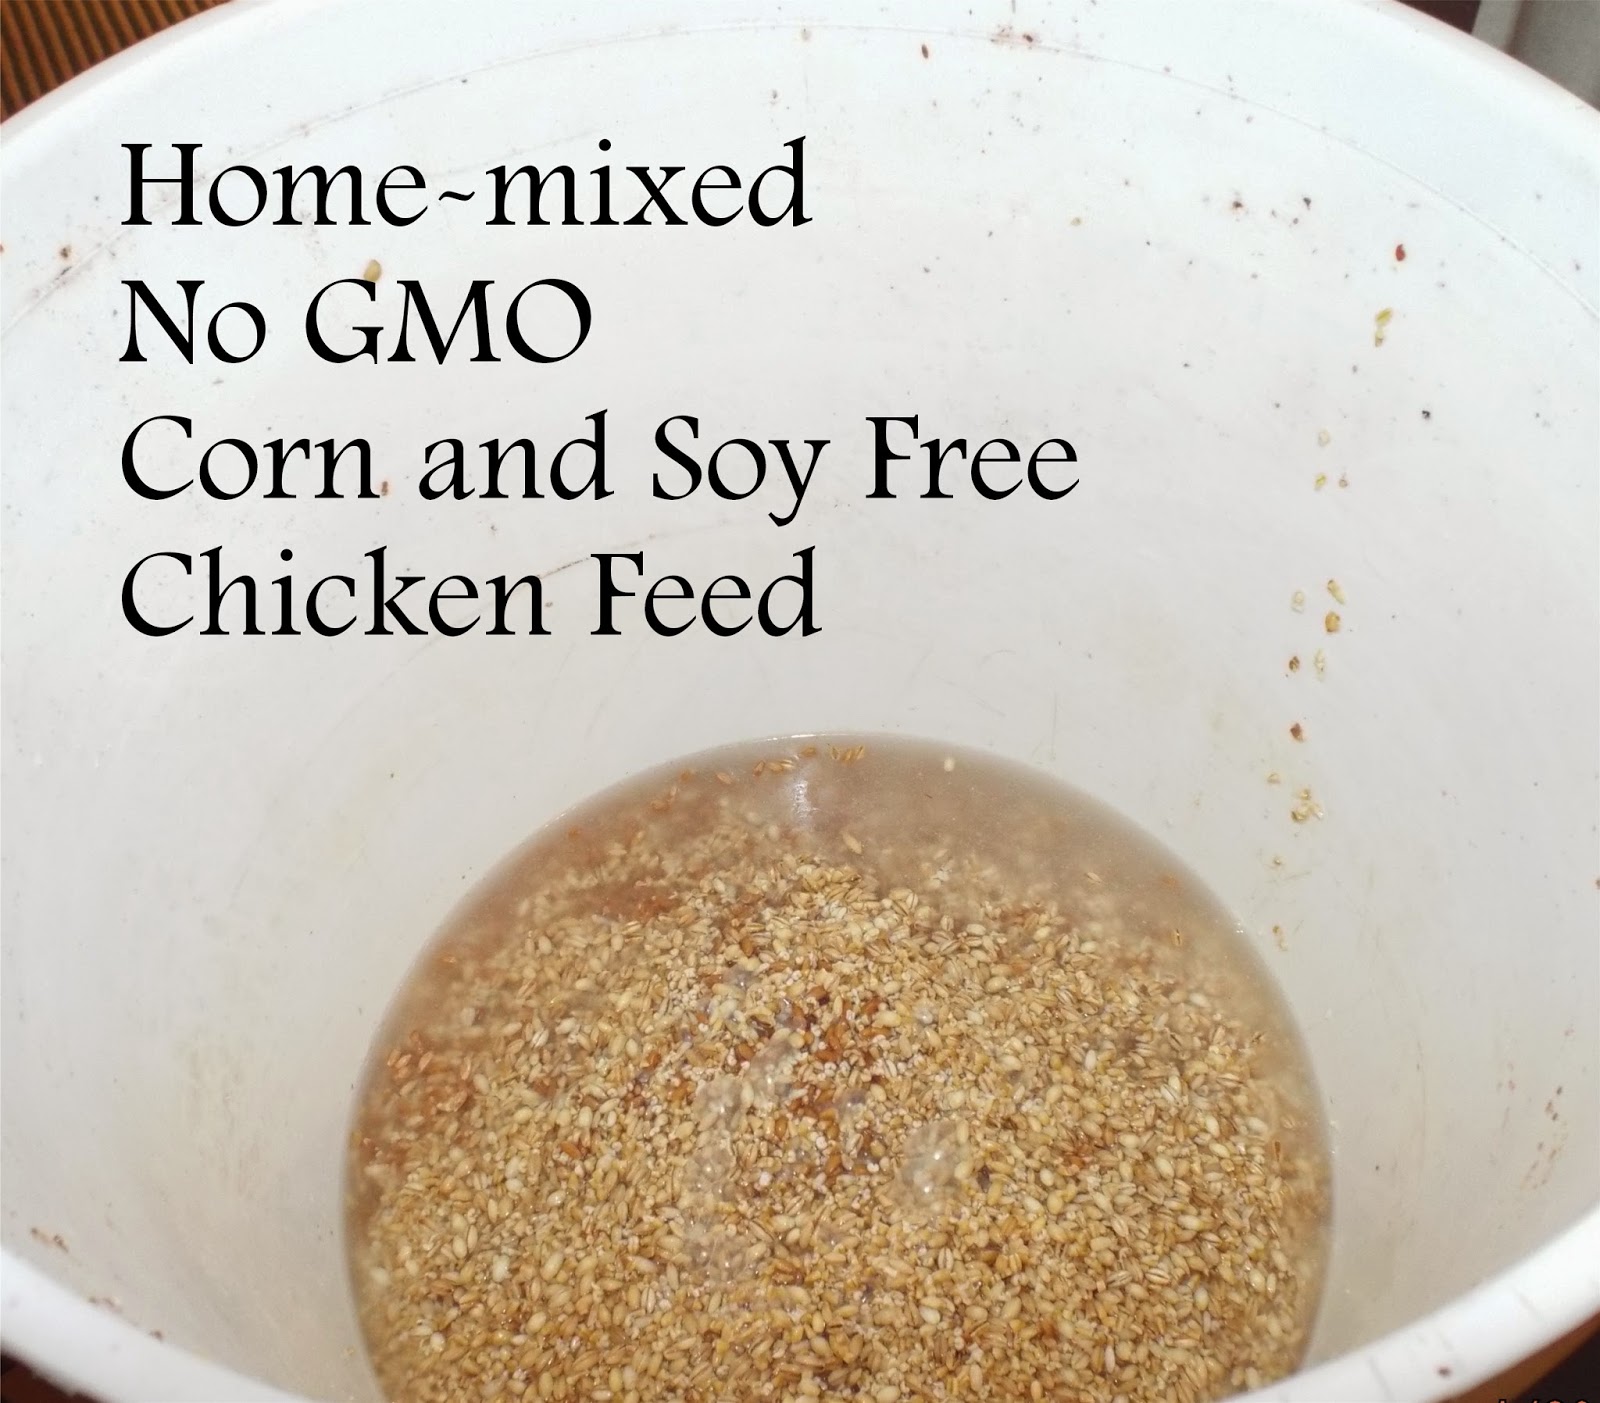
I like to soak the grains overnight, mixing the wheat, oats, and barley and covering with water (or whey, if I have any left over from making cheese). This encourages the grains to sprout slightly, which enhances the nutritional content and makes the whole grains easier to digest. In the morning, I add the flax (which I first grind in a coffee grinder - unground flax just goes right through the chickens whole), the Nutribalancer, and the sunflower seeds.

Notes:
I tried soaking the sunflower seeds with the grains, but they tended to get moldy, even if only soaked overnight, so I switched to just adding them in the morning.

I don't buy ground flax because it goes rancid so quickly it would be bad before it picked it off the store shelf. My cheap little coffee grinder handles the flax seeds just fine.

I add raw apple cider vinegar to the chickens' water each day (about 1 tablespoon per gallon) to boost their immune system (here's the link to how I make it, or you can use some you've purchased).

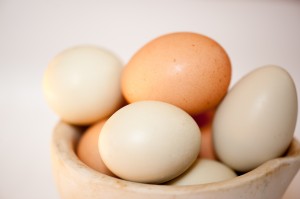
They have oyster shell available free choice, and I like to toast eggshells after I've used them and feed them back, crushed, with the other kitchen scraps. I've never had problems with soft shells.

Whenever I think of it, I chop up a clove of garlic and add it to the kitchen scraps, again to boost their immune systems.

Every so often, I quarter a small pie pumpkin and feed it to the girls. It is reported that there are compounds in pumpkin seeds that kill intestinal worms.
I buy my grain in 50-pound bags at the local bulk food store for about 50 cents a pound. I like to get Wheat Montana's Bronze Chief Red Spring Wheat (red wheat has a higher protein content), but if they don't have it I've also used their Prairie Gold White Spring Wheat (which I've also seen for sale at my local Walmart in 25-pound bags, for about the same per-pound price). Wheat Montana guarantees that their wheat is GMO-free and chemical free (not organic, but as close as I can afford right now).

I did some research, and found that there is no GMO version of barley, oats, flax or sunflowers, so that makes my whole mix GMO free (Nutribalancer is certified for use on organic farms).

I buy my flax in 25-pound bags from the same bulk food store where I buy my grains, and it makes the most expensive portion of my mix at over a dollar a pound (but since I use less of it, it doesn't drive up the overall price of the feed too much). The sunflower seed I get from a local farmer for a little over 30 cents a pound.

So this feed costs me a little under 50 cents a pound - which is more than I was paying for the organic feed, but I don't have to drive an hour and a half to get it (gas isn't getting any cheaper, nor is the wear and tear on my truck!) and it doesn't have any corn or soy in it (which I'd prefer not to have, even if it's organic). The biggest perk, though, is that I could one day grow all of this myself (if I scaled way back on the number of chickens I raise and way up on the amount of garden space for growing grain - but still, theoretically, it's possible). In the meantime, I'm looking for more local farmers who would be willing to sell grain directly to me, which I think would be a very happy compromise.

This post is part of the Sunday Social blog hop.

Super Simple Chocolate Syrup

I've tried many recipes for chocolate syrup, some with evaporated milk, some with heavy cream, others with all kinds of complicated ingredient lists - when I found this, I couldn't believe it would work, but it did! So simple, and so yummy!

Super Simple Chocolate Syrup
1/2 cup maple syrup
1 Tbsp cocoa powder
Mix well, and it's ready to go!

(This recipe is definitely not set in stone - feel free to use more or less of either ingredient, to your personal taste.)


My Favorite Homemade Ice Cream Sandwiches

I can't take the credit for these - they were my husband's idea - but they are soooooo good! Just put a scoop of Maple Syrup Sweetened Ice Cream between two Zucchini Chocolate Chip Cookies. The cookies are nice and soft, so they don't squish all of the ice cream out when you take a bite. Perfect!

Maple Syrup Sweetened Ice Cream

One of my gifts last year was a Cuisinart ice cream maker (only $50 on Amazon!) This quickly became my favorite recipe:

Maple Syrup Ice Cream
2 cups cream
1 cup whole milk
1/2 cup maple syrup
1 egg (optional; I think it makes it extra creamy)
Dash salt
Mix well and chill. Prepare according to ice cream maker directions.

For chocolate ice cream, add 2 Tbsp cocoa powder.

My favorite way to serve this is topped with Super Simple Chocolate Sauce, with a Maple Syrup Brownie on the side. Mmmmmmm!