Showing posts with label Garden. Show all posts

Friday, March 19, 2021

Starting Over - Again

You may have noticed that it's been quiet on the blog for a while. Part of that is because I've been putting more effort into my Ruth's Homemade business (click the link to see what I've been up to over there), but mostly it's because (surprise!) we moved again. Our last move was only three years ago (just enough time to start to get things humming on the homestead). The log house, though beautiful, ended up needing a lot more money invested in it than we had anticipated, and so one June evening we decided we should try to sell it. The very next day, a friend asked if we knew anyone in the area who was selling a home in the in our area with some acreage! One thing led to another, and in a matter of weeks we had a buyer lined up (after explaining very carefully just what they were getting into! We didn't want someone else to end up unprepared like we were).

Unfortunately, the market that made it easy for us to sell made it more challenging when we were looking for something to buy. "In the country with a little land" seemed to be what everyone was looking for in the summer of 2020 (one house we looked at - on the day it came on the market - had three offers (over the asking price) before we looked at it at noon!) But eventually we found a place with some acreage, a few outbuildings (including a chicken coop and garden shed!), and a house that all seven of us (plus our German shepherd and two cats) could fit into.

We hadn't been planning to move; our first really serious thoughts of selling were on that June evening. So in the spring I had planted the garden, bought feeder pigs and meat chickens, and generally did all of my normal spring homestead planning. When we closed on the house mid-August, all of that needed to be either moved or harvested – which meant that in addition to packing, I needed to do all of the canning, freezing, dehydrating, etc. that a normal garden season required. I didn’t get many tomatoes, but I put up all of the carrots, potatoes, cucumbers, beans, onions, and herbs that I could (I am so thankful for my five helpful teenagers! I don't know how I would have done it without them!) We processed the meat chickens the weekend before the move, but we had to move the pigs to the new farm (that ended up being quite the story! We’d never moved pigs before (we’d always put them down on-farm) so although we’d read horror stories of moving pigs, we didn’t really know what we were getting into!)

backyard homestead garden

Finally, the closing date came, and whatever we hadn’t harvested had to be left behind. But now we had to put in the perennials we’d dug up to move with us – I had a couple elderberry bushes and an ice cream bucket full of Egyptian walking onions from my brother (the granddaughters of some I’d given him a couple years ago), and my 14 year old daughter had been assiduously tending a few dozen "daughters" from her strawberry plants. So now we had to hurry up and prepare a place for them!

I saved all of the cardboard moving boxes that I could, and a friend had some old, otherwise-useless hay. I used these to cover a 50'x40' patch of grass for a new garden spot. We laid out the basic plan for the new garden beds and put up fencing to keep the chickens out (otherwise they would make a mess of the mulch, not to mention digging my daughter’s strawberries!) By the time the ground froze, we had a good start on the spring garden. We were even able to get in a late planting of spinach!

We spent the winter settling into the house - and of course, planning for spring! We have apple, plum, and pear trees ordered, as well as cherry bushes, blueberries, raspberries, and a mulberry tree. It's hard not to try to replace everything we had built up at our old house right away - we'd like to get our new place producing food as quickly as possible - but we can only afford to do so much.

We're hoping to set up a permaculture food forest, following some of the ideas on Stefan Sobkowiak's YouTube channel (although I still have to sigh every time I realize that even though he's in Canada, he still has a better growing zone than I do!) The east side of the property was planted in field corn when we moved in, leased to a neighboring farmer. He harvested it in November, so now we have almost 5 acres of blank slate to fill up this spring. Only a small part of that will be orchard; we're also hoping to use some of it for pasture and a start to a future woodlot (including maple trees - it broke my heart to sit on the sidelines during maple syrup season this year!) My daughter is planting a corner of the old cornfield into a food plot for the chickens, rabbits, and pigs - and also hoping to keep the local deer population coming around (she put two of them in our freezer using her crossbow this fall!)

And now, ready or not, it's spring - I have eggs in the incubator and trays of seeds coming up under grow lights in the sunroom. My homestead project list is a mile long (which is a good thing - if I wasn't keeping busy with infrastructure work, I'd be planting seeds outside much too early - again!) 

incubator hatching chickens

As much as I hate losing all of the work I put in at the last farm, I'm trying to focus on the excitement of setting up our new place - fresh with no mistakes in it (yet!) I keep reminding myself that each time I start over, I have the chance to make the garden better from the start, with nothing to re-do or fix later. My daughter commented this spring, "This is our best garden ever!" - and it was. It took three years to get it to that point - maybe on this property I'll make it there in two. Sounds like a worthy challenge to me!

Have you ever had to leave a garden behind? What was the first thing you set up on your new place? Comment below and let me know how you made the transition!

Wednesday, December 25, 2019

Homestead Holiday Letter 2019

Sunrise over the pasture
It’s the time of year when cards and letters from family and friends start dropping into our mailbox. My favorite letter each year is always from an older couple who have a hobby farm on the other side of town. We don’t see them often, but we exchange letters every year. What I like best about their letter is that it relates what none of our other friends write in their letters – how their garden did, projects they’re working on, and general home-spun humor.

So, in case there’s another crazy farm lady (or guy) out there who thinks the same, here’s my Homestead Holiday Letter for 2019.

grass clippings as mulch for the garden
My 2018 garden - adding more space for 2019
This year was our first full year on the homestead. In 2018 we basically had a smaller version of what we’d left at the old house – our laying hens, a batch of broilers, a couple of pigs, and a little bit of a garden (a few cucumbers, a butternut squash, and just enough tomatoes to keep up with what my daughter would grab and eat when she walked through the garden). Most of my energy was spent on getting settled into the house.

In 2019, with the house a little more organized, I got more serious. The fall before, I’d expanded my garden footprint to about three times its previous size by laying down cardboard and covering it with a deep layer of leaves and grass clippings. I let the chickens run through it all winter, so the soil was well fed and ready to plant in the spring.


seed starting planning
Planning the 2019 garden
I rebuilt my mini-greenhouse (the flimsy metal frame had crumpled under the weight of the squash I tried to store on it over the winter in 2016) and started most of my garden seeds indoors, since I’d learned that transplants are easier to plant into deep mulch. I’d only done this haphazardly before, starting what I guessed would be a good number of seeds about 6 weeks before our last frost date. This year I took some extra time and planned out how many of each plant I needed for each bed, which companion flowers and herbs would benefit each vegetable, and made a seed starting schedule.  (You can see my basic seed starting plan by clicking here). I really think planning made the biggest difference in the garden this year. It may seem counter intuitive, but my work indoors in January had the biggest effect on my harvest in the fall.

backyard maple syrup setup
Making maple syrup in the snowy March weather
With my seed schedule set, starting my seedlings was easy, which left time in March for trying something new. I’d taken a class on making maple syrup, and I’d tagged as many maple trees as I could identify in the fall, so it was time to put that information into practice. I set up a little trial-size boiling station in the garden (hoping the ash from the small fires would help fortify the soil even more) and set to work. It was fun to try something new, and a great excuse to sit around a campfire two or three times a week. When all was said and done, I’d made a little over 3 gallons of maple syrup, which was just enough to cover the cost of the supplies I’d purchased. I look forward to making even more syrup this year - now that I know what I’m doing! And this year, it will all be free, since I saved enough making syrup last year to offset the cost of the infrastructure! (You can read about my maple syrup adventures by clicking here, herehere, or here).

mulch and other garden preparations
Getting the garden ready
Syruping finished up in April, which left a little time for Easter travels before it was time to start garden prep. We needed to mark off the garden beds (I used as many straight(ish) logs from the woods as I could haul over for borders for my beds), scrape the good compost off of the paths and into the beds (it was all one big chicken-scattered bed after the winter), lay down another layer of paper mulch (we’d saved up our feed sacks from the pigs and chickens the year before, so we had a good stash – but even so, we didn’t have as many as we would have liked), cover the paper on the paths with pine needles, and add strips of compost where I was going to be planting seeds (a friend from church brought over a dump trailer full of broken down manure from their beef cattle barn – leading me to wonder what exactly it said about me that one of my most-appreciated gifts of the year was a literal load of crap!)

apple blossoms
Apple blossoms on our one year old tree
May, as always, came with a rush – baby bunnies and baby chicks to cuddle and care for, baby garden plants to be hardened off and planted outside, homeschool classes to finish up and field trips to take. It was a wet spring, and the wildflowers were spectacular (the not-so wildflowers on the apple and plum trees were also wonderful). In the middle of all of this rush, I injured myself (not moving logs or hauling feed bags, but moving furniture to wash the living room floor!) I had a herniated disk in my lower spine, which put me out of commission for most of the summer.

Thankfully, my daughters really stepped up and helped out. My youngest daughter, in particular, took on the bulk of the outdoor responsibilities. She fed the laying hens every day, collected eggs, and raised the broilers pretty much single-handedly (and did a great job – probably better than I’ve done!) 

harvesting wild strawberries
Harvesting wild strawberries
She also took upon herself to forage as much food as she could, hunting out wild mushrooms (after carefully identifying them, of course!), wild strawberries, raspberries, blackberries, blueberries, elderberries, rose hips, and hazelnuts from our property and along the side of our country road.

My oldest daughter decided that she would be in charge of the tomatoes (which only made sense, since she ate most of them!) We had a little under 20 plants this year, and although she didn’t tend them as carefully as I would have, she did a good job and we ended up canning a good amount (read: it’s almost January and they aren’t all gone yet – a new record!)


our new little pigs
My middle daughter took over raising the pigs, which was a major undertaking, since we move our pig pen (four 16-foot hog panels lashed together at the corners, with an old truck topper for shelter) at minimum every 10 days, depending on how much they tear up the ground (toward butcher time it’s almost every day). The pigs ended up a little smaller than usual, but without her help we wouldn’t have had them at all, so I’m very grateful for her efforts!

As you can imagine, with four teenagers in the house (all five will be teenagers this coming year!) we had a busy summer. They discovered sailing, and took their little boats out as often as they could manage. We also took a stay-cation this summer, seeing as much of our little corner of the world as we could fit in over the course of a week. On our last day, a record-breaking storm went through our area, so after our relaxing week we had a week of hard work cleaning up downed trees (a task my husband is still working hard on – turning all of that destruction into firewood!)  

In August, our energy turned to harvesting and enjoying the fruits of our labor. We had enough corn for two big meals of corn on the cob, quarts and quarts of pickles and dilly beans, and just when we thought we could handle the bounty, the apples were ripe. Our own trees are too small to bear (we planted them in 2018 – the first spring we lived here), but friends offered us their surplus and we took advantage of the opportunity. What the kids didn’t eat out of hand we made into applesauce, apple jelly, apple cider vinegar, and apple pie filling  until we ran out of jars, and made the rest into cider. The skins, cores, and wormy apples went to the pigs and chickens to be turned into bacon and eggs.(You can read my post about how many things you can make all from the same apples by clicking here)

carving our giant pumpkins
Our last harvest of the year was our pumpkins. My middle daughter (who also tended the pigs this summer) always claims the privilege of raising our carving pumpkins every year. They must have liked the mulch, because they were huge – too big to reach my arms around – and prolific – we ended up with about a dozen that size! Needless to say, the kids had a great time carving those giants this fall!

Now the garden is all snug under its blanket of snow, waiting for spring so that the chickens can again clean out all of the over-wintered bugs and add their little packets of fertilizer before I shut them out for the summer growing season. I love how God made all of the seasons so different, so that we can enjoy each one as it comes around again. Each has its own challenges and joys, beginning with hope and excitement and usually ending with an exhausted farmer ready to move on to the next thing!

I’d like to wish each of you reading this a Merry Christmas and a Happy New Year – may your harvest be bountiful, your animals stay healthy, and your family grow in love and productiveness!

Drop a line in the comment section below and let me know how your homestead did this year, whether it's a pot of herbs on your windowsill or a farm on 100 acres! I love to hear what everyone is up to!

Saturday, May 25, 2019

How Much Money Can You Save By Raising Your Own Food?

Homestead costs
For many people, one of the main reasons for rasing your own food is to save money. Taking out the middle man, cutting out the costs of labor and transportation - it only makes sense. Add to that the idea that foods harvested right from your back yard can be richer in flavor and nutrients (saving you money in health care costs) - and of course gardening itself can be a great form of exercise (saving you money at the gym, too!)

But how much money can you really save raising your own food? I ran the numbers for last year (which are lower than they'd normally be, since I only had a minimal garden as we worked to set up our new homestead), and found it can be a lot!

Our biggest savings was from our pork. We raised two hogs this year, which we purchased for $100 ($50 each). They ate about 2,125 pounds of organic feed, bringing our total cost up to $1156.28 (this is actually about $300 more than we would usually spend because of an unforseen delay in our butchering date - you can read about that here). We butchered them ourselves and will be smoking all of the meat at home, so the only processing cost will be for the equipment we purchased (this was our first time butchering our own pigs) for $296.20. So our total cost was $1452.48 for 300 pounds of meat in the freezer, not counting the bones (which we'll make into broth) and lard. We'll be making all of this meat into pork chops, bacon, ham, and bratwurst (this is Wisconsin, after all. We love our brats!) From our normal sources, we would have paid around $3,140 for that amount of meat (in those cuts), so by raising our own we saved just under $1,700 (again, that's counting the price of the processing equipment and the extra feed from raising them longer than we expected). If you'd like more information, you can read more about how much we saved by raising our own pork in this post.

We also raised a batch of 50 broilers this year, each bird averaging 5 pounds. Purchase price was $71 ($1.42 per bird), and total feed cost was $458.84 (about $9.18 each). That price is for organic feed, which is generally about twice the cost of regular. We did the butchering ourselves and used chicken tractors we had already built (you can see my post with building plans here), so our total cost was $529.84 (or $10.60 per bird; about $2.12 per pound, dressed).  Our normal source for organic chicken charges $3.50 a pound, which would come out to $875 for the 50 chickens we raised. So our savings was $345.16, or $1.38 per pound.

From those chickens we also made broth (also known as stock). The cheapest source I have for organic chicken broth is Walmart, which charges $2.50 for a quart. I don't usually measure exactly when I make broth, but a conservative guess at how much we made would be a gallon per bird, which would multiply out to 200 quarts a year, or $500. Since I already calculated the cost for the bones in the meat total, there was no additional cost for the broth.

Our free range hens (which we only had from May to December in 2018 because of our move to the new house) gave us 2,235 eggs this year, at a cost of $297 in organic feed.  If we had paid $4 a dozen (the going rate for organic eggs around here), those eggs would have cost us $745; a savings of $448.

So the animals on our farm alone saved us around $3,000. We weren't able to have much of a garden this year, but we did raise about $116 worth of butternut squash (our cost was just $5 for the seedling plant) and $30 worth of mushrooms (which cost $25 for the spawn, but will give us harvests for years to come). I didn't add up how many tomatoes we harvested (the kids ate most of them before they made it into the house!) so I can't calculate the value of those. Conservatively, then, our tiny starter garden netted us only $121, but obviously that number will go up significantly when we're able to garden more extensively this summer.

But what really surprised me was the amount of money our countertop microbial "farm" saved us. We have kefir smoothies every morning for breakfast, using 3 pints of kefir per day for all seven of us. Using a supermarket price of $4 a quart for plain organic kefir ($6 for our 3 pints) times 365 days a year, that would cost us $2,190. Making our own from organic milk that costs us $1.50 a day instead of $6, which saves us $1,642 over the course of a year - all for less than a minute or two of work per day.

We also make our own homemade kombucha (you can find my recipe here). You can get kombucha at Walmart for about $3 a pint, and we make 2 gallons every week. That would cost us about $2,500 over the course of a year. The tea and sugar required to make that same amount at home would cost around $150, for a savings of  $2,350 (we flavor it with raspberries harvested for free from a friend's garden, so that added no extra cost).

When you add those it all up, our total savings, even without much of a garden, was over $7,000. Our total expenses for all groceries over the past year was around $14,000, so we cut our grocery bill by a third! I can't wait to see how we do next year!

How about you? As you can see, some of the biggest cost savings were "raised" right on our kitchen counter (ooh, that reminds me - I didn't count my sourdough bread! I'll have to calculate that out next . . .) How much do you save by raising your own food?

Saturday, May 4, 2019

Spring Planting Signs

When to Plant
Everyone knows that farming is dependent on the weather. Where I live, in hardiness zone 4b, we have short summers and long winters, so we really need to maximize our growing season. We want to get our plants in as early as possible; but how do we know when the ground is ready to plant? Too early, and our transplants won't survive and seeds will just rot. Here in Northwestern Wisconsin, frost-out can vary by weeks from year to year - it seems like sometimes the ground thaws out in March, and other times not until mid-April. So how do you know when it's safe to plant?

If you've read Laura Ingalls Wilder's classic book Farmer Boy, you may remember the scene where Almanzo and Alice are arguing about planting time:
At the end of the row he looked at the ash tree’s crumpled new leaves, and asked Alice if she knew when to plant corn. She didn’t, so he told her. Corn-planting time is when the ash leaves are as big as squirrel’s ears.
“How big a squirrel?” Alice asked.
“Just an ordinary squirrel.”
“Well, those leaves are as big as a baby squirrel’s ears. And it isn’t corn-planting time.”
For a minute Almanzo didn’t know what to think. Then he said:
“A baby squirrel isn’t a squirrel; it’s a kitten.”
“But it’s just as much a squirrel—”
“No it isn’t. It’s a kitten. Little cats are kittens, and little foxes are kittens, and little squirrels are kittens. A kitten isn’t a cat, and a kitten isn’t a squirrel, either.”
“Oh,” Alice said.
Squirrels and kittens aside, there are many signs from nature that give us hints at what's going on below ground. One rule of thumb I've heard is that if the weeds are coming up, cold-hardy plants like spinach, lettuce, and broccoli should be able to grow, too. Makes sense, don't you think? If it's warm enough for the "wild" plants to germinate, our cultivated plants should be able to, too.

A more specific tip I've read is that you should plant potatoes, beets, carrots, and peas when the dandelions start blooming. Now, I have dandelions growing right up next to my house that are about to flower, but I'm not going by that, since they're benefiting from the warmth coming off of the foundation - a very different microclimate than down in my garden. I need to look at the dandelions growing around my garden to see when that soil is ready.

Another tip I've heard is that when crocus flowers start blooming, you can plant peas, lettuce, spinach, cabbage, and broccoli. Or, if you don't have crocus flowers, you can plant these when the lilacs show their first leaves, or when the daffodils begin to bloom. In our neck of the woods, the daffodils are just sending up their first leaves right now, the lilac leaves aren't out yet, and unfortunately I don't have any crocus flowers planted on our new property. So it looks like I have a little time to wait before I should start planting - which I should note for next year, since the broccoli and Brussels sprouts I started indoors are more than ready to be transplanted! Ah, well. I'll know to start my seeds a little later next spring.

For the more tender vegetables like corn and beans, the old-timers said that you can plant these when oak leaves are the size of a mouse's ear - or, if you're more the Alice type, and want to be contentious about what size mouse, you can wait until the apple blossoms start to fall. Another sign is when the daylillies bloom; that's when you'll want to put out your tomatoes and peppers. And when the lilac flowers start to fade, then you can plant your cucumbers and squash.

In our modern, over-scheduled world, this seems very imprecise and hard to plan. I want to know when to start my seedlings indoors so they'll be at the perfect size when planting time comes! But any farmer will tell you, the real world doesn't necessarily run on your schedule. Some years spring will warm up early, other years you'll get snow the first week of June (my dad has a photo of snow on our lilac bush from a freak June snowstorm when I was a teenager). But knowing what signs to look for can help you know when your part of the world is ready to start growing again.

Friday, April 19, 2019

The Best Laid Plans . . .

In Literature class recently the kids and I were reading poems by Robert Burns, and one of the selections was "To a Mouse." While the kids loved his description of the "wee, sleekit, cowran, tim'rous beastie" (and laughed at my terrible Scottish accent while I read to them), I was sighing in commiseration with the line, "The best laid schemes o' mice an' men/Gang aft agley,/An' lea'e us nought but grief an' pain,/For promis'd joy!"

It seems that all my careful planning back in January might turn out to be a bigger mess than that mouse's nest. April 15th was suppsed to be my first round of putting transplants out in the garden, but this is what the broccoli bed looked like yesterday afternoon:
garden bed layout
Obviously, the ground is not warm enough to plant in - even for a cool-weather tolerant plant like broccoli. And the beds, though well mulched with leaves over the winter, need a little TLC before they're ready for the summer.

The other problem was that the garden I laid out on paper, with carefully spaced gridlines and exact spacing for each plant, didn't exactly line up with the more organic reality outside. For example, here's a picture of my asparagus bed (with a wire tunnel over it to keep the chickens out of it) and the wood-bordered raised garlic bed next to it (there's fence wire on top of the garlic bed - also to keep the chickens from digging - and the logs on top of the bed are to keep the fencing down)
early spring garden design
The strings show where my carefully planned gridlines say my beds and paths should be - unfortunately, that puts a path straight through my garlic plants, and the asparagus row is completely katywampus to where the strings say it really ought to be.

So there was a little re-thinking to be done. Thankfully, I had plenty of time to stand around and contemplate garden layouts while I was boiling down my last batch of maple syrup, and I think I've figured out a way to make it work. Instead of four three-foot garden beds in the middle of the garden, with two-foot beds along the fences, I have three beds in the center of the original size with a two-foot bed on either side, plus the original fence-edged beds. So I actually ended up with an extra, smaller bed and one slightly shrunken bed - even better than my original plan!

We'll see how this plan holds up to reality as the summer unfolds . . .

Monday, April 1, 2019

Seed Starting Part 2

starting plants from seed
It's beginning to look a little more like spring outside (the snow is down to just patches in the yard instead of multiple feet deep everywhere) so I didn't feel quite so crazy starting my second batch of seeds today. It's amazing what a difference a few weeks can make! My last batch of seeds are up and beautifully green (although the Brussels Sprouts in particular are getting pretty leggy - anyone have any tips to help with that? I have two grow lights over each tray, and I try to run my hands over them every few days to toughen them up, but it doesn't seem to be enough. I would appreciate any tips you might have!)
I'm really loving the soil blocks - I didn't need to water at all while the seeds were under the clear plastic "greenhouse" dome, and I've only watered once or twice since (don't worry, I check them daily, and they've never dried out). I did have to move the parsley blocks into a smaller greenhouse tray because they take so much longer to germinate (I hadn't thought that through when I started), and they held together wonderfully, both when I took them out and when I moved them back. I am amazed that it's been a full month and they're still holding their shape, even after light watering and being moved around twice, without any paper pot or net or anything.

So I was very confident this afternoon starting my second batch of seeds. The plan was to start my tomatoes, peppers, spinach, lettuce, and rutebagas (I've never grown those before - any tips on those? I'm guessing they're pretty similar to other brassiccas?) I've noticed that I have a bit of a compulsion about buying seeds - and I also have trouble throwing them out if I have partial packages from previous years - so I had multiple packages of tomatoes (and multiple varieties, as well!) dating back to at least 2014 (some of them you couldn't even read the date on anymore . . .) I did manage to finish off one package today (although somehow it was the newest package. *sigh*)

In case you're curious, here's what I planted (I should confess - this is more for my benefit than for yours, to help me remember how many of what seed I planted, and where it is on the tray!)
On the far left, I planted three blocks of Seeds of Change "San Marzano" tomatoes (those were the ones I ran out of - and of course those were the ones I wanted to plant the most!) I filled out my main tomato crop with twelve Seed Savers Exchange "Brandywine" tomatoes (my absolute favorite for flavor, but I had a lot of blossom end rot in that variety last year), and just for fun I'm starting two blocks of cherry tomatoes (which I read somewhere actually have the best nutritional profile of all of the different kinds of tomatoes - so maybe I should plant more of those). Next I put in a row of four jalapenos (I don't have high hopes there - those were the seeds from 2014, and they were from a 50 cent packet I picked up at the grocery store on a whim). Then I put in five Seed Savers Exchange "Joan" Rutebagas along the bottom edge (I'm really excited to try those). And finally I filled in the box with a dozen spinach seeds ("Bloomsdale Longstanding" - my old standby), four "Red Velvet" lettuce, and four "Buttercrunch" lettuce.

It's hard to believe that my next garden task (in just two weeks!) will be planting peas, lettuce, spinach, and onion sets out in the garden. It seems impossible that my currently snow-covered garden will be warm, dry, and ready to plant in just two weeks, but it happens every year - and the progress that's been made in the last two weeks gives me reason to hope!

Wednesday, February 27, 2019

2019 Seed Starting Plan

Although you wouldn't know it to look outside, (as you can tell by Monday's post) spring is just around the corner! Our last frost date around here is May 15th (well, that's a little optimistic, but it usually works out alright), so March 1st is time to start my first seeds indoors (if you have a different last frost date, you can use this chart, too - just adjust your seed starting times back accordingly).

Here's my plan for sowing seeds this spring:

March 1st - start indoors:
5 parsley plants
12 Brussels sprouts
20 broccoli
(these are all cool-season plants, so I'll aim to get them transplanted outside around April 15th)

April 1st - start indoors:
17 tomatoes (to be planted out May 15th)
12 spinach
12 lettuce (I'll plant both the spinach and the lettuce every 2 weeks for a continuous harvest; I'll plant the firsts set out on April 15th)
20 rutabagas (transplant April 15th)
4 jalapenos (transplant June 1st)

April 15th - direct sow in the garden:
peas
lettuce
spinach
onions

May 1st - start indoors:
5 watermelon
5 pumpkins
1 butternut squash
5 cucumbers
4 dill
5 nasturtium
3 hollyhocks
5 calendula
4 borage
1 basil

May 1st - direct sow in the garden:
potatoes
carrots
radishes
swiss chard

June 1st - direct sow in the garden:
corn
runner beans
bush beans

How about you? Are you starting any seeds indoors this year?

Monday, October 17, 2016

Broccoli Three Ways


Just had to share this picture I took with my phone when I went out to check for eggs this afternoon. Although it looks like a mess, this is actually one of the most productive parts of my garden. I planted broccoli (and other things) in the chicken run this spring, while the chickens were out in another pasture. When I'd harvested all I wanted, I let the broccoli flower, and eventually let the chickens back in to that pasture. Now the bees are enjoying the late fall nectar from the broccoli flowers, the chickens are feasting on the broccoli leaves (and any cabbage worms that may fall off of the broccoli), and the plants are enjoying the fertility left behind by the chickens. It was one of those scenes that made me stop and think, "Yup, God knew what he was doing!" It all works together so perfectly!
Not to mention we humans get three harvests from one plant - the broccoli florets, the honey from the bees, and the eggs from the chickens (four if you count the meat and broth from the chickens when they're done laying!) So much abundance from one small space!

Saturday, February 13, 2016

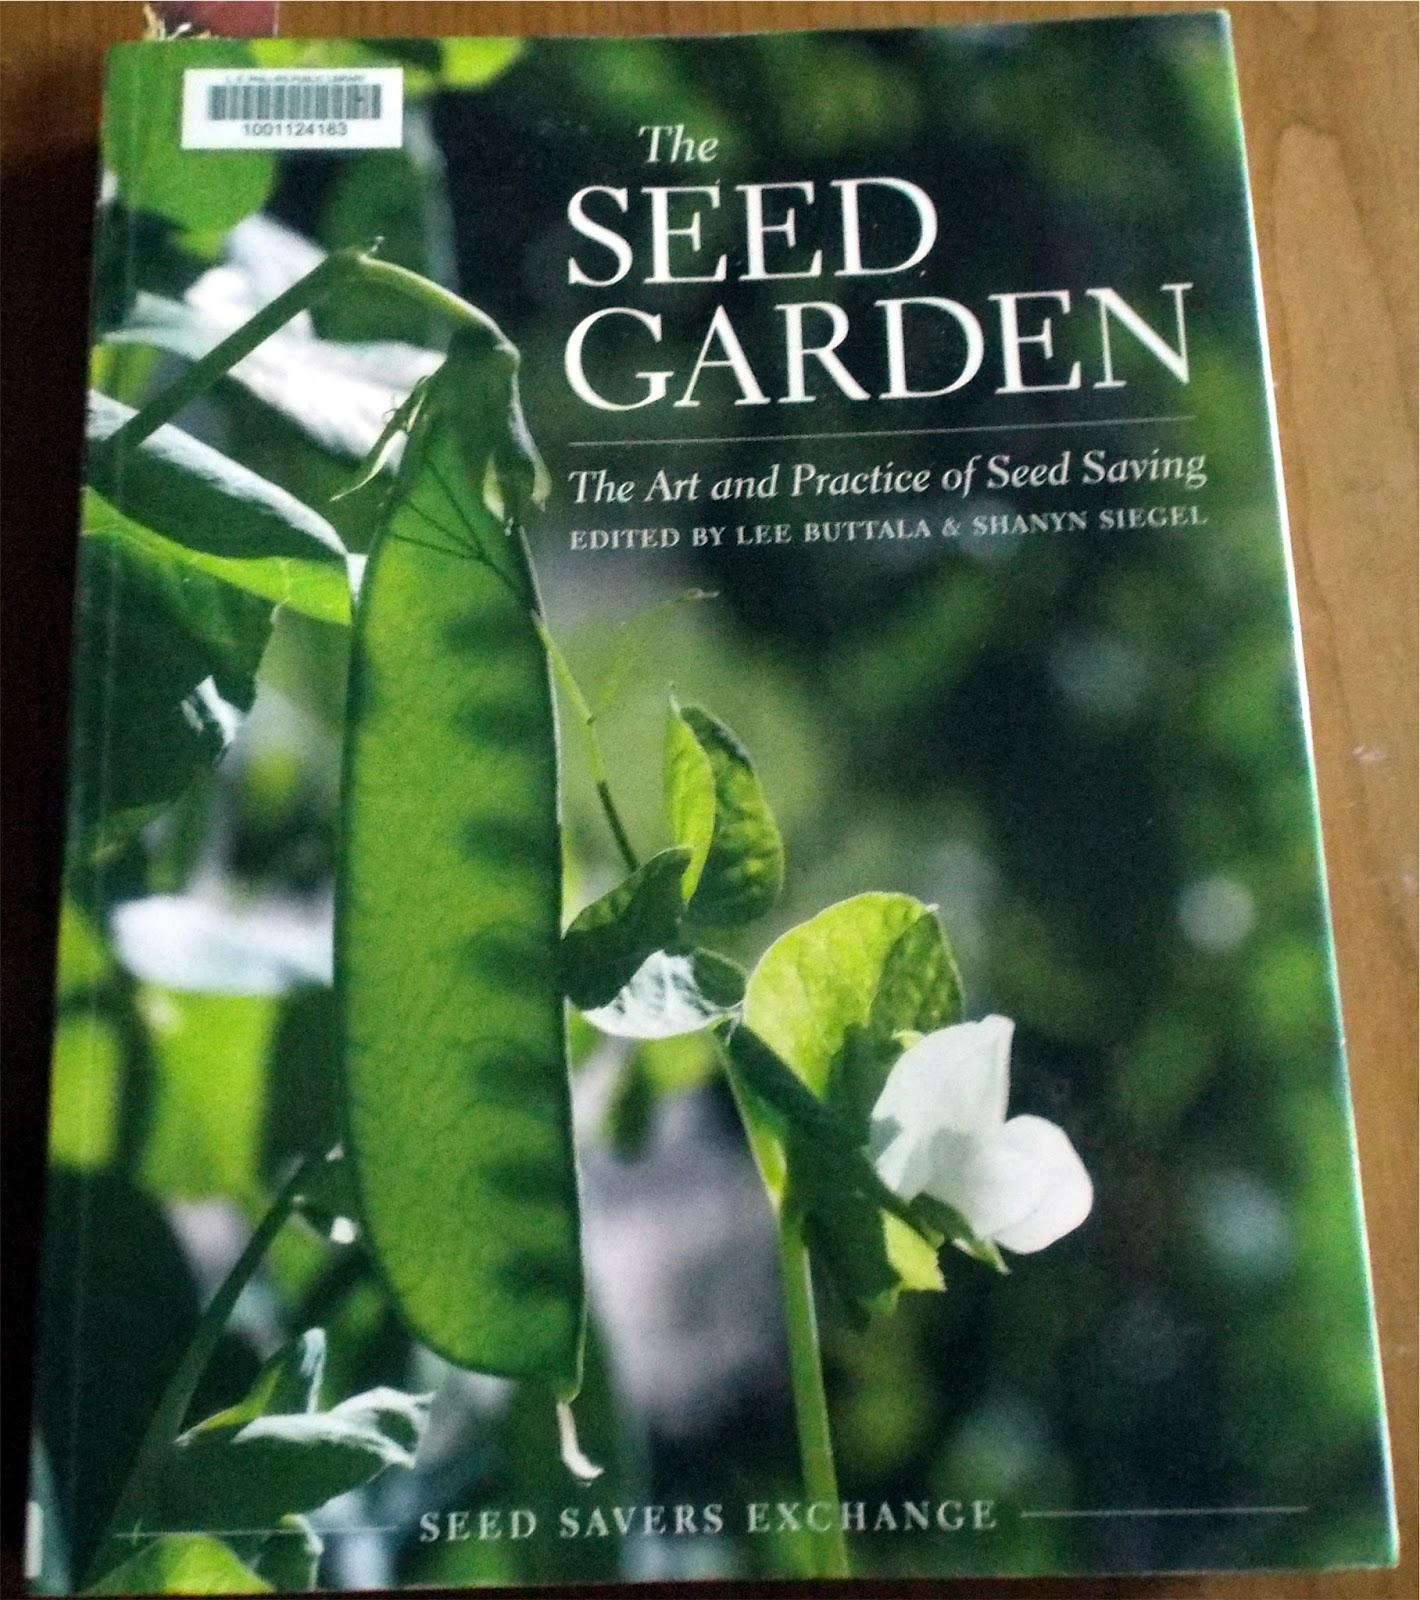
Favorite Books of 2015 #3 - The Seed Garden

The Seed Garden: The Art and Practice of Seed Saving edited by Lee Butalla and Shanyn Siegel
(click on the link above to buy the book on Amazon)

One thing I'd like to do more in my garden is saving my own seed, but to be honest, I know just enough to know I don't know enough to do it well! I know, for example, that I need to have a large enough planting to avoid inbreeding in certain crops (although self-pollinating crops, like beans, don't have this problem) - but which ones were self-pollinating again? And for those that do cross-pollinate, which crops do they cross with, and how much spacing do I need between them? When it's harvesting time, how do I know when my seeds are fully mature, and how do I dry and store them? I remember that tomato seeds need to be soaked and fermented before they're ready, but what other seeds need this? And which ones need a cold period?

I could hunt down information online about each crop when I was planning my garden, and again when I was harvesting seeds, but in the hustle of summer harvesting, who's got time for that? And in January when I'm planning my garden, my kitchen table is already overflowing with books on companion planting, how-much-to-grow-for-how-many-people charts, lists of how much our family ate last year, and of course seed catalogs! There's no room for seed-saving research for a dozen different plants.

That's why this book is a Godsend. In one handy, indexed volume are 230 pages of crop-by-crop descriptions of everything you need to know about each crop (usually two or three pages per crop), including history of the plant and its common uses, how to grow it for seed (not necessarily the same as growing it for food), pollination requirements, variety maintenance concerns (isolation distances, inbreeding depression, specific traits to select for, etc.), how to tell when your seed is fully mature, and how to dry and store your seed.

And if you don't know why all of that matters, the first 119 pages of the book are like a Seed Saving 101 course, giving you the whys and hows of seed saving and basic plant genetics (but in a very friendly and understandable way). This book is packed with information, and would be useful for both the first-time seed saver and the expert, who would welcome having all of this information at his fingertips. Much more comprehensive than other books on the subject (but not overwhelmingly so), this handy reference would be a useful addition to every gardener's bookshelf.

*** I should note that although this book is pretty comprehensive in respect to vegetable varieties, it does not cover flowers or herbs (I'm assuming they chose not to because of the sheer size that volume would have to be!) For those, I will be keeping my old copy of Seed Sowing and Saving by Carole Turner, which lists basic information for saving both vegetable and common herb and flower seed (although it's by no means as extensive in terms of vegetable crops as The Seed Garden, or as comprehensive in the information about each plant - Seed Sowing and Saving mostly just covers how to preserve the seed, and basic planting requirements).
Note: I was not payed to review this book, I just really love it! But if you click on the link above and buy the book at amazon.com, I will receive a small commission from the sale. Thank you for your support!

Thursday, December 10, 2015

Early Winter Kale Comparison

The little bit of snow cover we've had so far this winter melted off in some warm weather this week, so I'm taking the chance to see how the kale is holding up. I'm hoping to make a bed of kale, spinach, and possibly carrots next year, which I'm planning to protect with a row cover and harvest when the rest of the garden is covered in snow (trying out Eliot Coleman's idea).
This is by no means scientific, being only a comparison of one plant of each variety, but I'm going to go with it anyway. This first picture is from a "Dwarf Green Curled Kale" I sowed in mid-July (seed purchased from Bountiful Gardens). It's a little frost-bitten around the edges (not surprising since it's December in Wisconsin!) but otherwise looking pretty good.
Further down the bed, I sowed some "Red Winter" kale seed from Burpee's in mid-August. Despite the name, this variety doesn't seem to be holding up to our mild-so-far winter as well:
So, as I said, this is not exactly a scientific test, but I'm thinking I'll order some more of the Dwarf Green Curled Kale for next year, and not the Red Winter variety.

Wednesday, May 20, 2015

Much More Mulch: Cover Crops

I like to think I've come a long way since back in 2011 when I last wrote about my mulching experiments. No more plastic for me; now I'm mulching with combinations of chicken bedding, cardboard, living mulches, and green manures. Instead of being concerned only with weed control (although that is certainly still my main priority), I now think more in terms of soil building and conditioning.
While green manures aren't primarily meant to be a mulch, they will cover your soil somewhat and minimize new weed seeds emerging. Anna Hess over at The Walden Effect was kind enough to send me some oilseed radish and oat seeds to try out for her new book, The Ultimate Guide to Soil (due to be published in Spring or Summer 2016 - if you can't wait that long, I highly recommend her e-book Homegrown Hummus: Cover Crops in a No-Till Garden). Since she lives in zone 6, she was interested in how these crops would work in my zone 3-maybe-4 garden.
I'm sorry to say that I probably wasn't very much help, since I sowed the seeds quite late in the season, and didn't keep the best records (last fall was extremely busy, for non-garden-related reasons); but I can share the few things I did observe. Both crops did grow (although the oats seemed to have trouble - Anna reported that her oats had a lower germination rate than she'd been hoping for, too). The bed I sowed the radishes in had been double-dug and filled in with old logs and compost the previous summer (2013), then topped off with soil (kind of a hybrid of John Jeavons double-digging method and Sepp Holzer's Hugulkulture). I'd planted the bed with rye that spring (2014), then after the rye was harvested I covered the bed with a layer of leaves. When I sowed the radish seeds from Anna in early September, I simply sprinkled them over the leaves and watered them in well. 
Here's a shot of the oilseed radishes, just after a hard frost last November:
As you can see, the mulch blocked out a good number of the seeds, and the plants that did make it through the leaves didn't get more than about 6 inches high before they were killed by frost.
For me, the real test was how the gardens look this spring. I went out this morning and took the shot below, showing the radish seeds that apparently didn't germinate last fall but sprouted this spring (I pulled up a few, and they definitely don't have roots big enough to have carried them through the winter). For my purposes, I wanted these plants to winterkill and keep the ground covered over the winter, but leave the ground open for planting this spring. So seeing seedlings coming up this spring was disappointing (but since they pulled up quite readily it wasn't a deal-breaker for me). Obviously the grass coming up behind is going to be a much bigger problem. That does show, however, that the radishes didn't work extremely well as a weed barrier - but I haven't yet found a cover crop that will block out grass!
Another matter of interest was how the radishes affected the soil below. I turned up a patch under these radish seedlings, and the soil was quite loose and nice. There was another patch, however, where the soil hadn't been double-dug (it was under a young apple tree, and I didn't want to disturb the tree's roots while I was building the bed below it). When I turned over the soil under the radish seedlings there, the soil was much more dense, even though it had been under the same cover of radishes and leaf mulch.
So in terms of soil conditioning, the radishes didn't seem to have much effect (although that was probably due to how late I planted them - they didn't have time to make much of a root, which in turn would break down and add organic matter to the soil).
As for the oats, it was really hard to tell how they did, since there is so much grass invading the area. I could tell last fall that some of it had come up (there is a slight color difference between the oats and the grass), but again, it wasn't thick enough to keep the grass out entirely, and since I had the leaf mulch already on the bed, the oats didn't do much in terms of covering the soil.

So, Anna, I'm sorry I wasn't much help, but hopefully you can use at least some of the information I learned. It was very interesting for me to experiment with some crops I wouldn't otherwise have tried!

Sunday, April 12, 2015

Early Spring Harvest


It's April in northern Wisconsin. While the snow is gone, it's not nearly time to start planting things out in the garden yet (I'm in zone 3b, which is technically less amenable to gardening than Anchorage, Alaska. Snowstorms in April - or even May - are not uncommon here). But if you know what to look for, there are a few things out there ready to be eaten.

The first, and most surprising to me, is winter cress. I had never even heard of it until I read Euell Gibbons' Stalking the Wild Asparagus, and now I see this "weed" growing everywhere in my yard! It loves recently disturbed ground, which means I've been weeding it out of my gardens for years. Here's a sample of what it looks like in the yard right now:

It's a perennial member of the mustard family, and apparently (according to Gibbons, anyway) long used by Italian housewives. He says that these plants "have an extraordinary ability to grow vigorously during any warm spell in winter and from them the forager can often gather fresh salad material or boiling greens in midwinter if the ground is free of snow. However, it is in late February and early March (make that late March and early April in Wisconsin) that winter cress becomes best and most abundant. It forms dense, bright green clusters before any other green thing shows." But, "in April (May here) the plant puts up a seed stalk which eventually reaches from one to two feet high and bears many bright yellow flowers, about a quarter inch across and evenly spaced along the stem. . . . To be edible, the leaves of winter cress must be gathered early, while the weather is still cold. Those who complain of the bitterness of this plant are usually those who gathered it too late in the season. When gathered early enough, winter cress is no more bitter than the best leaf lettuce, and far less so than endive or escarole. As soon as the frosty nights are past, this plant becomes too bitter to eat. Fortunately, by this time, one can select from a number of other wild salads and potherbs."

I assume by "other wild salads" he means spinach and such - which are much to small still to harvest without damaging the plant (and thus harm any future harvests). Here's what my spinach looks like right now:


This is spinach that volunteered in my garden last fall, after I let another spinach plant go to seed in the heat of the summer (my Grandma Ada's old trick). As you can see, the outer leaves are brown from overwintering, but new leaves are forming in the center. There are also some really tiny lettuce plants starting up, but definitely nothing harvestable yet.

Since this foraging trip was for the sake of gathering ingredients for soup, I also took the chance to weed out some stinging nettles growing nearby in the garden:


Of course, I was careful to wear gloves when I harvested these so I didn't get stung, but once boiled they are highly nutritious, and apparently work as a soup thickener as well, so I was happy to find them.

I would have loved to have added some chives to the soup, but they're still pretty puny, too:


Instead, I harvested some of my walking onion roots. In the summer and fall I usually harvest only the bulblets on the top (here's a picture from last summer in case you're not familiar with walking onions):


but this early in the season they're barely putting up greens, so I harvested to roots instead:


Paired with some potatoes, carrots, parsley, and garlic from last year, a few jars of chicken stock, salt, pepper, and an nice cheesy white sauce, and we had a nice, hearty pot of soup for lunch. A good start to a new year's harvesting!

Wednesday, December 19, 2012

Free Tomato Plants

Not only can you propagate herbs from cuttings, you can also do it with tomatoes! Tomatoes are well-known for rooting very easily, so they're actually one of the easiest plants to propagate this way. I currently have two tomato "mamas" growing in front of my kitchen patio door, and can't wait to plant cuttings from them in the spring.
I actually started them sort of by accident - I was tying up my tomato plants in the garden in July, and accidentally broke off two side branches. Instead of just throwing them in the compost pile, I decided to try growing them as cuttings to see if they would take hold. I didn't use any rooting hormone, I simply sunk the stems in well-moistened soil and kept them watered. I had them outdoors in pots until our first frost in September, and before I brought them in they each had tiny tomatoes starting to grow on them (we ate them in October - boy, was it good to have fresh, home-grown tomatoes while the snow was flying outside!)

They haven't flowered since (decreased light? lower temperature? the dog's tail constantly knocking off small branches?), but since I'm not counting on them for fruit over the winter, just vegetation for cuttings in the spring, I don't mind.

I'm very excited about this experiment because it means not only will I have a head start on spring planting (cuttings get going much faster than seeds) but, since each cutting is an exact copy of the parent plant, I don't have to worry about cross-polination. Since I grow more than one type of tomato (I usually have at least one cherry, one brandywine, and a bunch of roma-type for sauce) I usually end up with "mutts" when I save seed. This can be a fun little experiment, but it's a little less amusing when I meant to plant a bunch of meaty romas for the winter's supply of spaghetti sauce and end up with a bunch of cherry tomatoes instead!

But if I save a couple "mamas" from each type of plant in the fall, I should be able to start as many new cuttings as I'd like in the early spring, sure that they'll turn out to be the kind of plant I want (I'd save more than one plant of each kind, just in case - one of the plants I saved this summer got knocked over by an over-excited dog, and is barely hanging on).

I can't wait to see what other plants I can grow this way (although I may need my husband to build me a sunroom for all of these plants to overwinter in!)

Free Herb Plants for Next Spring


I am so excited about this little experiment of mine - I took cuttings from most of my herb plants in the fall (peppermint, basil, oregano, rosemary, sage, and thyme), rooted them in small pots (adorable little tea tins, actually), and they're growing into strong plants for putting out in the garden next spring (not to mention cuttings for adding to recipes all winter).

It's so simple, I wish I'd tried it years ago (instead of buying new potted herb plants from the local garden center every spring). Here's what I did:

1. Cut off a 2-3 inch piece from the growing tips of your plant.
2. Trim off all but the upper few leaves.
3. (optional) Dip the bare stem in water, then in rooting hormone:
4. Gently sink the stem into your pot of soil and water well.

And that's it! Keep the soil very moist until you see new growth (did you know you can toothpick test soil, like you do to see if a cake is done? If the soil sticks to the toothpick, it's moist; if it comes away clean, your soil is dry) then water as you would your other houseplants. Obviously, a sunny windowsill is the best place for them, but anywhere they will get good light should be fine. You can expect these baby plants to be more tall and spindly than their outdoor-grown parents because of the restricted light conditions (a lamp might help, but isn't strictly necessary if your window is sunny enough), but they should "beef up" just fine once you plant them out in the spring (but be careful to harden them off a little at a time before you set them out permanently).

Thursday, August 23, 2012

Ugly Tomatoes

Have you ever noticed that the tomatoes that look the worst often taste the best?

This beauty would never appear on any store shelf, but it was delicious! Sure, it's a bit tricky cutting out the stem, and those strange brown rings (they're just on the skin - anyone know what they are, and what causes them?) but it's definitely worth it, in my book, for the flavor. Unless I'm entertaining, I really don't care what it looks like (and if I invited people over, that means I'd have to share!)

Sorry, I don't even know what variety this one is (I'm guessing either a Brandywine or a Mortgage Lifter - my tomato patch this summer was a mishmash of old seeds I needed to use up (I think all of them were between 5 and 10 years old!) So there were some of those two types, some Jelly Bean, some Beefsteak, and I think some saved Romas, too - so I have quite a variety pouring in!)

Saturday, March 24, 2012

First Harvest of 2012

It's official! I harvested the first vegetable out of my garden this afternoon - a handful of spinach to add to our spaghetti sauce. The gardening season has officially begun!
(and, as you can see, the weeding season needs to begin as well . . .)

The brown and yellow tips are on the leaves that stayed on the plant over the winter; the plants that had started growing in the fall started up again as soon as the snow was gone. I would never have expected a spinach plant to survive our cold Wisconsin winters, but here's living proof that they do!

Saturday, March 17, 2012

Spring is Bustin' Out All Over!

We've been having a strange spring warm spell this past week, with temps in the 60s, and even up into the 70s once or twice. Considering that just two weeks ago we got over a foot of snow in one day and it looked like this around here:
 it's amazing that today I found this in the garden:
and these, too!
Not only that, but the rhubarb is starting to peek out:

and the spinach that was covered in all that deep snow over the winter is sending out tiny new leaves:

Over in the herb garden, the chives are coming up through last year's dead growth:
and, under cover (I accidently brushed off the spent leaves that were hiding this baby), the oregano is getting ready for the growing season, too:
I just love spring! It seems like every time I go outside, there's a new sign that what looked dead was just waiting for the right time to come alive again!

Maybe that's why Easter is my favorite holiday?

This post is part of Farmgirl Friday.