The first step is to skim the cream. If you're just bringing the milk home, you'll need to let it sit in your refrigerator overnight until the cream rises and separates from the rest of the milk.
 |
| Hopefully you can see the cream line - it's really obvious when you're right there |
Once I have the cream skimmed, I put it in the blender (not more than two cups at a time - remember, it's going to become whipped cream before it becomes butter, so you don't want to overflow your jar). I just have a basic Oster blender with a glass jar, nothing fancy.
 |
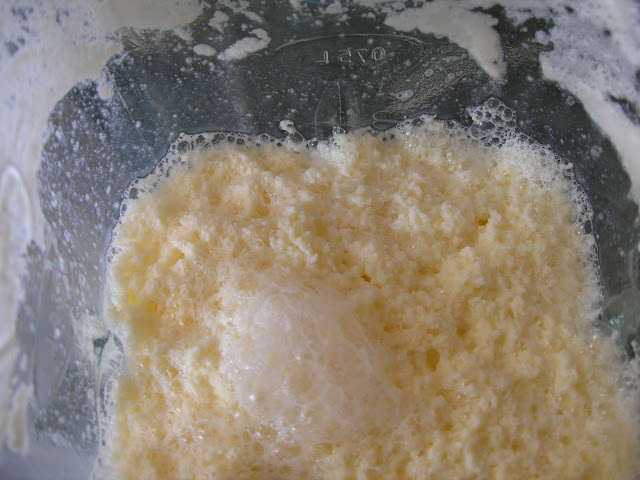
| At the whipped cream stage |
My blender has a "cream" setting, which seems to work well. The entire process usually takes around 5 minutes, give or take, so be prepared to wait. The cream will go through four basic stages - 1) still looks like milk, 2) whipped cream, where the cream will double in size (you can see it looks like 4 cups in the picture above, when I only put 2 cups of cream in the jar) 3) loose like milk again, and 4) chunks of butter floating in loose milk. Here's what the last stage looks like from the outside of the blender:
You can see that the butter looks yellow and frothy (my milk is from grass-fed cows, so it might be more yellow than if you bought regular whipping cream at the store). Here's the view from the top of the jar:
At this point, I pour the contents of the jar (both butter and buttermilk) through a strainer funnel lined with butter muslin (basically a very fine cheesecloth. I got mine in a mozzarella cheesemaking kit).
While this is draining, I usually start another batch of cream mixing in the blender. When that batch is at the whipped cream stage, I roll the drained butter out of the cloth and into a big bowl, so that the funnel is empty and ready to strain the new batch.
Once all of the butter has been added to the bowl, I use a wooden spoon to press out as much of the remaining buttermilk as I can (I usually do this over the cloth-lined funnel, to save as much buttermilk as possible).
When I've gotten as much buttermilk out as I can, I stir in the buttermilk culture and cover it, leaving it on the counter to sour (or sometimes I just put it straight in the fridge and use it that way - either way works).
Once there's too little buttermilk left in the butter to save, I rinse the butter with COLD water (you don't want to melt your butter; then it will drain away down the sink when you dump out the water), continuing to smoosh it with the wooden spoon, draining off the water and refilling until the water stays clear. This is very important, since any remaining buttermilk will make your butter go sour much more quickly.
Then all that's left is to put the butter in its storage container, wash off your blender, cloth, and utensils (warm water works slick for this), and you're done!
I store my butter in a covered glass container, at room temperature on my kitchen counter. It easily lasts a week this way.
This post is part of The Ole Saturday Homesteading Trading Post.


