Monday, May 14, 2012

Feeling a Little Wild

I haven't been harvesting much other than spinach and rhubarb from my garden yet, but I've been gathering quite a bit of wild plants already.

Our lettuce (which sowed itself last fall) isn't quite big enough for picking yet, so for our early spring tacos, we've been harvesting plantain out of the yard (which hasn't been sprayed with anything in the 6 years we've been here, so I'm fairly sure it's safe).

We also discovered two small patches of nettles, so I harvested those and dehydrated them (wearing gloves and long sleeves, of course!) I was a little worried that dehydrating without blanching wouldn't deactivate the stingers, but I tried it anyway, and unloaded the dehydrator bare handed without any trouble. Apparently, you can use them just like spinach, and I plan to add them to our spaghetti and pizza sauce this winter, for a nice vitamin boost.

Earlier this week, my oldest daughter seemed to have an eye infection (the lids were swollen, and the eyeball itself was a little red). After a quick check in The Handbook of Vintage Remedies, I found that raspberry or blackberry leaf tea was an effective remedy, so we ran out and picked some leaves from the blackberries that grow wild on the edge of our property. By the next day, her eye was back to normal, so I decided to pick more leaves and dehydrate those for wintertime teas.

Needless to say, I am so grateful for my Excalibur dehydrator! I'm certainly getting a lot of use out of it this spring!


Next up: wild strawberries! Our yard is full of these tiny little beauties every summer. Right now they're in bloom, promising a great harvest in a month or so!

Friday, April 27, 2012

Making Bentwood Garden Structures

About a year ago, I discovered the book Making Bentwood Trellises, Arbors, Gates & Fences by Jim Long. I loved the idea, but didn't have enough wood (or time!) to implement any of his plans.
But the idea stuck with me, and when I saw the brush pile my husband made after pruning the apple and maple trees (and clearing out a ton of brush out back), I knew I could finally bring some of those ideas to fruition. 
Raw Materials!

I was a little nervous that I was biting off more than I could chew, but once I actually got going, the projects turned out to be really easy! Here's what I made first:

Not bad for a first try, I think! My front garden is very "blah", but I think this accents it nicely. I plan to grow scarlet runner beans up it this summer (a variety I'd never even heard of until I read Edible Landscaping by Rosalind Creasy - another book I highly recommend!) This fence is held together with galvanized deck screws, and supported from behind with steel fence posts (the three main uprights are held to the fence posts with deck screws). I also set the three main uprights on top of concrete pavers, which hopefully will make the fence last a little longer than if I had simply sunk them into the ground). This project took less than three hours to put together.

Excited by this first success, I decided to try another bentwood project (here's what it should look like this summer - this is the picture that gave me the idea, from Green Renaissance)

Here's what my version looks like (and remember, it's only April, so there's nothing growing on it yet. I'm planning to grow more scarlet runner beans on this, so imagine lots of green foliage and pretty little red flowers):
For this project, I don't plan on it lasting more than a year, so I just sunk the poles around 8 inches into the ground and tied them together on top with twine. My husband put a ridgepole along the top (it was a little too high for me to do comfortably), and I'm planning to put two more support poles along the sides, to give it a little more stability and to give the beans something to twine around.

Meanwhile, there's still a lot of wood in that brush pile out back, and I could use some tepees for the peas, and tomato supports, and an arbor would look really good, I think . . .
This post is part of the Farmgirl Friday bloghop.

Monday, April 16, 2012

Making Liquid Soap from Bar Soap

I love my homemade bar soap, but I've discovered that my 4 year old boy thinks of it more as a toy than as a cleaning agent - he loves to get it wet and play with it when I'm not looking. This means we go through soap a lot faster than absolutely necessary, which kind of defeats the purpose of saving money by making my own soap!

So yesterday I finally went online and looked for ways to make liquid soap, thinking that if anything it will at least take him longer to go through it! I found a few different ideas, and took what I liked out of each and put them together into my own simple method. Here's what I did:

First, shred a bar of soap (I used my tallow soap, which I honestly wasn't impressed with; even after it was fully saponified, it still smelled like beef! My dog really liked me, but my husband wasn't as impressed . . .)

(Thankfully my boy liked being part of the solution as much as he enjoyed being the problem!)
Then take one cup of this shredded soap (packed down a little bit so you get a full cup) and add it to 10 cups of hot water (I boil the water, then turn off the heat just before I add the soap, so it's very hot but not actually boiling anymore). Stir it well, so that the soap is fully dissolved. It will be really runny at this point, but don't worry! Cover loosely and let it sit overnight, or until it's completely cooled. When you come back in the morning, stir it up well one more time. At this point, it should be thick, like purchased liquid hand soap, and you can now put it into your empty hand soap pump and use it.


If it's not thick, you can try mixing 3 tablespoons of salt into 8 oz of water, and then stirring this into your runny soap - a little bit at a time! - until it thickens to the consistency you like. I haven't tried this myself, since my batch worked just fine without it, but apparently it works really quickly so you can see if it's working right away.

An added bonus to making liquid soap is that you can add scents or oils very easily - just stir them in just before you pour your soap into your pump. I added tea tree oil to mine, thinking it would cover the beefy smell, and it seemed to work just fine.

(By the way, you don't have to have any special separate equipment like you did for making the original soap - after all, you're working with finished soap. Your pots and spoons won't be touching any dangerous chemicals, just good, clean soap!)

~~~~~

In case you were wondering, here's the cost breakdown for this soap:

1 bar of my tallow soap cost 64 cents, and I used half of it - so 32 cents for the whole batch;

the whole batch filled up four 7.5oz soap pumps, plus a 48oz spaghetti sauce jar, for a total of 78 ounces, or enough for more than 10 soap pumps.

Dividing the batch cost - 32 cents - by the number of pumps you can fill - 10 - you get a total of a whopping 3.2 cents per container, or .4 cents per oz (that's four tenths of a cent).

A quick check on amazon found that the big soap refill bottles cost anywhere from 5 to 40 cents per ounce, so you can see that this idea could save quite a bit of money!

This post is part of the Homestead Barn Hop.

Friday, April 13, 2012

Simple, Light Chicken Tractor DIY Plans

I have to admit, I've been reluctant to post directions for my chicken tractors (sorry, Lori!) because, honestly, I'm kind of embarrassed by how simple - and, frankly, redneck! - they are. Blue plastic tarps and zip ties aren't generally featured in Better Homes and Gardens! But, on the other hand, they do make it possible for a wimpy, carpentry-challenged girl like me to achieve my pastured poultry dreams.

So, excuse their homely appearance and simple construction - they really are useful (and cheap!)


This tarp is two years old, and obviously needs replacing.
. I haven't gotten around to refurbishing this pen for the current year yet.
 Materials:
10 2x2 furring strips
1 1x2 furring strip for door frame
8 corner braces
25 feet of hardware cloth
cable ties ("zip ties") and galvanized deck screws
6 foot by 8 foot tarp
2 carbiner clips or double-ended snap hooks
All of these should be available from your local home improvement store (Lowe's, Home Depot, Menards, etc.) I included the links in case you weren't sure what each item was.

You will also need some kind of saw to cut your lumber to size (I used my brother-in-law's compound miter saw, which was a lot more tool than necessary - but it worked pretty slick!), and a drill for driving the screws.

First, you need to cut your furring strips to size. You'll need 4 in their original 8' length, cut four others in half for seven 4' pieces, and cut the extra 4' piece and the two remaining 8' strips into 2' pieces (nine total) for the 4 corner posts, 4 roost supports, and one for the door frame. Also cut the thinner strip into four 2' pieces.

Once you have them cut to size, you just need to screw them together. Use the metal corner braces and 1" deck screws to make two big rectangles, then join these to the 2' uprights with 3" deck screws. It can be pretty tricky balancing everything, so if you can get someone to hold them for you that will be a big help.

Once you have the basic frame put together, add the roost supports, and then the roosts (you don't have to be too picky about the height of the roosts; I usually go for about 1/3 of the way up the supports).
Now it's time to add the wire - simply wrap the wire around the perimiter of the pen (leaving an opening for the door, of course), connect it to the wood with zip ties (or whatever other fastener you prefer), and trim it to size. There should be enough left over to cover the door. You can also add wire over the top of the pen (which I would recommend, but I didn't add that wire to the cost/materials list), leaving room of course to open the pen from above to add water and food (and a nest box, if you have laying hens). Add the tarp (also connected to the wood with zip ties) to the back of the pen, being sure to cover the back and sides.

Next put your door together - simply screw the 2' strips of 1x2 into a square, with the hardware cloth sandwiched between. Connect the door to the frame (I usually have to use two zip ties per "hinge" to make them long enough to go around both strips of wood, with a little play so the door can swing).

Once the door is finished, swing it to the "open" position and add your water support bar just behind where the door rests, so that you can swing the door freely without hitting the water bar (I have learned to add this step from frustrated experience). (See picture at top of post to see the water bar if that description doesn't make sense to you.)


To keep the door closed, I like to use either carbiner clips (pictured) or double-ended snap hooks. I can usually get a tighter close with snap hooks, although I haven't had any problems with either predators or escaping chickens with either one.
Obviously, this design is not going to win me any awards for beauty, but they are functional. Of all of the different styles of pen I've tried, these are the only ones light enough for me to move without straining my back.

And believe it or not, in the three summers I've been using these pens, I haven't lost any of my chickens to predators (while the chickens are in the pen, anyway - if they are out of the pen at dark, they rarely see the light of day again. There are plenty of coyotes, owls, hawks, skunks, raccoons, and other varmints around who love a free chicken dinner.)

So, even though they're pretty redneck, they're also pretty useful. I'd love to hear any ideas for improvement you might have (that preferably don't add any weight - I am still just one wimpy woman!)

This post is part of the Homestead Barn Hop and Morristribe's Homesteader Blog Carnival.

My Every Day Easter Basket

I am a firm believer that Christ's resurrection is something that shouldn't be celebrated just once a year, but every day - and my chickens help me remember to celebrate by filling my "Easter basket" every day!

Cream Cheese Chicken Liver Pate with Black Walnuts

This is just too good not to share! I discovered this recipe a few months ago, and I've made it at least twice (one batch makes quite a bit (especially if you're the only one eating it!) I usually freeze three one-cup portions and eat what's left fresh). My favorite way to eat this is spread on sourdough toast. Mmmmm.

Cream Cheese Chicken Liver Pate with Black Walnuts
2-3 large onions
1 pound chicken livers
8 oz cream cheese
¼ tsp sage
salt and pepper to taste
1-2 oz black walnuts

Sautee onions in bacon grease until deep golden brown. Place in food processor. In the same pan, cook the livers until just heated through, in plenty of bacon grease. Add cooked livers, cream cheese, sage, salt, and pepper to the onions in the food processor and puree until smooth. Stir in black walnuts.

Spoon into jars while still warm. Freeze any portion you will not use within a week.

Wednesday, March 28, 2012

Picking Up Chicks - 2012

We have our new baby chicks!
We drove down to Jennifer's on Monday to pick them up, and I was very happy with what I saw. We ended up getting 50 chicks, a mix of the four breeds I'd been thinking of (New Hampshire Reds, Barred Rock, Speckled Sussex, and Buff Orpington) and also a mix of ages (about four of them are already a week or more old; they look like gawky teenagers next to the other adorable fluffballs).
I've never gotten chicks this early in the year before, but the weather was so warm this spring I thought it would be OK. Of course, the day I picked up my babies, the temperature dropped 20 degrees! But I have the brooder covered with an old wool blanket, and they seem to be warm enough.
(the old porch beams are to hold the chicken wire down so our cat doesn't eat our new babies)

We don't have a thermometer in the brooder; I judge the temperature by how the chicks act. If they are all huddled under the heat lamp, they're most likely cold; if they're in the far corners, I assume they're too warm. Most of the time, I find the chicks napping in a ring around the edges of the heat lamp's main focus, so I think they're pretty cozy.

We did lose one chick this morning (it had been failing since we brought it home), but the rest look healthy and strong. They seem quieter and more laid-back than other chicks we've raised (but still very active, and they definitely have healthy appetites!) I can't wait to see what they're like as hens!

I've been throwing in weeds once or twice a day, with roots and soil attached (as Harvey Ussery recommends in The Small-Scale Poultry Flock), mostly dandelions and sheep sorrel. They seem to really enjoy them, and the weeds are generally gone by the next time I come to check on the chicks.
I'm very pleased with this batch of chicks, and I'm excited to think that, since I brought them home almost two months earlier than I've done with previous batches, they should be laying eggs earlier in the fall - perhaps September rather than late October or November?

I can't wait to see what this year will bring!

This post is part of the Homemaking Link-Up at Raising Homemakers and Simple Lives Thursday.

Saturday, March 24, 2012

First Harvest of 2012

It's official! I harvested the first vegetable out of my garden this afternoon - a handful of spinach to add to our spaghetti sauce. The gardening season has officially begun!
(and, as you can see, the weeding season needs to begin as well . . .)

The brown and yellow tips are on the leaves that stayed on the plant over the winter; the plants that had started growing in the fall started up again as soon as the snow was gone. I would never have expected a spinach plant to survive our cold Wisconsin winters, but here's living proof that they do!

Friday, March 23, 2012

DIY Chicken Tractor Pricing


Looking back through my chicken binder this week (where I keep my old feed records, chick purchase receipts, etc.) I found a note where I priced out the three different kinds of chicken tractors I've made. I thought this might be useful for anyone thinking about building their own this year.

The smallest, of course, is the cheapest. My 4x8 tractors cost me $44.50 each - $1.50 each for ten 2x2s ($10.50), 50 cents each for 8 corner braces ($4), 25 feet of 1" wire ($30), and $5 for a tarp.

The 8x8s were $72.50 each - $1.50 each for 11 2x2s, 50 cents each for 8 corner braces, $42 for 32 feet of 1" wire fencing, and $10 for a tarp.
The 10x10 PVC pens cost me $124.50 - 10 pieces of 10-foot PVC at $3.47 each ($34.70), 10 elbows at $1.55 each ($15.50), 2 cross connections at $2.15 each ($4.30), 40 feet of 1"wire fencing ($60), and $10 for a tarp.  

Obviously, prices change, and you can certainly build these with used materials, but hopefully this will give you an idea of how much it might cost to build each of these pens.

Thursday, March 22, 2012

Whole Wheat Sourdough Raisin (or Craisin) Bread

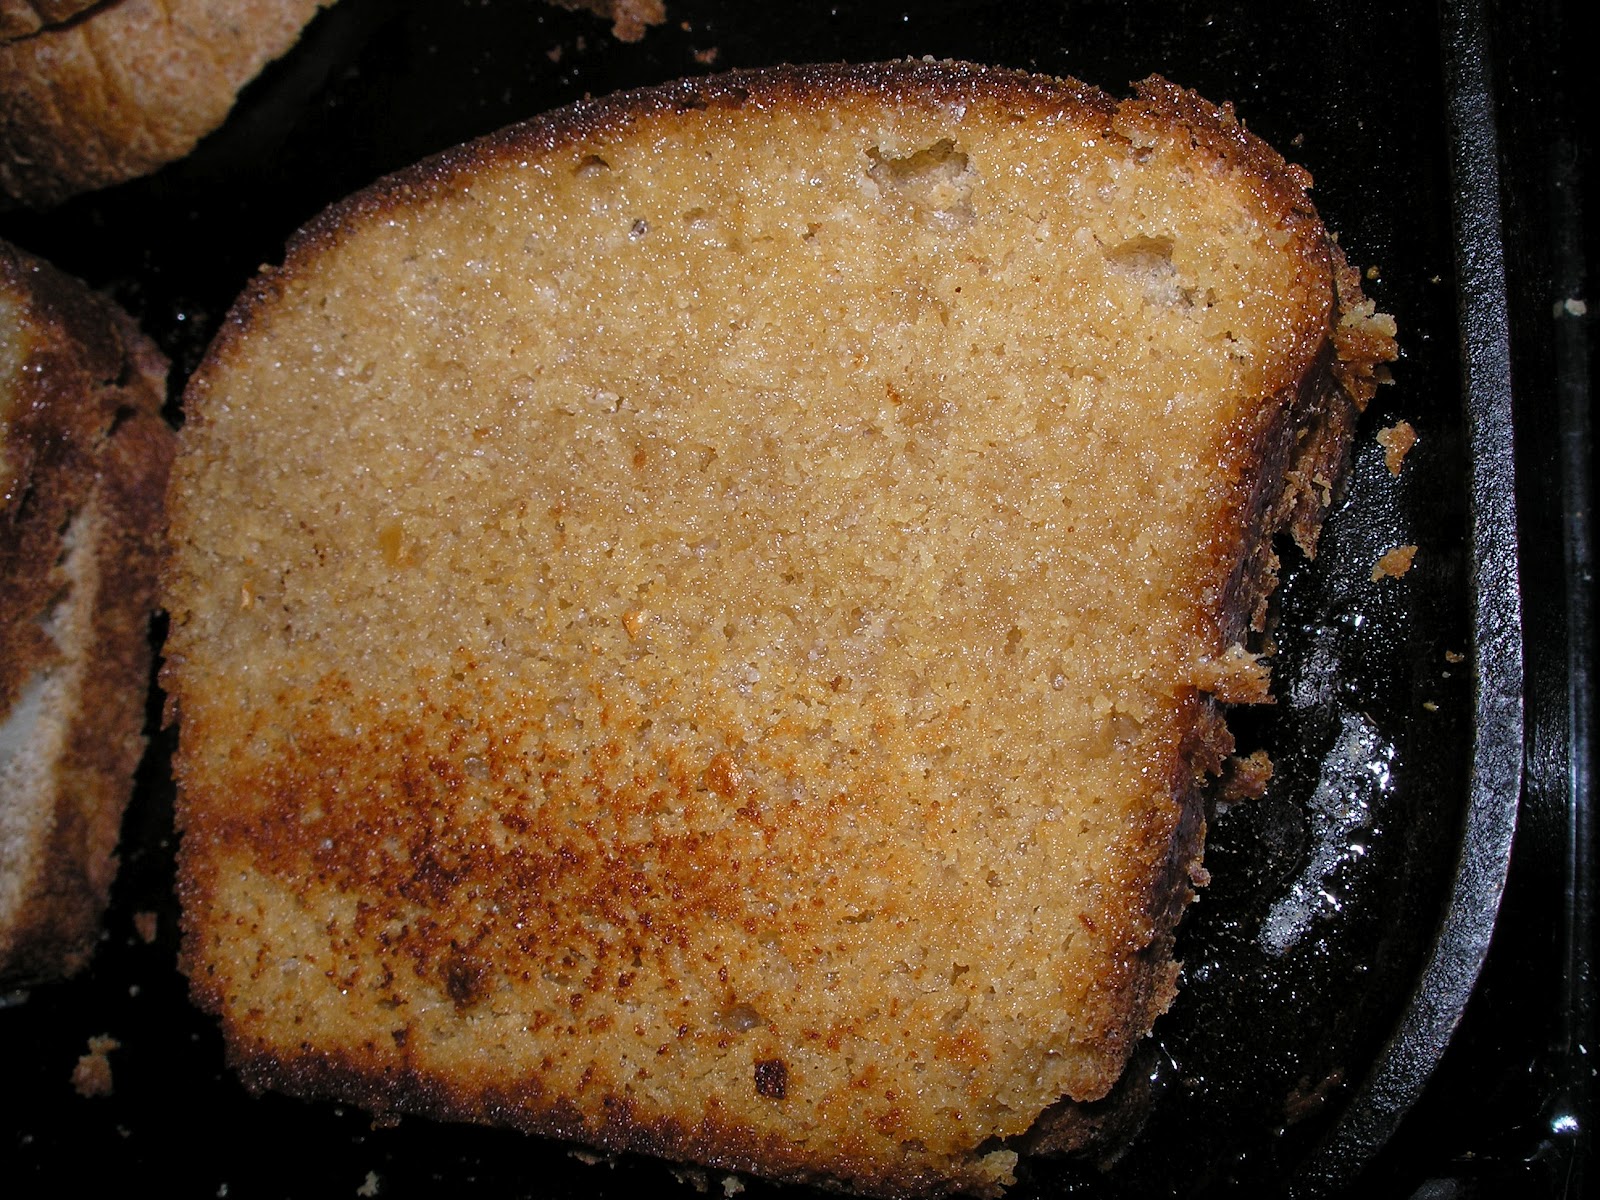
For a special treat, I'll serve this with breakfast (to rave reviews from the kiddos). Toasted and spread with some fresh butter, it sets a sweet tone for the rest of the day.

For the record, I always make this with dried cranberries (craisins) instead of raisins; I just like them better!

Whole Wheat Sourdough Raisin (Craisin) Bread
2 cups whole wheat flour (not sprouted! Read why not here)
1 tsp salt
1/4 cup melted butter or lard
1/4 cup honey
2 cups sourdough starter
Mix until dough forms a ball (I use my trusty Kitchen Aid stand mixer). Add about a half cup of raisins and/or dried cranberries and mix until well incorporated. Place in your greased bread pan and let rise until doubled (about 4 hours). Bake at 375 degrees for 45 minutes.

I don't use cinnamon in this recipe because cinnamon is slightly anti-biotic, and inhibits the natural yeasts from making it rise properly.

This post is part of Fight Back Friday and Make Your Own! Monday.

Saturday, March 17, 2012

Spring is Bustin' Out All Over!

We've been having a strange spring warm spell this past week, with temps in the 60s, and even up into the 70s once or twice. Considering that just two weeks ago we got over a foot of snow in one day and it looked like this around here:
 it's amazing that today I found this in the garden:
and these, too!
Not only that, but the rhubarb is starting to peek out:

and the spinach that was covered in all that deep snow over the winter is sending out tiny new leaves:

Over in the herb garden, the chives are coming up through last year's dead growth:
and, under cover (I accidently brushed off the spent leaves that were hiding this baby), the oregano is getting ready for the growing season, too:
I just love spring! It seems like every time I go outside, there's a new sign that what looked dead was just waiting for the right time to come alive again!

Maybe that's why Easter is my favorite holiday?

This post is part of Farmgirl Friday.

Wednesday, March 14, 2012

Immune-Boosting Comfort Food (or, Garlic Bread Grilled Cheese Sandwiches)

I don't know why I never thought of it before. We were recovering from a bout of the flu and were in serious hang-out-and-snuggle mode, so I decided to make some good ol' grilled cheese sandwiches with tomato soup for lunch. As I was slicing the bread (Super Simple Whole Wheat Sourdough, of course!), I noticed some garlic butter left over from an earlier meal sitting on the counter, and thought, hey, garlic is great for your immune system! And yummy!

And boy were they! I think I might make them this way all the time!

This post is part of Simple Lives Thursday.

Friday, March 9, 2012

Simple, Light Chicken Tractors

I love my chicken tractors. I use them to clean weeds out of garden beds, fertilize the garden, and, of course, make eggs and meat for us! Mine are a little different than others you may have seen, though, so I thought I'd share what I do.

I started off, when I first had just four chickens, with a ring of garden wire held up with step-in plastic fence posts. Surprisingly, this worked all right for a while. As long as there was nothing near the wire big enough to perch on, or a gap in the fence, the chickens pretty much stayed inside. I was also surprised to find that nothing snuck in and got them that first summer, either (Joel Salatin suggested in Pastured Poultry Profit$ that this is because the predators are thrown off by the fact that the chickens are moved every day. Whatever the reason, it seemed to work!)

But it was time-consuming to move all those posts, the chickens generally escaped while I was doing it (to the children's great delight - they love catching chickens for me!) and it wasn't suitable for growing out young birds, because hawks and owls could easily swoop in and grab a chick. I tried covering the ring with bird netting, but this quickly turned into a ripped, droopy, pain-in-the-neck-to-move mess.

The next year I had more hens, and I made a "hoop run" out of wire and bent PVC. The obvious problem reared its ugly head - the local coyotes figured out how easy it was to get under the wire and snatch a free dinner. Locking the hens in at night solved this problem, but in the summer, when I wanted to put the birds on pasture, I was stuck - I couldn't move a coop big enough to house my larger flock, and the yard around the coop had been scratched up until there was no grass left.

I needed something more sturdy, and more easily movable. My problem, though, was that I know next to nothing about carpentry, and am not extremely strong. I loved the idea of Joel Salatin's chicken tractors, but I knew I'd never be able to move them around by myself. I was also intrigued by "chicken ark" plans I found on the internet, but frankly intimidated by the carpentry skills I was afraid were involved (and none of them looked big enough for a dozen chickens).

I finally ended up making a pen four feet wide by eight feet long and two feet high. It only involved minimal carpentry, since it was made entirely of eight foot long 2x2 furring strips, cut to the necessary sizes and held together with metal corner braces.  I covered this frame with wire (1-inch (or smaller) hardware cloth works best, I've found) and put a plastic tarp over one end (a little redneck, yes, but functional!) I added two roosts under the tarp, set the feeder and water fount on the grass inside, and it was ready to go.

I moved this every day, and in the three years I've had it, I've never had a bird taken from inside (I have had birds escape, however, and they were pretty much always dead by morning. We have plenty of hawks, owls, raccoons, skunks, and coyotes around that love chicken dinner!)

It took me two years (yes, I'm that slow . . .) to figure out that I could use this for the hens as well as for growing out chickens - I simply needed to add a nest box (also removable, to keep the pen light). Before that brilliant idea struck, however, I kept the laying hens attached to the coop. I hated to have them stuck on one worn-out piece of ground, and so I devised a way to get them on fresh grass but still be connected to the safety of the coop and their nest boxes:

I cobbled together a long, thin run with doors every four feet along each side (the doors were made of cut-up pieces of a broken kiddie pool. Not the most beautiful things in the world, I know - they have since been replaced!) along which I moved one of my pasture pens (this chicken tractor has no roosts and no covering other than wire, since the girls were sleeping in the coop at night). This way, I could move then hens to a new door every day, leaving the previous days' grass time to grow back. There were 14 "stations", so the ground had two weeks to renew before the hens were allowed on it again. This worked quite well (of course I needed to make sure I locked the hens up at night!) but toward the end of August even two weeks wasn't long enough for the ground to recover, and the pasture quality wasn't nearly as good.

This is when I figured out the new set-up, and I added roosts and removable nest boxes to the chicken tractor and took it out on the yard.

That fall, I had too many chickens for the smaller tractor, so I built a new pen, based on the same design, but 8x8 rather than 4x8. It worked, but it was almost too heavy for me to move every day (last year I put drop-down wheels on it, which helped some).
My brother (The Enabler) also kindly built me a 10x10 tractor out of PVC for the broilers I raised that year (you can see it in the background of the picture above). It was basically the same, but being made of PVC made it much lighter, so it wasn't difficult to move. I couldn't put roosts in it, though, so I ended up fishing 8-foot furring strips through the wire and supporting them with cinder blocks, all of which I had to move every day.

Another innovation I tried was adding a strip of wood across the top of the 4x8 coop, and hanging the water fountain from it by a hook. This kept the chickens' drinking water much cleaner. It's also been helpful to lift the tarp in the middle (as you can see in the PVC pen in the back) because water can pool on the tarp and weight it down significantly. Tarps also need to be replaced every year, which led me to try covering the pens with 2 foot by 4 foot pieces of plywood instead of tarps this past year. This made the pens more heavy, but not unmanagable; if they weren't screwed on tightly, they could also be removed for each daily move - you have to decide for yourself if you can handle a little more weight, or would rather take a little more time to move the wood panels.

So, that's what I've done so far. Each tractor has its own merits; my favorite is still the 4x8 pens. They're light enough to move easily, and easy to make. The roosts are attached, so that saves me the trouble of disassembling them when I need to move them. Their main drawback is that you can't comfortably have more than a dozen hens in it (although they're great for growing chicks). I love how the 8x8 pens can fit more hens, but they're just too hard on my back to move daily, even with the wheels. I might experiment more with the PVC pens, but they have to be anchored down so they don't blow away with the strong winds we get up here on our hill - which makes moving some sort of anchor a daily chore. I may try anchoring the tarp down with tent stakes, which would mean that even if the tarp blew away, the tractor itself would still be in place, but again that would be a pain to move everyday. . .  I'll keep you posted with what I decide!

This post is part of Farmgirl Friday!

If you'd like to see instructions for my 4x8 tractors, you can read that post here.