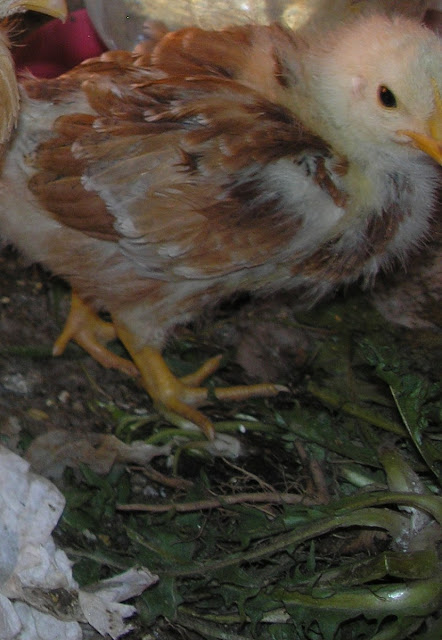
I love my chicken tractors. I use them to clean weeds out of garden beds, fertilize the garden, and, of course, make eggs and meat for us! Mine are a little different than others you may have seen, though, so I thought I'd share what I do.
I started off, when I first had just four chickens, with a ring of garden wire held up with step-in plastic fence posts. Surprisingly, this worked all right for a while. As long as there was nothing near the wire big enough to perch on, or a gap in the fence, the chickens pretty much stayed inside. I was also surprised to find that nothing snuck in and got them that first summer, either
(Joel Salatin suggested in Pastured Poultry Profit$ that this is because the predators are thrown off by the fact that the chickens are moved every day. Whatever the reason, it seemed to work!)
But it was time-consuming to move all those posts, the chickens generally escaped while I was doing it (to the children's great delight - they love catching chickens for me!) and it wasn't suitable for growing out young birds, because hawks and owls could easily swoop in and grab a chick. I tried covering the ring with bird netting, but this quickly turned into a ripped, droopy, pain-in-the-neck-to-move mess.
The next year I had more hens, and I made a "hoop run" out of wire and bent PVC. The obvious problem reared its ugly head - the local coyotes figured out how easy it was to get under the wire and snatch a free dinner. Locking the hens in at night solved this problem, but in the summer, when I wanted to put the birds on pasture, I was stuck - I couldn't move a coop big enough to house my larger flock, and the yard around the coop had been scratched up until there was no grass left.
I needed something more sturdy, and more easily movable. My problem, though, was that I know next to nothing about carpentry, and am not extremely strong. I loved the idea of
Joel Salatin's chicken tractors, but I knew I'd never be able to move them around by myself. I was also intrigued by
"chicken ark" plans I found on the internet, but frankly intimidated by the carpentry skills I was afraid were involved (and none of them looked big enough for a dozen chickens).
I finally ended up making a pen four feet wide by eight feet long and two feet high. It only involved minimal carpentry, since it was made entirely of eight foot long
2x2 furring strips, cut to the necessary sizes and held together with
metal corner braces. I covered this frame with wire (
1-inch (or smaller) hardware cloth works best, I've found) and put a plastic tarp over one end
(a little redneck, yes, but functional!) I added two roosts under the tarp, set the feeder and water fount on the grass inside, and it was ready to go.
I moved this every day, and in the three years I've had it, I've never had a bird taken from inside (
I have had birds escape, however, and they were pretty much always dead by morning. We have plenty of hawks, owls, raccoons, skunks, and coyotes around that love chicken dinner!)
It took me two years
(yes, I'm that slow . . .) to figure out that I could use this for the hens as well as for growing out chickens - I simply needed to add a nest box
(also removable, to keep the pen light). Before that brilliant idea struck, however, I kept the laying hens attached to the coop. I hated to have them stuck on one worn-out piece of ground, and so I devised a way to get them on fresh grass but still be connected to the safety of the coop and their nest boxes:
I cobbled together a long, thin run with doors every four feet along each side
(the doors were made of cut-up pieces of a broken kiddie pool. Not the most beautiful things in the world, I know - they have since been replaced!) along which I moved one of my pasture pens
(this chicken tractor has no roosts and no covering other than wire, since the girls were sleeping in the coop at night). This way, I could move then hens to a new door every day, leaving the previous days' grass time to grow back. There were 14 "stations", so the ground had two weeks to renew before the hens were allowed on it again. This worked quite well
(of course I needed to make sure I locked the hens up at night!) but toward the end of August even two weeks wasn't long enough for the ground to recover, and the pasture quality wasn't nearly as good.
This is when I figured out the new set-up, and I added roosts and removable nest boxes to the chicken tractor and took it out on the yard.
That fall, I had too many chickens for the smaller tractor, so I built a new pen, based on the same design, but 8x8 rather than 4x8. It worked, but it was almost too heavy for me to move every day (last year I put drop-down wheels on it, which helped some).
My brother
(The Enabler) also kindly built me a 10x10 tractor out of PVC for the broilers I raised that year
(you can see it in the background of the picture above). It was basically the same, but being made of PVC made it much lighter, so it wasn't difficult to move. I couldn't put roosts in it, though, so I ended up fishing 8-foot furring strips through the wire and supporting them with cinder blocks, all of which I had to move every day.
Another innovation I tried was adding a strip of wood across the top of the 4x8 coop, and hanging the water fountain from it by a hook. This kept the chickens' drinking water much cleaner. It's also been helpful to lift the tarp in the middle (as you can see in the PVC pen in the back) because water can pool on the tarp and weight it down significantly. Tarps also need to be replaced every year, which led me to try covering the pens with 2 foot by 4 foot pieces of plywood instead of tarps this past year. This made the pens more heavy, but not unmanagable; if they weren't screwed on tightly, they could also be removed for each daily move - you have to decide for yourself if you can handle a little more weight, or would rather take a little more time to move the wood panels.
So, that's what I've done so far. Each tractor has its own merits; my favorite is still the 4x8 pens. They're light enough to move easily, and easy to make. The roosts are attached, so that saves me the trouble of disassembling them when I need to move them. Their main drawback is that you can't comfortably have more than a dozen hens in it (although they're great for growing chicks). I love how the 8x8 pens can fit more hens, but they're just too hard on my back to move daily, even with the wheels. I might experiment more with the PVC pens, but they have to be anchored down so they don't blow away with the strong winds we get up here on our hill - which makes moving some sort of anchor a daily chore. I may try anchoring the tarp down with tent stakes, which would mean that even if the tarp blew away, the tractor itself would still be in place, but again that would be a pain to move everyday. . . I'll keep you posted with what I decide!
This post is part of Farmgirl Friday!
If you'd like to see instructions for my 4x8 tractors, you can read that post
here.


