Monday, January 20, 2014

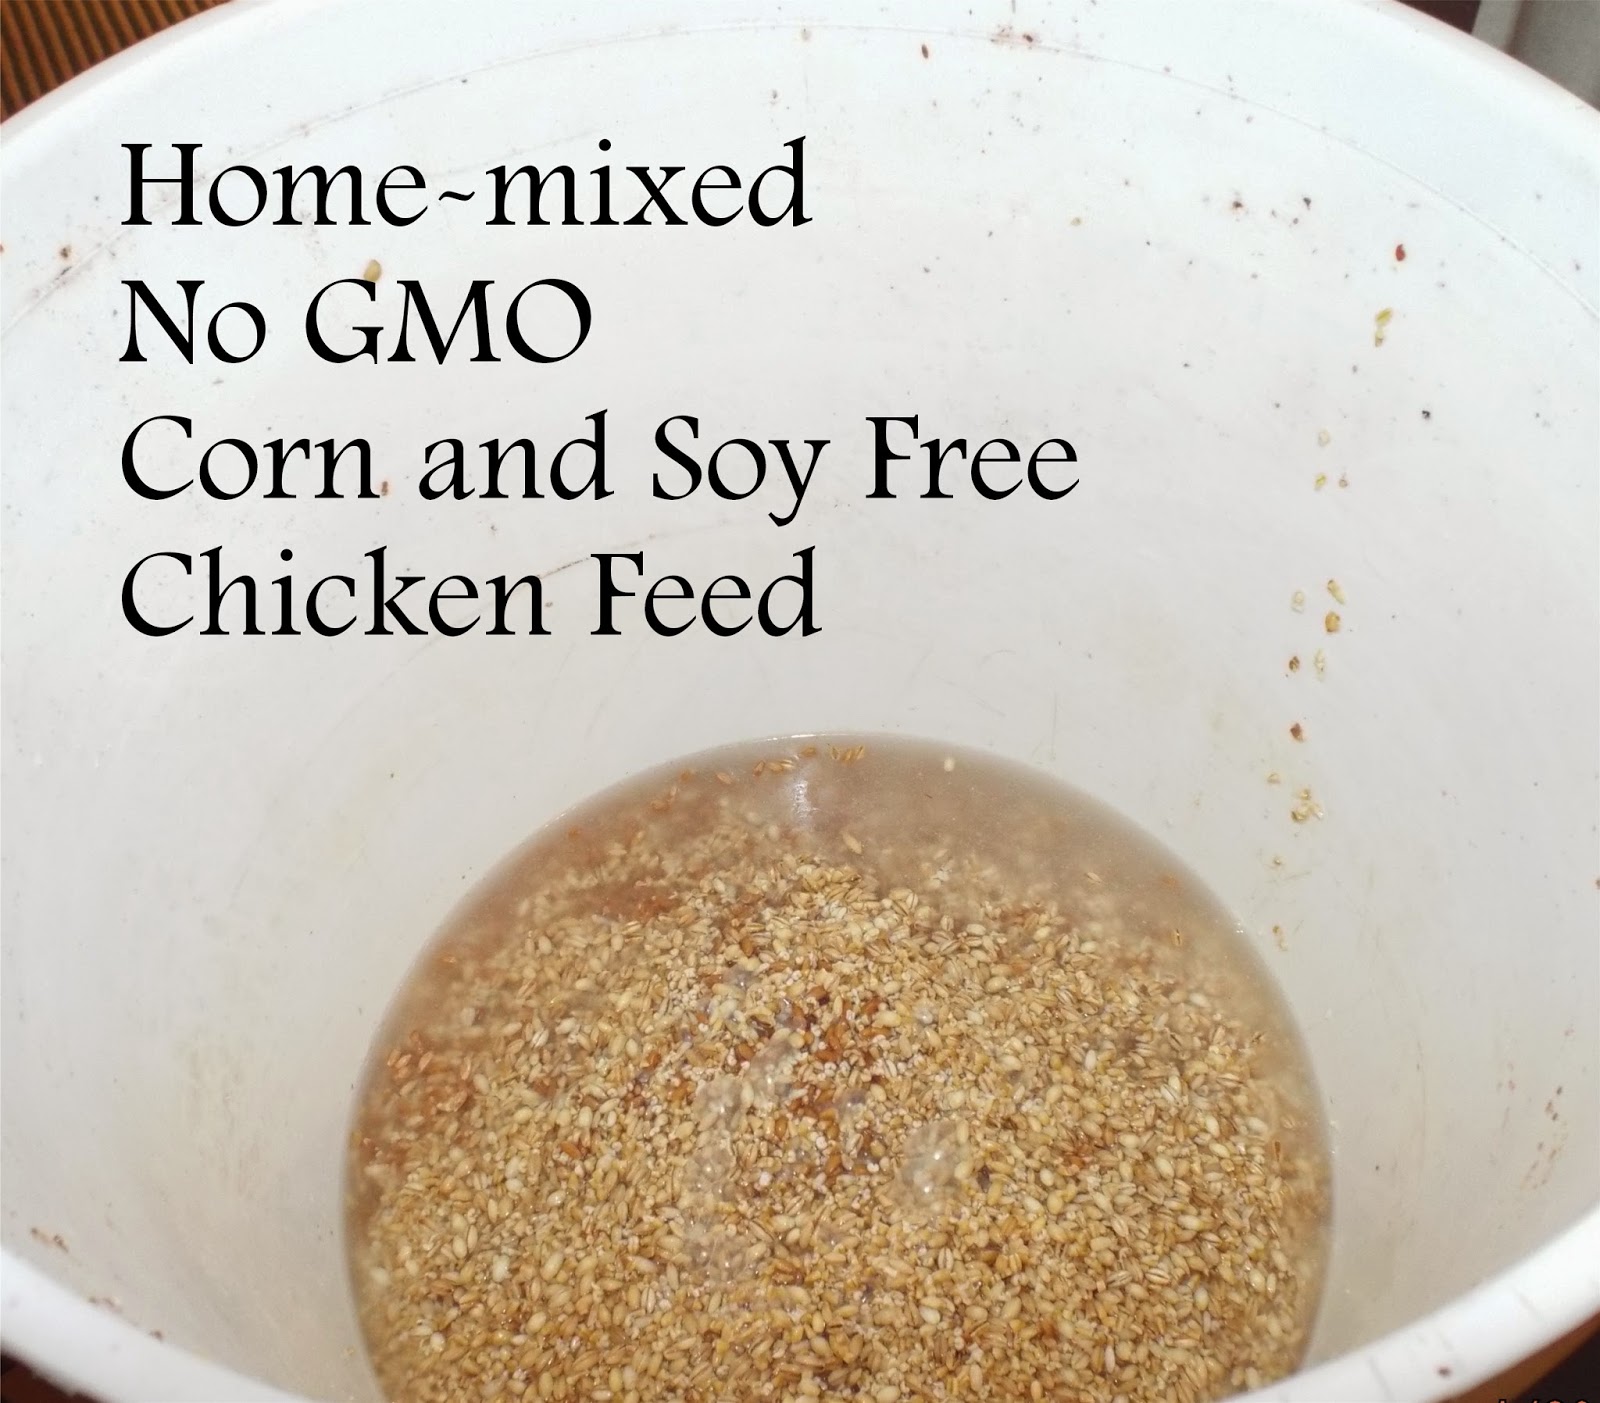
Home-mixed No GMO Corn and Soy Free Chicken Feed (that won't break the bank!)


I keep seeing posts online for homemade chicken feed, and I always click hopefully on the links, only to find that they all seem to have a dozen different ingredients (that I can't find locally) which would cost about five dollars a pound to mix. I don't know about you, but even considering the importance I put on quality food (that's why I raise my own chickens, after all!) I can't afford that. With my 40-odd bird flock, that would break the bank pretty quick!

So I finally sat down and did a little research into what a basic, simple-to-mix ration needed to have, and came up with the recipe below. I was a little scared to share my recipe right away, in case there was any glaring nutritional deficiency that might show up later (I'd hate to give bad advice and perhaps harm someone's animals!) but I'm happy to report that my girls have been living on this ration for five months now and happily laying that whole time (even through the sub-zero weather we've been getting lately) so I think it's safe to share.

This is still going to be more expensive than the feed from my local Farm & Fleet store (which I believe is still around $13 for a 50-pound bag), and even than the organic feed I was buying (which, last August, was about 43 cents a pound). But that feed relied heavily on soy and corn, both of which make me uncomfortable from a nutritional standpoint. Plus the fact that I had to drive an hour and a half one way to get it (and we always seemed to run out at the busiest times in my schedule!)

So I started making my own. It's important, whenever changing feed for your animals, to make the change gradually, mixing in a little more of the new feed each day, until you phase out the old ration completely. A sudden change of feed isn't good for any animal.

The Cheerful Agrarian's Homemade Chicken Feed
(this makes enough for about 10 hens)
2 cups wheat
1 cup oats or barley (I mix the two, to total 1 cup)
1 cup black oil sunflower seed
1/2 cup flax
2 Tbsp Fertrell Nutribalancer
I like to soak the grains overnight, mixing the wheat, oats, and barley and covering with water (or whey, if I have any left over from making cheese). This encourages the grains to sprout slightly, which enhances the nutritional content and makes the whole grains easier to digest. In the morning, I add the flax (which I first grind in a coffee grinder - unground flax just goes right through the chickens whole), the Nutribalancer, and the sunflower seeds.

Notes:
I tried soaking the sunflower seeds with the grains, but they tended to get moldy, even if only soaked overnight, so I switched to just adding them in the morning.

I don't buy ground flax because it goes rancid so quickly it would be bad before it picked it off the store shelf. My cheap little coffee grinder handles the flax seeds just fine.

I add raw apple cider vinegar to the chickens' water each day (about 1 tablespoon per gallon) to boost their immune system (here's the link to how I make it, or you can use some you've purchased).

They have oyster shell available free choice, and I like to toast eggshells after I've used them and feed them back, crushed, with the other kitchen scraps. I've never had problems with soft shells.

Whenever I think of it, I chop up a clove of garlic and add it to the kitchen scraps, again to boost their immune systems.

Every so often, I quarter a small pie pumpkin and feed it to the girls. It is reported that there are compounds in pumpkin seeds that kill intestinal worms.
I buy my grain in 50-pound bags at the local bulk food store for about 50 cents a pound. I like to get Wheat Montana's Bronze Chief Red Spring Wheat (red wheat has a higher protein content), but if they don't have it I've also used their Prairie Gold White Spring Wheat (which I've also seen for sale at my local Walmart in 25-pound bags, for about the same per-pound price). Wheat Montana guarantees that their wheat is GMO-free and chemical free (not organic, but as close as I can afford right now).

I did some research, and found that there is no GMO version of barley, oats, flax or sunflowers, so that makes my whole mix GMO free (Nutribalancer is certified for use on organic farms).

I buy my flax in 25-pound bags from the same bulk food store where I buy my grains, and it makes the most expensive portion of my mix at over a dollar a pound (but since I use less of it, it doesn't drive up the overall price of the feed too much). The sunflower seed I get from a local farmer for a little over 30 cents a pound.

So this feed costs me a little under 50 cents a pound - which is more than I was paying for the organic feed, but I don't have to drive an hour and a half to get it (gas isn't getting any cheaper, nor is the wear and tear on my truck!) and it doesn't have any corn or soy in it (which I'd prefer not to have, even if it's organic). The biggest perk, though, is that I could one day grow all of this myself (if I scaled way back on the number of chickens I raise and way up on the amount of garden space for growing grain - but still, theoretically, it's possible). In the meantime, I'm looking for more local farmers who would be willing to sell grain directly to me, which I think would be a very happy compromise.

This post is part of the Sunday Social blog hop.

Super Simple Chocolate Syrup

I've tried many recipes for chocolate syrup, some with evaporated milk, some with heavy cream, others with all kinds of complicated ingredient lists - when I found this, I couldn't believe it would work, but it did! So simple, and so yummy!

Super Simple Chocolate Syrup
1/2 cup maple syrup
1 Tbsp cocoa powder
Mix well, and it's ready to go!

(This recipe is definitely not set in stone - feel free to use more or less of either ingredient, to your personal taste.)


My Favorite Homemade Ice Cream Sandwiches

I can't take the credit for these - they were my husband's idea - but they are soooooo good! Just put a scoop of Maple Syrup Sweetened Ice Cream between two Zucchini Chocolate Chip Cookies. The cookies are nice and soft, so they don't squish all of the ice cream out when you take a bite. Perfect!

Maple Syrup Sweetened Ice Cream

One of my gifts last year was a Cuisinart ice cream maker (only $50 on Amazon!) This quickly became my favorite recipe:

Maple Syrup Ice Cream
2 cups cream
1 cup whole milk
1/2 cup maple syrup
1 egg (optional; I think it makes it extra creamy)
Dash salt
Mix well and chill. Prepare according to ice cream maker directions.

For chocolate ice cream, add 2 Tbsp cocoa powder.

My favorite way to serve this is topped with Super Simple Chocolate Sauce, with a Maple Syrup Brownie on the side. Mmmmmmm!

Tuesday, October 15, 2013

Book Review - Eating on the Wild Side

Eating on the Wild Side by Jo Robinson


Ok, I have to admit that when I first saw this book, I thought it would be about foraging for edible weeds or perhaps interesting venison cookery. I was delighted to find, however, that it's chock-full of real, helpful information for people interested in getting the most nutrition out of their food, but who prefer to get their food from the garden, farmer's market, or grocery store.

The book covers most of the common fruits and vegetables commonly available in the U.S., discussing the plant's history (did you know most of today's sweet corn was developed from seeds exposed to the nuclear radiation from the bombing of Hiroshima?), nutritional profile (artichokes have one of the best antioxidant profile of any food found in the grocery store!), preparation tips (believe it or not, you can get more antioxidants out of blueberries if you cook them), and a list of the best varieties to look for in the grocery store, farmer's market, or seed catalog (for example, a Fuji apple has more phytonutrients than a Braeburn).

This book is such a wealth of information for anyone looking to get the best nutrition from their food choices (I will definitely be buying myself a copy - I know I'll be looking back for tips, both when I'm perusing the seed catalogs in January and planning my family's meals each day). What a find!

Thursday, September 26, 2013

Wild Child

This afternoon my seven year old daughter walked in the door with her shirt made into a big basket full of these beauties:

Thankfully, I knew they were tasty, edible meadow mushrooms (also known as “pinks” because of their pink gills) – I’d researched them extensively when we found some a few weeks ago, and I’d actually harvested some on my morning walk earlier today.

We also found some small puffball mushrooms (which are basically like giant marshmallows (in appearance and texture, not in flavor!), but I found that it’s kind of hard to say "marshmallow mushrooms" correctly unless you really think about it – but maybe that’s just me). So we froze the pinks for later and sauteed the puffballs to go on our burgers for supper (along with some onion and green pepper, of course. Mmmmm).

****
My kids have gained quite the reputation for harvesting wild foods – so much so, in fact, that my sister-in-law has given her three year old son the rule, “Only eat things out of the yard if your cousins give them to you!” Apparently her lawn is full of tasty plantain, purslane, and wood sorrel

Monday, August 12, 2013

Making a Sourdough Starter from Scratch

I published this earlier as part of another post, but it seems that some friends had trouble finding it. To make it easier, I'll share it again here.

If you don't have a starter culture, the easiest and cheapest way to get one is to "catch" your own: Here's my adaptation of Sally Fallon's recipe from Nourishing Traditions:

Starter (takes one week):
Mix two cups freshly ground flour (rye works best, but wheat is fine too) and two cups water in a glass bowl. Mixture will be very soupy. Cover with a cloth attached with a rubber band and let sit in a warm place.

The next day, and every day for the rest of the week, mix in 1 cup flour and 2/3 cup water. Cover and let stand. After a few days the starter will begin to bubble and develop a wine-like smell. 
After 7 days the starter should be ready to use (although it will get stronger as it ages, producing lighter breads). Once the starter is ready, you can either keep it on the counter and keep using and feeding it, or it can be stored in the refrigerator if you can't bake that often. If you do put it in the fridge, make sure to pull it out and feed it at least 12 hours before you mix up your recipe, to give the bacteria a chance to "wake up" and get growing again.
Now, what to do with all of that extra starter? How about making some pizza crust? or pancakes? or waffles? or tortillas? or (my favorite) cranberry cinnamon rolls?)

For more information on sourdoughs and starters, try the book Wild Bread by Lisa Rayner or the blog Sourdough Home.
~~~~~
Ooh! I couldn't find this when I first posted, but I stumbled upon it again - this is a wonderful video about sourdough starters from gnowfglins. My kids even enjoyed watching it with me (can you say homeschool science for the day?)

Thursday, August 1, 2013

Easy Lacto-Fermented Salsa

Salsa making season is upon us! Here's my favorite recipe (love the great probiotics - not to mention the fact that you can make as much or as little as you like!) 

Lacto-Fermented Salsa
1 quart chopped tomatoes
1/2 cup chopped onion
2 Tbsp snipped fresh chives (dried spices work fine, too)
2 tsp minced garlic
2 chopped jalapeno peppers
1/4 tsp oregano
1/4 tsp cilantro (use more if using fresh)
1 Tbsp sea salt
Mix all together and fill desired jars, leaving 1-inch head space. (If you have whey on hand, it helps to put about 1/4 cup on the top of each jar, to kick-start the lacto-fermentation. Or you can sprinkle the sea salt over the top of the salsa in the jar rather than mixing it in - this can help prevent mold forming on the top of your mixture.) Cover tightly and leave at room temperature for 3 days, "burping" the jar regularly to release pressure. After three days, move the jars to a refrigerator or cool cellar for long-term storage.

(For an even stronger dose of probiotics, you can use a heremes jar and ferment it in a cupboard for 4 weeks (read the Saurkraut Survivor post for more information). After that time, transfer to the refrigerator.) 

Tuesday, July 23, 2013

Easy Small Batch Honey and Wax Strainer

With all of the bee drama settled for the moment, it was time to get at straining out the honey and the wax. Since the mostly empty comb I'd collected from the first hive had been thrown hastily on the ground in the craziness of re-hiving the swarm, it had gotten ants on it, so the first thing I did was put it in a kettle, weighted down by a plate (wax floats), to drown the ants. I let that sit overnight.

Then I found this ingenious idea on backyardhive.com - for small quantities of comb, simply mash it well with a fork (or potato masher)
put it into a quart-sized mason jar, cover the jar with a bit of window screen, screw the ring down to hold the screen in place, and tip it over onto a second jar. On the site they duct taped two large-mouth jars together; I simply used a narrow-mouth jar on top, which fitted nicely into the opening on the wide mouth jar on the bottom.
I found that the honey would stop dripping after a while, but that if you tipped it, a big air bubble would make its way through the honey still in the top jar, and this would let more honey run down into the bottom jar. To solve this problem, I wedged the jars between a picture on the wall and my cheese slicer (feel free to use whatever you have on hand - lol!) so that the air wouldn't get captured and stop the honey flow. I also just happened to have a batch of chicken stock simmering in the slow cooker, so I moved the honey jars next to that, hoping the extra warmth would help the honey flow.

The next morning, I found my first honey harvest strained and waiting for me - a full pint of sweet golden goodness! (Even though I have some older honey I'd purchased previously, I'll be using this up first, since most of the honey cells weren't capped. That means it has a higher moisture content than capped honey, so it's less antibacterial than properly dried honey, so it could possibly go bad sooner. Better safe than sorry - I'd hate to waste my first honey harvest! Of course the first thing we made was a batch of pumpkin spice honey butter. It made the whole bee drama a little more worth it!)

Once I'd gotten the honey out, I melted the wax in a double boiler, poured it into the narrow-mouth quart jar, and strained it the same way I'd done with the honey. This was a little more tricky, since the wax hardened quickly, and I had to keep re-melting it before I could get it all through the strainer (I tried a few different ways of doing this - the best way I found was to keep scooping it out of the top jar and re-melting it every so often. A bit putzy, but it worked. I also tried putting it in the oven along with a batch of pumpkin pie bars I was baking (yes, I know it's July, but the honey butter got me in the mood for pumpkin pie). When I took the jars out of the oven, though, the wax was bubbling, which apparently is a no-no (although the only reason why that I've seen for not boiling it was that it makes the wax darker, which I'm not super concerned about).

When you're done, the bottom jar will have a lovely hard layer of yellow wax, with some runny brown stuff on the bottom. It can be a bit tricky getting the wax out of the jar (without splashing the nasty brown stuff all over your shirt, anyway - don't ask how I know). The easiest way I found was to put the jar in the freezer, and the wax will contract and come out of the jar much more easily. If you leave it too long, the brown stuff will freeze too, but just defrost it in a bowl and then you can rinse it off in the sink.

With all of the honey and wax strained out, I was left with little brown lumps of pollen that wouldn't flow through the strainer. These are very high in protein, and can be frozen and saved to feed to your bees next summer (instead of buying "pollen patties"). I won't be giving them to my bees, since I baked them, but I'm assuming they'll also make a good protein supplement for my chickens.

So, ready or not, I've dealt with my first swarm, and completed my first harvest! 

Bee Drama

In case you were wondering what NOT to do when raising bees, here are a few ideas:

Sunday afternoon, after transplanting iris, daylilly, and blazing star flowers that were growing wild along our fenceline (moving them to the flower bed in front of the house - I love free flowers!), I went to chat with my husband, who'd just finished digging a new strawberry hugulkultur bed between the apple trees (I want to try Herrick Kimball's "Hugelberry" idea from his new book The Planet Whizbang Idea Book for Gardeners). We were both tired and ready to break for supper, but as we were talking, I just happened to look out into the field behind our house, and saw this:
Of course, having read just about every beekeeping book and blog there is, I recognized it immediately. My bees had swarmed!

(sorry it's fuzzy, but my daughter wasn't getting anywhere near those bees with the camera!)

Now what? I'd read enough to know that catching a swarm is fairly easy (if you're quick and they don't fly away before you get there), but you have to have some kind of box to put them in. After wracking my brain for a bit, I remembered that I still had the cages I'd brought the bees home in - perfect. I fetched one out of the garage and, along with my pruners, went to work. I cut off the branch a little before and after where the swarm was hanging, so that I could maneuver the whole thing more easily to shake them down into the box. It all went smoothly, and I brought the box back to the lawn until I could figure out what to do with it. While I was at the tree, however, I saw that there was another bunch of bees clinging to the trunk. I had another bee cage, so I figured I'd go and collect those, too. I brushed them off of the trunk with my bee brush as well as I could, then covered that cage and put it by the other one.

It's a good thing that I went back for that second bunch - judging by the number of still-loose bees that were collected around the outside of the cage, the queen was in that second batch.
With the swarm captured, I had time to take a deep breath, shake out the adrenaline jitters, and calmly assess the situation.

First up - where was I going to put this new bee colony? I didn't have any more hives, so what was I going to do with them? I quickly went online and looked up how to make a basic hive box, figuring we could cobble something together and then make a decent floor and roof for it later. My husband was not sure that was such a good idea, and flat out said that I should just release the swarm and prepare better for next time. But, at my obvious distress, he set to work building a quick hive box. Thankfully, we already had the necessary wood, so he just had to cut it and screw it together.

The next thing to do was to find out which hive the bees had come from. "Check Bees" had been on my to-do list for over a week, but I'd been busy with other things and hadn't gotten around to it. Obviously I shouldn't have put it off!

When I looked in the first hive, I figured it was the one that had swarmed - there were hardly any bees in it - maybe a hundred or so. When I looked in the second hive, however, I was puzzled. This hive was chock-full - only one frame hadn't been drawn out, and - oho! - there were queen cells in the top box. Since overcrowding was usually the cause of a swarm, and this hive was making new queens, the swarm must have come from this colony. So why were there so few bees in the first hive?

Still trying to work that one out, I realized that the first thing to be done was to make more room in the overcrowded hive. I grabbed my giant 5-gallon kettle and harvested four frames of comb. Hopefully that will give them enough room so they don't need to swarm again soon.

But now back to that first hive - what was going on there? Why were there so few bees? I looked again at the comb, and saw that there were no bee babies at all, and no honey, just some cells half-full of pollen. Something was very wrong. No larva meant no queen. No queen meant the colony would slowly die out. It was worse than I thought.

Then it struck me - this was the solution to my swarm relocation problem. It was only a matter of time until the first colony died out altogether, so why not clear them out and put the new swarm in their hive? There was a risk, of course, that the first colony had succumbed to disease - but if my choices were take a chance on disease or lose the swarm, I figured it was worth a try.

So I took out all of the comb, brushed most of the bees out of the hive, and shook out the boxes containing the swarm into the now-empty hive. I closed it all up, said a prayer that this cockamamie jerry-rigged idea would somehow work, and went to deal with the combs I'd harvested.

I had been very careful to brush off any bees that were on the comb from the second hive before I put the comb into the kettle and covered it (I definitely didn't want any bees in the house!) but when I came back to the kettle, there were bees in it! Very pale, disoriented-looking bees. I soon realized that those bees had just hatched out of the brood comb! About 1/4 of the comb I'd harvested turned out to have brood in it. With an inward cringe, I realized I would have to pick out all of the bee babies before I could process the honey and wax (to make it a little easier on my over-emotional adrenaline-pumped mind - waste not want not - I fed that brood comb to the chickens).

Once all of the brood comb had been picked off (I used a fork), I took the rest of the comb into the kitchen to process.

Tuesday, May 21, 2013

Bees - first check

This morning I checked on the two hives of bees I bought and installed 10 days ago. I checked my top bar hive (Hive 1) first. Everything looked great! The bees were drawing comb off of the bars, there was still plenty of honey left in the jar, the queen had been released, and everything was humming along nicely. I moved back the follower board to give them more room, took out the queen cage, closed them back up, and that was that. The bees stayed calm (it helped that it was only 60 degrees out and they were cold).

The Warre hive (Hive 2), however, was another story. When I removed the top box, I found comb hanging everywhere but where it was supposed to be. The jar of honey I'd left for them was completely empty, but they'd built comb on top of it, rising up in a ring, continuing the shape of the jar. I'd taken out three frames to make room for the jar, and the bees had built comb off the bottom of the frames above, down into the opening next to the jar. So basically I had to remove all of the comb they'd built over the course of the week. I also found that the queen was still in her cage, so I carefully removed her and dropped her in the hive. Thankfully, that means there wasn't any brood in any of the combs (and no honey that I could see, either).

So basically this means that Hive 2 is starting over from scratch. I'll give them more honey (using the feeder this time) so hopefully they can bounce back after this early setback.

This means that right off the bat the top bar hive is showing a lead on the Warre - but that may just be because the queen wasn't released and I didn't use the feeder like I should have. We'll see how each progresses over the course of the summer (and winter - I'm very nervous to see if either of them make it through!)
Some of the drawn comb I had to remove from Hive 2

Sunday, May 19, 2013

Fudgy Maple Syrup Brownies

This has become my go-to dessert recipe; my husband asks for it all the time (and my brother- and sister-in-law always request it when we visit them on Friday nights (with homemade ice cream on the side, of course!)
And of course I always oblige, because they're so easy to make!
 
Fudgy Maple Syrup Brownies
1/2 cup butter
1/3 cup cocoa
2 eggs
1 cup maple syrup
1/2 tsp vanilla
3/4 cups flour
1/2 cup nuts (optional)
Mix all together, pour into 8x8 pan. Bake at 350 degrees for 30 minutes.

Saturday, May 18, 2013

Chocolate Whipped Cream

I made this as the frosting on my husband's birthday cake today - yum! And so easy!

Chocolate Whipped Cream
1 cup heavy cream
2 Tbsp unsweetened cocoa powder
1/4 cup maple syrup
Mix cream and cocoa powder well, then whip until soft peaks form. Slowly drizzle in the maple syrup and continue to whip until stiff.