These make a big batch - you bake them in a jelly roll pan. Perfect for big fall gatherings!
Pumpkin Bars
2 cups flour (I use sprouted whole wheat)
1 1/2 cups sugar (I use rapadura)
2 tsp baking powder
2 tsp cinnamon
1 tsp baking soda
1/4 tsp salt
1/4 tsp cloves
4 eggs
2 cups pureed pumpkin
1 cup oil (I generally use extra virgin olive oil, and don't taste a difference)
Mix all and pour into a jelly roll pan. Bake at 350 degrees for 25 to 30 minutes, or until toothpick tests clean.
Top with a half recipe of cream cheese frosting when cool.
Cream Cheese Frosting
6 oz cream cheese, softened
1/2 cup butter, softened
2 tsp vanilla
Beat all together until light and fluffy. Gradually add 2 cups powdered sugar (I've read you can put rapadura in a blender to make it a finer consistency - but I've never actually tried it yet). If desired, add up to 2 1/2 cups more powdered sugar until you get to the desired consistency.
Tuesday, October 18, 2011
Pumpkin Bread
Another yummy fall treat (see why I grow so many pumpkins?)
Pumpkin Bread
1/3 cup soft butter or coconut oil
2 eggs
1 cup pumpkin puree
1 cup rapadura
1 Tbsp baking powder
1/4 tsp baking soda
1 tsp cinnamon
1/4 tsp salt
1/4 tsp nutmeg
1/8 tsp ginger
1/8 tsp cloves
2 cups flour (I use sprouted whole wheat)
Mix all together and bake in a loaf pan for one hour at 350 degrees.
(to make this recipe as muffins or cake, use appropriate pan and bake for 20 minutes)
Pumpkin Bread
1/3 cup soft butter or coconut oil
2 eggs
1 cup pumpkin puree
1 cup rapadura
1 Tbsp baking powder
1/4 tsp baking soda
1 tsp cinnamon
1/4 tsp salt
1/4 tsp nutmeg
1/8 tsp ginger
1/8 tsp cloves
2 cups flour (I use sprouted whole wheat)
Mix all together and bake in a loaf pan for one hour at 350 degrees.
(to make this recipe as muffins or cake, use appropriate pan and bake for 20 minutes)
Pumpkin Cheesecake
My favorite fall treat! Of course anything with cheesecake is wonderful, but I think pumpkin is especially good! I like to have this for my birthday, which is in October.
Pumpkin Cheesecake
Crust:
1 1/4 cups flour
1/4 tsp salt
1/3 cup honey (may be omitted)
1/2 cup soft butter
1 egg yolk
Mix crust ingredients and press into springform pan. Bake at 400 degrees for 20 minutes.
Filling:
2/3 cup honey
3/4 tsp cinnamon
1/4 tsp cloves
1/4 tsp ginger
1/8 tsp nutmeg
1 pound cream cheese
Mix all together, and then add, one at a time:
2 large eggs plus 2 egg yolks
1 cup pumpkin puree
Pour into crust and bake for 30 minutes at 350 degrees. Reduce temperature to 325 degrees and bake for 10 minutes longer, until the edges look puffed but the center still looks moist and jiggles.
Topping:
1 cup sour cream
1/4 cup honey
1 tsp vanilla
Spread over cheesecake and return it to the oven for 7 more minutes.
When done, cover with an inverted bowl until cool. Refrigerate 24 hours before serving (if you can wait that long!)
Pumpkin Cheesecake
Crust:
1 1/4 cups flour
1/4 tsp salt
1/3 cup honey (may be omitted)
1/2 cup soft butter
1 egg yolk
Mix crust ingredients and press into springform pan. Bake at 400 degrees for 20 minutes.
Filling:
2/3 cup honey
3/4 tsp cinnamon
1/4 tsp cloves
1/4 tsp ginger
1/8 tsp nutmeg
1 pound cream cheese
Mix all together, and then add, one at a time:
2 large eggs plus 2 egg yolks
1 cup pumpkin puree
Pour into crust and bake for 30 minutes at 350 degrees. Reduce temperature to 325 degrees and bake for 10 minutes longer, until the edges look puffed but the center still looks moist and jiggles.
Topping:
1 cup sour cream
1/4 cup honey
1 tsp vanilla
Spread over cheesecake and return it to the oven for 7 more minutes.
When done, cover with an inverted bowl until cool. Refrigerate 24 hours before serving (if you can wait that long!)
Pumpkin Cookies
These are requested every year for our family Punkinfest celebration. Definitely a family favorite!
Pumpkin Cookies
2 1/2 cups flour (I use sprouted whole wheat)
1 tsp baking powder
1 tsp baking soda
2 tsp cinnamon
1/2 tsp nutmeg
1/4 tsp cloves
1/4 tsp ginger
1/4 tsp salt
1/2 cup softened butter or coconut oil
1 cup rapadura (update - this recipe works great if you substitute the sugar for maple syrup!)
1 cup pureed pumpkin
1 egg
1 tsp vanilla
Preheat oven to 350 degrees. Mix all together and drop by teaspoonfuls onto a cookie sheet. Bake 15-20 minutes.
Pumpkin Cookies
2 1/2 cups flour (I use sprouted whole wheat)
1 tsp baking powder
1 tsp baking soda
2 tsp cinnamon
1/2 tsp nutmeg
1/4 tsp cloves
1/4 tsp ginger
1/4 tsp salt
1/2 cup softened butter or coconut oil
1 cup rapadura (update - this recipe works great if you substitute the sugar for maple syrup!)
1 cup pureed pumpkin
1 egg
1 tsp vanilla
Preheat oven to 350 degrees. Mix all together and drop by teaspoonfuls onto a cookie sheet. Bake 15-20 minutes.
Pumpkin Muffins
My ten-year old son is making these for us for breakfast this morning! He had the ingenious idea to top them with chopped walnuts - yum!
Pumpkin Muffins
2 eggs
1/2 cup melted butter or coconut oil
1 cup pumpkin puree
3/4 cup honey
1 Tbsp molasses (optional)
1/4 cup cold water
1/4 tsp baking powder
1 tsp baking soda
1/4 tsp salt
1/4 tsp cloves
1/2 tsp nutmeg
1/2 tsp cinnamon
1 2/3 cups whole wheat flour (sprouted flour works great)
Mix all together, pour into muffin pans (these can also be baked in an 8x8 pan, or, better yet, in a cast iron skillet) and bake at 325 degrees for 30 minutes.
Pumpkin Muffins
2 eggs
1/2 cup melted butter or coconut oil
1 cup pumpkin puree
3/4 cup honey
1 Tbsp molasses (optional)
1/4 cup cold water
1/4 tsp baking powder
1 tsp baking soda
1/4 tsp salt
1/4 tsp cloves
1/2 tsp nutmeg
1/2 tsp cinnamon
1 2/3 cups whole wheat flour (sprouted flour works great)
Mix all together, pour into muffin pans (these can also be baked in an 8x8 pan, or, better yet, in a cast iron skillet) and bake at 325 degrees for 30 minutes.
Monday, October 17, 2011
Pumpkins!
I have always loved pumpkins, and the more I grow them, the more I love them. The last few years we've had great success growing good-sized specimens, and there's really almost no work involved, other than prepping a bed for them.
Here's what we do:
Pretty much as soon as the snow's gone and it's dried up a bit (usually early to mid-May in our neck of the woods) I put the chickens out in their 10x10 chicken tractor to clean up a patch of lawn for a new pumpkin patch:
(In case you've never heard about chicken tractors, let me tell you, they're a gardener's best friend! I put the girls out on a patch of grass for about a week, and it's totally cleared (and fertilized!) Usually, a couple weeks later the grass might start coming back, so I'll put the girls on for a second treatment, and then it's good for the summer. I always make sure the patch has at least two weeks after the chickens have been on it to rest before I plant, so that the "clucker muck" fertilizer isn't too fresh (it can hurt the seedlings)
And lest you are tempted to poo-poo (*groan*) the effects of clucker muck, I took this picture last spring:
I get a such a kick out of how you can see the individual squares where the chicken tractor was the summer before. Those patches green up so much faster than the rest of the lawn, and turn out such lush, healthy grass! And this was with the chickens only on the patch for a day before I moved them.)
But back to the pumpkins:
After the hens have prepped the bed, I cover it with paper mulch (I use old newspapers, empty flour bags from my local bulk food store (the ladies there are sweet enough to save them for me), or empty feed bags, if I have them) held down with old chicken wire, weighted with a cement block every few feet (it gets pretty windy up on our hill, and if I didn't put something on top to hold them down they'd end up in the neighbor's cow pasture, the ground would be exposed, and the weeds would take over).
You do have to be careful, though, or you can end up with pumpkins growing into the cement block, like we had this year.
It's hard to see in the picture, but this pumpkin had a little square knob of flesh wedged tightly into the block. We had to cut it apart to get it out of there!)
Ahem. Back to planting:
I leave little squares uncovered, about four feet apart, and this is where I plant the seeds. Then the kids and I check daily until we see those big, fat leaves pop up:
(doncha just get all giddy seeing your plants pop up in the spring?)
Then they're pretty much on their own until fall, when the kids start counting how many green pumpkin "babies" they can find under all of the leaves. This year, we had over 40, although a good number of those won't be usable because of the early frost. I did manage to bring in a dozen or so that were ripe, though, the evening before the frost (those are the ones in the picture at the top of this post) and in the days following I cooked up some of the more ripe ones that were left outside before they got soft.
My favorite pumpkin varieties to grow are "Hercules" and "Big Max" - they're consistently good-sized, with nice, straight sides for carving. We tried "Big Moon" last year, thinking they'd be similar to Big Max, but they were much more round and flabby-looking (but still very big, and we carved them anyway). We also planted some "Jack Be Little" pumpkins this year, which the kids loved, but we only got a handful of those (I think the bigger vines shaded them out too much).
But that's it - just prep the bed and watch them grow! And then all winter you can have pumpkin cheesecake, and pumpkin pie bars, and pumpkin bread, and pumpkin muffins, and pumpkin bars, and pumpkin cookies, and . . .
Here's what we do:
Pretty much as soon as the snow's gone and it's dried up a bit (usually early to mid-May in our neck of the woods) I put the chickens out in their 10x10 chicken tractor to clean up a patch of lawn for a new pumpkin patch:
(In case you've never heard about chicken tractors, let me tell you, they're a gardener's best friend! I put the girls out on a patch of grass for about a week, and it's totally cleared (and fertilized!) Usually, a couple weeks later the grass might start coming back, so I'll put the girls on for a second treatment, and then it's good for the summer. I always make sure the patch has at least two weeks after the chickens have been on it to rest before I plant, so that the "clucker muck" fertilizer isn't too fresh (it can hurt the seedlings)
And lest you are tempted to poo-poo (*groan*) the effects of clucker muck, I took this picture last spring:
I get a such a kick out of how you can see the individual squares where the chicken tractor was the summer before. Those patches green up so much faster than the rest of the lawn, and turn out such lush, healthy grass! And this was with the chickens only on the patch for a day before I moved them.)
But back to the pumpkins:
After the hens have prepped the bed, I cover it with paper mulch (I use old newspapers, empty flour bags from my local bulk food store (the ladies there are sweet enough to save them for me), or empty feed bags, if I have them) held down with old chicken wire, weighted with a cement block every few feet (it gets pretty windy up on our hill, and if I didn't put something on top to hold them down they'd end up in the neighbor's cow pasture, the ground would be exposed, and the weeds would take over).
You do have to be careful, though, or you can end up with pumpkins growing into the cement block, like we had this year.
I leave little squares uncovered, about four feet apart, and this is where I plant the seeds. Then the kids and I check daily until we see those big, fat leaves pop up:
(doncha just get all giddy seeing your plants pop up in the spring?)
Then they're pretty much on their own until fall, when the kids start counting how many green pumpkin "babies" they can find under all of the leaves. This year, we had over 40, although a good number of those won't be usable because of the early frost. I did manage to bring in a dozen or so that were ripe, though, the evening before the frost (those are the ones in the picture at the top of this post) and in the days following I cooked up some of the more ripe ones that were left outside before they got soft.
My favorite pumpkin varieties to grow are "Hercules" and "Big Max" - they're consistently good-sized, with nice, straight sides for carving. We tried "Big Moon" last year, thinking they'd be similar to Big Max, but they were much more round and flabby-looking (but still very big, and we carved them anyway). We also planted some "Jack Be Little" pumpkins this year, which the kids loved, but we only got a handful of those (I think the bigger vines shaded them out too much).
But that's it - just prep the bed and watch them grow! And then all winter you can have pumpkin cheesecake, and pumpkin pie bars, and pumpkin bread, and pumpkin muffins, and pumpkin bars, and pumpkin cookies, and . . .
Wednesday, October 5, 2011
Talking Turkey (part 2)
I finally (now that the weather is cooler) cooked up our first turkey. I figured I should try one before we served a houseful of guests for Thanksgiving - but I didn't need to worry; it was delicious! Easily one of the tastiest birds I've ever eaten.* It was tender and flavorful, even with out any seasoning! I generally cook my birds plain, so that I can use the leftovers for anything I want without worrying about odd flavor combinations (and because that's how our family likes it). We all stuffed ourselves, but there's still plenty left for meals for the rest of the week - I'm looking forward to making enchiladas this weekend, and perhaps some turkey sandwiches (I don't buy lunchmeat, so we don't have sandwiches very often). Of course we had soup made with turkey stock for lunch today (I got two batches of broth out of that big carcass. Perfect fall weather food!) Ooh - maybe some Barbecue turkey pizza for supper tomorrow . . .
I definitely need to raise turkeys again next year!
*In case you were wondering, I cooked it in a covered graniteware roaster with a rack at 325 degrees for three and a half hours. I didn't do anything else - no basting, no butter rub, nothing - just popped it in the pan, breast side down, and baked it. I checked the temperature with a meat thermometer when the time was up, and it was right where it should be. The breast was tender and moist, the legs were done perfectly. It was so good!
I definitely need to raise turkeys again next year!
*In case you were wondering, I cooked it in a covered graniteware roaster with a rack at 325 degrees for three and a half hours. I didn't do anything else - no basting, no butter rub, nothing - just popped it in the pan, breast side down, and baked it. I checked the temperature with a meat thermometer when the time was up, and it was right where it should be. The breast was tender and moist, the legs were done perfectly. It was so good!
Sunday, October 2, 2011
Garden Accounting - September
This is the fourth installment in this series - you can see the total for June here, July here, and August here.
Well, this month wasn't quite as big as the last (I'm blaming the early frost, and the fact that I was gone on vacation for the whole last week of September), but I still think it was great! I do wish I'd gotten more tomatoes, but I'm happy to have harvested any - my poor plants looked so sad this year.
As expected, the tomatoes and zucchinis were the big players this month, but the herbs are also still going strong. I had to pull up quite a lot of garlic while it was still small (I was completely out, and didn't have the heart to go buy some when I had some lovely organic garlic right there in my garden! I did manage to leave a whole row of it in the ground for next year, though - the bulbs I pulled were just starting to form cloves, so I'm hoping for a big harvest next summer.)
Well, without further ado, here are this month's totals:
At the end of August, my account was firmly in the black at $560. September brought in another $375, which brings my total so far to $935 (and I still have half of the potato bed and a whole row of carrots to harvest yet. I think I may come out over a thousand dollars! I never dreamed it would be so much! I'm so glad I did this little experiment!)
Here's what I harvested this month:
4 bunches of oregano
8 bunches of parsley
11 bunches of chives
20 cloves of garlic
8 bunches of swiss chard
57 oz green beans
22 cucumbers
18 1/2 pounds zucchini
37 cups tomato sauce
10 pints diced tomatoes
2 pounds of broccoli
18 oz dried onion powder
3 whole onions
1/2 oz dried parsley
1/2 oz dried sage
16 grams dried peppermint
17 30-ish pound pumpkins
4 jack-be-little pumpkins
This post is part of the Homestead Barn Hop at The Prairie Homestead and Harvest Monday.
Well, this month wasn't quite as big as the last (I'm blaming the early frost, and the fact that I was gone on vacation for the whole last week of September), but I still think it was great! I do wish I'd gotten more tomatoes, but I'm happy to have harvested any - my poor plants looked so sad this year.
As expected, the tomatoes and zucchinis were the big players this month, but the herbs are also still going strong. I had to pull up quite a lot of garlic while it was still small (I was completely out, and didn't have the heart to go buy some when I had some lovely organic garlic right there in my garden! I did manage to leave a whole row of it in the ground for next year, though - the bulbs I pulled were just starting to form cloves, so I'm hoping for a big harvest next summer.)
Well, without further ado, here are this month's totals:
At the end of August, my account was firmly in the black at $560. September brought in another $375, which brings my total so far to $935 (and I still have half of the potato bed and a whole row of carrots to harvest yet. I think I may come out over a thousand dollars! I never dreamed it would be so much! I'm so glad I did this little experiment!)
Here's what I harvested this month:
4 bunches of oregano
8 bunches of parsley
11 bunches of chives
20 cloves of garlic
8 bunches of swiss chard
57 oz green beans
22 cucumbers
18 1/2 pounds zucchini
37 cups tomato sauce
10 pints diced tomatoes
2 pounds of broccoli
18 oz dried onion powder
3 whole onions
1/2 oz dried parsley
1/2 oz dried sage
16 grams dried peppermint
17 30-ish pound pumpkins
4 jack-be-little pumpkins
This post is part of the Homestead Barn Hop at The Prairie Homestead and Harvest Monday.
Wednesday, September 21, 2011
What a difference a day makes!
Last Wednesday my pumpkin patch looked like this:
That's 8 plants in a 4x8 raised bed - grown to take over roughly 40 feet square of lawn. This is why pumpkins aren't allowed in my regular garden! There were about 40 pumpkins in there (by my seven year old daugter's count, anyway).
This is how it looked the next morning:
*sigh*
This was a very early first frost for us - we usually have until at least October 1st here in Northern Wisconsin, but no such luck this year. I harvested all of the ripe pumpkins on Wednesday after I saw the forecast, and also picked all of the tomatoes, etc.
Thursday morning I went out and started harvesting the green pumpkins, figuring I could cook them up for pies and pancakes and such before they got bad.
I grabbed the biggest one I saw - which turned out to be around 30 lbs! It was fun cutting that up, let me tell you! And the "guts" easily filled up the biggest kitchen bowl I have.
I cut it in half and put each half on the biggest pans I have (and it was still too big to fit in my oven - I had to cut one half in to smaller chunks). It took an hour and a half to roast (at 350 degrees, in case you were wondering).
When it was finally done, I roughly pureed it in my Kitchen Aid (with the paddle) (a food processor would also work great for this, but I don't like putting hot food in plastic, and haven't found any food processors with glass or stainless steel bowls).
I checked in my Ball Blue Book for how to pressure can pumpkin puree - but it wasn't listed. So I looked online, and found that you're not supposed to can pumpkin puree (you can, however, process cubed pumpkin) So I simply filled up some wide-mouth pint jars and froze it instead.
Now I just have to remember to get some out to thaw when I want to make Pumpkin Pie Bars!
That's 8 plants in a 4x8 raised bed - grown to take over roughly 40 feet square of lawn. This is why pumpkins aren't allowed in my regular garden! There were about 40 pumpkins in there (by my seven year old daugter's count, anyway).
This is how it looked the next morning:
*sigh*
This was a very early first frost for us - we usually have until at least October 1st here in Northern Wisconsin, but no such luck this year. I harvested all of the ripe pumpkins on Wednesday after I saw the forecast, and also picked all of the tomatoes, etc.
Thursday morning I went out and started harvesting the green pumpkins, figuring I could cook them up for pies and pancakes and such before they got bad.
I grabbed the biggest one I saw - which turned out to be around 30 lbs! It was fun cutting that up, let me tell you! And the "guts" easily filled up the biggest kitchen bowl I have.
I just love how it makes my 7-quart crock pot look small!
When it was finally done, I roughly pureed it in my Kitchen Aid (with the paddle) (a food processor would also work great for this, but I don't like putting hot food in plastic, and haven't found any food processors with glass or stainless steel bowls).
I checked in my Ball Blue Book for how to pressure can pumpkin puree - but it wasn't listed. So I looked online, and found that you're not supposed to can pumpkin puree (you can, however, process cubed pumpkin) So I simply filled up some wide-mouth pint jars and froze it instead.
Now I just have to remember to get some out to thaw when I want to make Pumpkin Pie Bars!
100% Whole Wheat Sourdough Bread - Update
1) The starter works better if your 1:1 ratio is by weight, not volume, which means when I feed it 1 cup of flour in the morning, I need to add about 2/3 cup of water.
2) When I make my starter this way, I don't need to add water at all to the bread recipe.
3) The bread rises slightly better when you add less salt.
4) It also tastes much better (read: the kids actully like it, rather than just suffering through it) when I add a little honey.
So, without further ado, here's my revised recipe:
100% Whole Wheat Sourdough Bread
2 cups whole wheat flour (freshly ground is best)
1 tsp salt (sea salt is best)
1/4 cup honey (can be omitted)
1/4 cup olive oil (can be omitted - lard also works well)
2 cups sourdough culture*
Mix all together and knead well (I use my Kitchen Aid
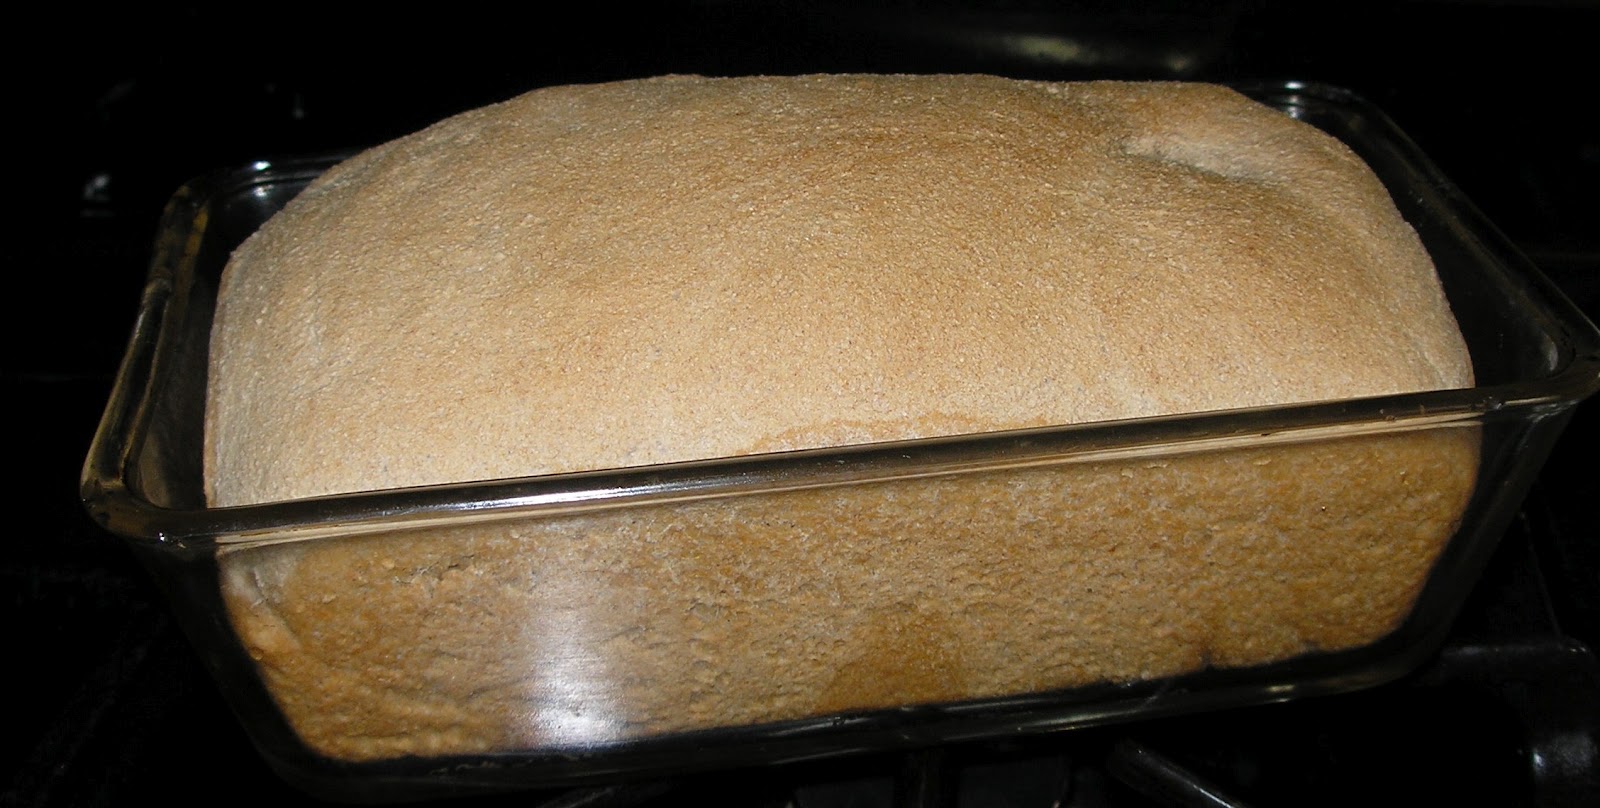
Place in a greased loaf pan and let rise until doubled (this will take a while - anywhere from 4-12 hours, depending on your culture and your room temperature (it usually takes closer to 4 in my house). You can also put this in the refrigerator (covered) to slow it down (if you'd like to go to bed and finish in the morning!) but make sure it's at room temperature and fully risen before you bake it.
When fully proofed (risen), bake at 375 degrees for about 45 minutes (it will be lightly brown; if you stick a meat thermometer into it, it should read at least 200 degrees)
My kids prefer a softer crust, so I cover the bread after it comes out of the oven until it's cooled. If you prefer a crisp crust, tip it out of the pan onto a rack and let it cool that way.
This bread is a great "keeper." It will last at room temperature for almost a week.
*As I mentioned, I feed my starter 1 cup flour and 2/3 cup water at each feeding. I feed once in the morning, bake with it at noon, and feed it again after I take some out to bake with. If I want to build it up for a larger baking, I'll also feed it the night before I bake, or double the quantities at each feeding.
I've also found that you can put your starter in the fridge for a few days (if you're gone for the weekend, or just don't want to bake as often). Just get it out at least four hours before you want to bake (so it can "wake up" and get back to room temperature) and feed as usual.
This post is part of Real Food Wednesday.
Wednesday, September 14, 2011
Use That Aloe Plant!
I made the mistake once of reading the ingredients on the back of the bottle of aloe vera I'd bought at Target. I was shocked to see it listed about a dozen unpronouncable chemicals! That bottle went immediately in the trash, and the next time I went shopping I bought myself an aloe vera plant.
Aloe plants can be found at almost any store that sells houseplants (you can even buy one on Amazon
But how to make that plant into something you can use to soothe your sunburn?
I initially tried to just cut off a leaf and squeeze out the gel. What I got was a goopy, slimy mess. Yuck! So I gave up on it for a while. Then, spurred on by too much sun on a beautiful weekend in July, I did a little more research.
The easiest way I found to use aloe is to cut off a nice, thick leaf and put it in the freezer. When it's fully frozen, I cut it into chunks and store it in a glass jar back in my freezer.
When I need it, I use a paring knife
And that's all there is to it! Easy, once you know the trick (and boy am I glad I found that trick!)
This post is part of Simple Lives Thursday at GNOWFGLINS.
Friday, September 9, 2011
Peppermint Power!
In June I planted three little 4-inch peppermint plants, hoping to be able to harvest a bit for soothing teas this winter:
It's September now, and I think I'll have enough for this winter's tea, and for Christmas gifts for all of my friends and relatives (and casual acquaintances, and confused passers-by . . .)
I just can't believe how much these three little plants grew! They are covered in purple flowers (which the bees don't seem to like - although the flies certainly do.) I had read that they are extremely invasive, so I made sure to plant them in their own little bed where they can't "escape" and crowd out other plants. Boy am I glad I did!
This post is part of Simple Lives Thursday.
Subscribe to:
Posts (Atom)