Showing posts with label Bread. Show all posts

Monday, November 23, 2015

24 Hour 100% Whole Wheat Sourdough Bread

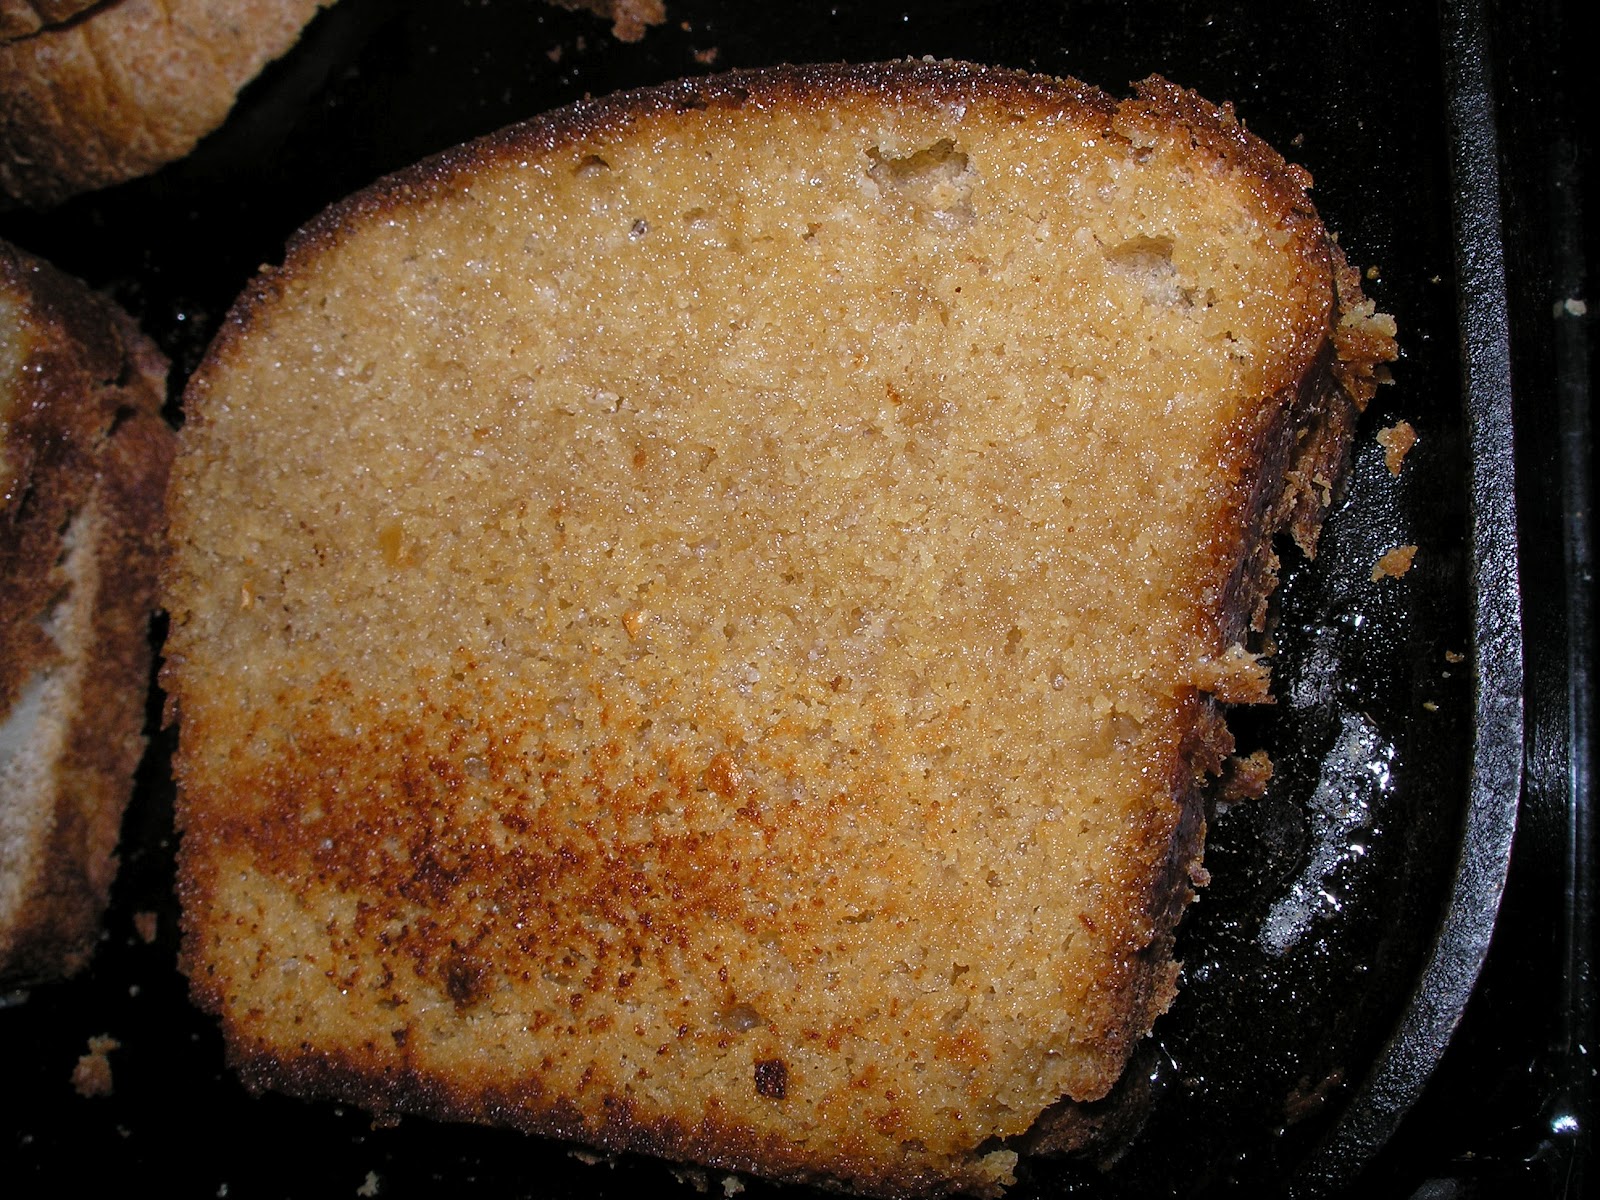
In general, when you're talking about whole grain sourdough, the longer the soak, the easier it is to digest, and the more of the whole grain's nutrition you will get out of it. I finally figured out a recipe that combines nutrition-packed whole wheat with only natural sourdough leavening, for a full 24 hours. It has quickly become our family's "daily bread" - we use it for everything from peanut butter and jelly sandwiches to grilled cheese, garlic bread, and turkey melts (and if there's any leftovers, Pumpkin Pie French Toast Bake like we had this morning!)
24 Hour Sourdough Bread
Mix together for your sponge:
.6 oz starter (I have a rye starter)
5 oz water
8 oz flour (I use fresh-ground whole wheat)

In a separate bowl, mix together:
12.2 oz water
12.7 oz flour (again, wheat flour I grind myself, but store-bought probably works fine, too)
.4 oz salt
Let sit on the counter, covered, for 16 hours.
After they've rested, mix the contents of the two bowls together and place into a bread pan. Let rise, covered, another 6-8 more hours (depending on your room temperature; it might rise more quickly in the summer when the room is warmer). Bake at 375 degrees for 45 minutes. Let cool at least half an hour before slicing.

I'd like to thank the folks over at The Fresh Loaf, where I found great information when I was working on this recipe!

Pumpkin Pie French Toast Bake

As it is the time of year for all things pumpkin, I decided to try combining two of our fall favorites into one pan of warm, yummy comfort food.

Pumpkin Pie French Toast Bake
Line a 9x13 pan with crumbled bread (dry or fresh is fine)
Mix together:
3 cups pureed cooked pumpkin (or squash)
1 cup milk
1 cup maple syrup (or sweetener of choice)
6 eggs
1 tsp cinnamon
1/2 tsp each ginger, nutmeg, and vanilla
1/4 tsp cloves
1/4 tsp salt
Pour over bread and refrigerate overnight. In the morning, bake at 350 degrees for one hour.

This post is part of Thank Goodness It's Monday at Nourishing Joy.

Sunday, November 15, 2015

Making Sprouted Wheat Bread Without a Grain Mill or Dehydrator (Wet Sprout Bread)

A friend asked me the other day if it was possible to make sprouted bread if you didn't have a dehydrator or a grain mill. I honestly didn't know - I'd tried a recipe for Ezekiel Bread once that used wet sprouts, and it turned out a heavy, crunchy mess, so I hadn't tried again. But my friend's question got me thinking . . .
This time I wanted to start out with a tried-and-true recipe (my 100% Sprouted Whole Wheat Flour Light and Fluffy Sandwich Bread) and tweak it to see if I could make it work with wet sprouts.
First, I needed to make the sprouts. I weighed the amount of flour called for in the original recipe, then measured out the same weight of unsprouted grain. It came out to about 2 1/2 cups of grain weighed the same as 3 cups of flour. Then I mixed the dry grain with the 1 1/2 cup of water called for in the recipe and let this sit in a bowl, covered, overnight.
The next morning, the grains were sprouted nicely - you can see the tiny root "tails" in the picture.
The first time I tried this, I just ran the sprouts through my meat grinder attachment for my Kitchen 
Aid mixer without adding anything, but it made my machine bog down worrisomely. So I tried it again, this time mixing the oil called for in the recipe into the sprouts, and that made the process go more smoothly.
NOTE: The second time I made this recipe, I stripped out the gears on the top of my mixer. I can still mix things in the bowl, but now I can't use the tools that attach to the front. One expensive lesson learned.
Instead of my now-useless meat grinder attachment, I use my food processor, which works just fine.
After mixing in all of the ingredients and mixing the dough until it formed a rough ball, I placed it in a bread pan to rise. After an hour, I pressed it out into about a 10x15 rectangle (I used my Pampered Chef Baker's Roller, but a regular old rolling pin should work, too), rolled it up jelly-roll style, and put it back into the loaf pan to rise a second time.
After another hour, it had risen a little (not nearly as much as the loaves I make with sprouted flour), but I popped it in the oven and hoped for the best.
When the finished bread came out of the oven, it was not very tall (although it had gotten some oven spring), but it smelled heavenly. Once it had cooled for about an hour, we cut into it and the kids and I all tried some (slathered in butter, of course).
Every single one of the kids exclaimed about how good it was! It was slightly sweet from the sprouting, a tiny bit crunchy because of the coarse grind from the meat grinder, and it had all of the flavor of a hearty whole wheat bread. That first loaf disappeared in minutes, and the kids were begging me to make another!
I should mention that this wouldn't work well for a sandwich loaf - it's quite crumbly. But it's a great snack or go-along bread (my kids love it warm out of the toaster with breakfast).

Simple Wet Sprouted Bread
1 cup water
2 1/2 cups wheat berries
3 Tbsp oil of choice (I usually use butter or lard)
3 Tbsp sweetener of choice (I like honey or maple syrup, but sugar works fine, too)
1 1/2 tsp salt
2 1/4 tsp yeast
Soak grain in water overnight. In the morning, mix in oil and run through meat grinder twice. Add all other ingredients and knead until dough forms a ball. Let rise one hour, then press into a 10x15 rectangle, roll up jelly-roll style, and place in loaf pan. Let rise another hour, then bake at 375 degrees F for 45 minutes. Let cool for one hour before slicing.

Monday, September 21, 2015

Homemade Sprouted Whole-Grain Flour


A few weeks ago I was teaching a sourdough baking class in my home, and I mentioned that for recipes where using sourdough or soaking your flour wouldn't work, I generally used sprouted flour. One of the students was not familiar with sprouted flour, so I gave her a very quick and basic tutorial on how to make it. Afterwards, I looked online to see how much it would cost to buy sprouted flour rather than make it, and I was shocked to find that most of what I could find was over $3 a pound! I quickly compared that to what it costs to make it at home. I buy non-GMO wheat berries for less than $1 a pound at my local bulk food store (I think I've also seen this brand for sale at Wal-Mart), and the only costs over and above that would be for the electricity to run the well pump, dehydrator, and grain mill. Definitely much cheaper (and fresher) than anything I could buy!

I do want to note that I use a dehydrator and a grain mill when I make mine, but it is also possible to make sprouted flour using your oven and a good-quality blender. There is more risk of over-cooking the grains (or even burning them) in the oven, but if you're careful, this shouldn't be a problem. A blender may not grind all of your grains perfectly evenly, and you can only do very small batches, but it does work in a pinch. So don't let a lack of equipment stop you from trying.

The first thing you need is whole grains - wheat "berries", rye, spelt, oats - pretty much any seed you'd make flour with will germinate this way (this is also a good preparation method for beans; just cook them after they've sprouted and skip the dehydration and grinding steps). I do want to note that this doesn't work well for flax - the grains make a slimy coating when they're soaked, and they should never be run through a grain mill because of their high oil content. It also won't work with oatmeal, because once the seeds are rolled they can no longer germinate.

The way I like to do it is to fill a wide-mouth quart jar with about a cup of grain (size of the jar doesn't really matter - just big enough for the amount you're working with, and able to be covered for the draining step), then cover the seeds with about an inch of water (the grains will swell as they soak. If the grains get above the water during the soaking stage, just add more water). Warmer water will help the process along. Hot tap water is fine - just not too hot, you don't want to cook the grains (but your tap water shouldn't be that hot anyway!) Set them on the counter to soak for 8-12 hours.
When that 8-12 hours is up, cover the jars with a piece of loose-weave cloth and a rubber band (or one of my custom-made sprouting cloths with elastic edging, which unfortunately I don't yet have a picture of! Hopefully I'll be able to update that soon!) and invert to drain the water. Let drain upside down another 8-12 hours.
By the end of this draining time, the seeds should be showing tiny "tails" (really roots starting to emerge). This is the stage you want to put them in the dehydrator - if you let them get too long, they won't flow through your grain mill as well.

As a side note, the sprouting water than you drain off is great for plants, and some people even drink it as a health tonic (I'm not one of those people - I give it to the plants). I use a funnel and store it in an old gallon milk jug, then use it to water my houseplants.

I like to dry my sprouts at about 105 degrees F in my Excalibur dehydrator (I love that it has adjustable temperature settings), to preserve as many nutrients as possible, but if you're dehydrating in an oven, just use the lowest temperature you can (you will be baking these grains, after all, so don't stress too much about the temperature here - but you don't want to bake them before you put them in the final product, either). I leave them in the dehydrator for around 4-6 hours, or until a seed from the dehydrator "crunches" the same in my teeth as a seed fresh out of the bag (very scientific, I know!)

When the seeds are properly dried, you can then either store them whole in the refrigerator, or grind them and then store them. I prefer to store them in the refrigerator because the oils in whole grains can go rancid quite quickly (another reason to grind your own flour and never buy unsprouted/non-sourdough whole grain products from a store!) I love sprouted flour for baking - I can use it just like I would any store-bought flour, and it actually gives a lighter, fluffier texture than unsprouted whole grain flours. I use it mainly for cookies, quick breads, and such, but sprouted wheat bread is also a favorite treat (when I don't have time to wait for sourdough but I have sprouted flour on hand).

Sunday, April 12, 2015

Easy French Bread

I don't know why I've put off making French bread for so long - I guess I'm just too much of a whole-grain purist, and you just can't make a good loaf of French bread with whole grains (at least I assume so - I guess I haven't tried it yet!) But I found myself buying frozen garlic bread one too many times in the grocery store and feeling horribly guilty for all of the nasty chemicals I was feeding my children. So I finally gave in and pulled out my trusty old Better Homes and Gardens New Cook Book and looked up French Bread.

The ingredient list was simple - flour, yeast, salt, and water (with an eggwash for that classic crust - I'm sure you could skip that if you needed to go egg-free). So I pulled out my organic white flour and went to work. I made one recipe by the book, and a second right away skipping some of the more complicated steps. They both turned out about the same, so here's my "cheater" easy version:

Easy French Bread
makes 2 loaves
5 cups flour
1 1/2 Tbsp yeast
1 1/2 tsp salt
2 cups warm water
Mix all together (in a mixer or by hand) and knead until smooth and elastic. Let rise for about an hour (I use my seedling grow mat, and it rises like a dream!) After dough has risen, roll out into a 15x10 inch rectangle and roll up, starting from a long side:
Place seam-side down on a baking sheet, cover with a towel, and let rise for another 45 minutes. Then, using a sharp knife, slice each loaf 4 or 5 times diagonally across the top. For an extra-crispy crust, make an egg wash (use a fork to beat one egg (I use a whole egg; many recipes call for just the white, but I don't bother separating it - this is my "cheater" recipe, remember) and brush across the top of each loaf. I like to use a silicone barbecue brush):
Bake in a preheated 365 degree oven for 40-45 minutes, or until bread sounds hollow when you tap the top with your finger. Immediately move to a wire rack to cool.
To make garlic bread, slice lengthwise and brush with garlic butter (crush garlic and mix with melted butter - I use about two cloves per 1/2 stick of butter). Bake about 10 minutes at 400 degrees, or until edges begin to brown.


The links above are affiliate links. If you make a purchase after clicking I will receive a small commission, but your price remains the same. Thank you for your support!

Saturday, March 23, 2013

Rye/Wheat vs. Rye/White Bread Bake-off

After learning how much more phytase (which of course neutralizes the mineral-binding phytate) rye flour has than wheat, and reading how the healthy remote Swiss studied by Weston Price lived on mainly rye bread and dairy products, I've been trying to use more rye flour in my bread making. Unfortunately, using 100% rye flour makes for a very dense loaf (especially with my sourdough recipe), so I've been mixing rye flour and white all-purpose flour in my bread lately, thinking whole wheat would still be too heavy. On a whim, I decided to try a side-by-side comparison of a half whole wheat/half rye loaf of pumpkin sourdough bread, and another using the same recipe, but with half white flour and half rye. Here were the results:
The loaf on the left is the one with white flour, and as you can see it did rise a little bit more (which caused it to crack around the bottom). I had flattened it a bit more when I put it on the pan, so it's a bit wider, but pretty much as tall, as the whole wheat loaf on the right. All in all, though, the difference is too small to convince me the loss of nutrition is worth it, so I think I'll be using the whole wheat rather than the white flour.

Monday, October 15, 2012

Pumpkin Sourdough Bread

Now that the garden is done (phew! is anyone else completely exhausted for the entire month of September?) I've had more time to play around in the kitchen. We are blissfully overrun with pumpkins from our garden this year, so I was browsing the internet for a sourdough pumpkin sweet bread. I didn't have any luck (if you know of a good one, please let me know!) but it did get me thinking, and just for kicks I decided to try swapping out pumpkin for the potato in my potato sourdough bread recipe.

It worked beautifully - it's not anything like the pumpkin bread you see at bake sales; it's really more like a slightly orange sandwich loaf. You can barely taste the pumpkin. But it rises beautifully and tastes delicious (as you can see, more than half of it was gone before I got a chance to take a picture!)
I am going to continue trying to find a sourdough pumpkin sweet bread, but for now we're really enjoying this recipe (especially smothered with pumpkin spice honey butter. Mmmm . . .)

Friday, July 20, 2012

Whole Wheat Sourdough Potato Bread

As you've probably noticed, I like playing around with sourdough bread recipes. While I love my Super Simple Sourdough Bread, it tends to be a little too sour for my kids' taste, and a little dense for my husband's. So I've reverted back to an old favorite, sourdough potato bread. It's not quite as simple, and a little less healthy, but it doesn't taste so sour and rises beautifully (sometimes too much! I just had a loaf overflow onto the bottom of the oven because I left the dough a little too wet). It's a great sandwich loaf for the whole family.

Whole Wheat Sourdough Potato Bread
Sponge:
1/2 cup sourdough starter
3/4 cup water
1 cup freshly ground whole wheat flour (NOT sprouted!)
1/2 cup plain mashed potatoes (no butter or salt)

Mix these ingredients together in a large bowl, cover loosely, and let rise overnight. This will rise a LOT so make sure your bowl is at least twice as big as your sponge.

In the morning, stir down the sponge and add:
1/3 cup warm water
1 tsp salt
1/4 cup oil, lard, melted butter, or liquid coconut oil
2 Tbsp honey
3 cups whole wheat flour (NOT sprouted!)

Mix all well (I do this in my Kitchen Aid mixer). Add more flour if needed to prevent stickiness. Dough should be soft and firm yet pliable. Cover and let rise until doubled, about 2 hours.

Punch down and place into loaf pan; cover loosely and let rise again.

Bake in a preheated oven at 375 degrees for 45 minutes. Remove from pan and cool on a wire rack. If you prefer a softer crust, cover until completely cooled.

Thursday, March 22, 2012

Whole Wheat Sourdough Raisin (or Craisin) Bread

For a special treat, I'll serve this with breakfast (to rave reviews from the kiddos). Toasted and spread with some fresh butter, it sets a sweet tone for the rest of the day.

For the record, I always make this with dried cranberries (craisins) instead of raisins; I just like them better!

Whole Wheat Sourdough Raisin (Craisin) Bread
2 cups whole wheat flour (not sprouted! Read why not here)
1 tsp salt
1/4 cup melted butter or lard
1/4 cup honey
2 cups sourdough starter
Mix until dough forms a ball (I use my trusty Kitchen Aid stand mixer). Add about a half cup of raisins and/or dried cranberries and mix until well incorporated. Place in your greased bread pan and let rise until doubled (about 4 hours). Bake at 375 degrees for 45 minutes.

I don't use cinnamon in this recipe because cinnamon is slightly anti-biotic, and inhibits the natural yeasts from making it rise properly.

This post is part of Fight Back Friday and Make Your Own! Monday.

Wednesday, March 14, 2012

Immune-Boosting Comfort Food (or, Garlic Bread Grilled Cheese Sandwiches)

I don't know why I never thought of it before. We were recovering from a bout of the flu and were in serious hang-out-and-snuggle mode, so I decided to make some good ol' grilled cheese sandwiches with tomato soup for lunch. As I was slicing the bread (Super Simple Whole Wheat Sourdough, of course!), I noticed some garlic butter left over from an earlier meal sitting on the counter, and thought, hey, garlic is great for your immune system! And yummy!

And boy were they! I think I might make them this way all the time!

This post is part of Simple Lives Thursday.

Wednesday, December 14, 2011

Sourdough Stollen

Being of nearly 100% German descent, this recipe is a must-make for Christmas. I tweaked the original recipe to make it sourdough, but it tastes basically the same. We like to have it for breakfast (smothered in butter, of course!) as often as we can during the Christmas season.
Sourdough Stollen
3/4 cup dried fruit (candied lemon peel, raisins, dried cranberries, dried cherries, etc.)
1/2 cup brandy or water
Soak together at least 15 minutes.
In a separate bowl, mix together:
2 cups flour
1 tsp salt
1/4 cup olive oil
1/4 cup honey
2 cups sourdough starter
Add fruit and mix well. Shape into loaves,* then let rise at least 4 hours. Brush with egg wash (1 egg, beaten, mixed with 1 tsp water) and bake at 350 degrees for 45 minutes.

*For braided stollen, cut into two loaves. Cut each loaf into three equal sections. Roll each section into a short rope about 1 1/2 to 2 inches in diameter and about 9 inches long. Lay these three side by side, pinch together at one end, and gently braid, loosely, just a few crossings. Pinch together the end pieces and shape with hands to make a nice oval shape.