Friday, March 29, 2019

Pudgie Pie "Recipes"

pudgie pie hobo pie recipes
In my previous post, I mentioned that while we're boiling down the sap to make maple syrup we like to use the fire to make pudgie pies, too. My friend Carla asked me to share my pudgie pie recipe - which made me laugh, since we don't really use a recipe; we simply think, "Would this be good toasted between two pieces of bread?" and if the answer is yes, we try it!

What is a pudgie pie, you ask? It's also sometimes called a Hobo Pie, and it's basically a sandwich toasted over a campfire using a special iron (click here or see the link below). I recommend using the cast iron version rather than the aluminum kind (I don't use aluminum for food preparation in general, and I also feel that the cast iron heats more evenly).

To make a pudgie pie, you butter two pieces of bread and place them into the iron - butter side out, touching the cooker. Then you fill the sandwich with your filling of choice - either sweet or savory - close the cooker, and set it into your campfire to cook (a nice hot bed of coals works best). It's done when you say it's done - a light golden brown or almost black, everyone has their own personal preference, just like roasting a marshmallow or making toast. As long as your ingredients are pre-cooked, it doesn't really matter.

Our favorite savory pudgie pies are hot ham and cheese. Think paninis - it's basically the same idea. My husband likes to make his with turkey, cheese, avocado slices, and crushed garlic (he really likes his garlic!) Another favorite is Pizza Pudgies - pizza sauce and mozzarella, with your choice of fillings: pepperoni, mushroom, black olive, green pepper, etc.

But of course the best pudgie pies are the dessert pies. Growing up, we always had pudgies with canned pie filling (cherry is my favorite!) It wasn't until I was married that I tried other options, like PBJ (if you haven't had melted peanut butter and jelly, you haven't lived!), peanut butter and chocolate (think a melted peanut butter cup), or my all-time personal favorite: dark chocolate covered cherry.

The possibilities are endless, and kids love the chance to make their own special sandwich, just for them. When cooking with kids, however, be careful; the irons get very hot! It's helpful to have a heat-proof table nearby to set your irons on when filling and emptying them (plastic folding tables are NOT good for this - mine now has a permanent pudgie pie iron mark melted into the top!)

To serve your pie, simply pull the handles apart so that the pie is on one side and the other is empty, then flip it out onto a plate. If you added enough butter at the beginning, it should fall out easily. This part can be tricky for kids with shorter arms, so it's best for adults to work with the hot irons after they've been taken out of the fire.

So as you can see, pudgie pies can be a super simple, family-friendly meal, or just a special treat around the campfire. They've always been a camping tradition in our family, and I have a feeling it's one my kids will be passing on to their children someday, too.

How about you? What are your favorite pudgie pie "recipes"?


Please note - the links above are affiliate links. If you make a purchase after clicking I will receive a small commission, but your price remains the same. Thank you for your support!

How Much Can You Get From a Batch of Home-Made Maple Syrup?

backyard maple syrup tips
I think I found the perfect job! For one month of the year, I get to sit around and poke sticks into a campfire every other afternoon. At the end of the month, I'll have (hopefully) a few gallons of maple syrup to show for all my "hard work". Sweet reward for something most of us do for relaxation! Of course, as my husband likes to point out, my per hour monetary compensation isn't even up to minimum wage (one pint of syrup goes for around $6 in our neck of the woods, and that's what I usually get for a four-hour stint at the campfire boiling down a five gallon bucket of sap), but since I don't really consider it working, I don't really care!

But my syrup output isn't the only reward for my "labor". I'm also counting this against a hypothetical gym membership, since I got plenty of exercise last fall gathering fallen sticks from the woods (squats, stretches, knee bends! And resistance walking pulling the sled full of sticks down to the garden!)

That's not all - I also decided that I'd burn the wood over a future garden bed. This will not only kill some grass (saving money on mulch!) but will also add wood ash and biochar, improving the nutrient profile in that garden bed, which will hopefully result in higher yields of more nutrient-dense vegetables this summer - saving money on fertilizer, food costs, and health care!

One more thing - just for fun, we made pudgie pies for supper over the fire (would that count for saving propane because I didn't cook in the house, or as a recreational expense, because we didn't have to rent a campsite?)

So even though my fiscal bottom line may not be up to the government's minimum wage, in my mind the time spent was well worth it. And home-made maple syrup really is a sweet reward!

(You can read more about my maple syrup adventures here, here, and here.)

Thursday, March 21, 2019

Signs of spring

spring signs
According to the calendar, it's officially spring! Around here, there's still about a foot of snow on the ground, but it's melting fast, with temps getting up into the 40s during the day. So we can't get in the garden just yet, but there are other signs that winter is on the wane.

One of the first signs is that the hens' egg production is picking up. Last month I'd feel lucky if we got 7 eggs in a day, this week we've gotten 11 eggs twice. The hens are also showing signs that they might be feeling like going broody (which would be awesome! In all my years of chicken raising, I have yet to have a hen hatch out chicks).

Another sign, which is good for the chickens but not so exciting for the rest of us, is that the insects are back, particularly the flies. While this is an annoyance for us, it's a sign that the natural food sources for the chickens are coming back (which means a major reduction in feed costs!)

A new sign in our yard this year is the blue bags hanging in the woods - we're trying our hand at making maple syrup this year. We tapped 10 of the maples on our property, with very mixed results. One tree is giving us about a quart of sap a day, while we're barely getting a dribble from the others. I'm not sure what's going on there (more research!), but I'm thinking now that the snow is dwindling and we can actually get to more of our trees, I might tap 7 more on our northern property line.

My least favorite sign that it's spring is that the whole family cought a chest cold. It's mostly just annoying (I was the only one who was really laid out by it; the rest are just dealing with a nagging cough and never-ending sniffles), but it seems like whenever there's a major turn in the weather in the spring and fall our bodies succumb to some kind of virus to transition to our summer or winter metabolism.

But on the bright side, despite the snow, it's warm enough to hang out our sheets on the clothesline, so the sunshine and fresh air can clear away the feverish residue and leave them smelling fresh and clean. That's definitely one of my favorite things about spring!

How about you? What are sure signs of spring around your neck of the woods?

Sunday, March 10, 2019

Feed Pan Update: Found It!

I know, you were all holding your breath, wondering what would happen to my feed pan, hopelessly lost somewhere in the garden under three feet of snow.
But hope was not lost - my husband was scrolling through pictures on my phone and found a one from before the snow, and I saw that the pan should be just past where I had already dug. So, armed with new information, I set out to vanquish the powdery foe and rescue the feed pan in distress.
And I did. It was only a foot or two east of where I'd previously dug, so it didn't take too long to find.
There's such a satisfaction in checking off all of your boxes, no matter how inconsequential the list, don't you think?

Thursday, March 7, 2019

It May Look Pointless, But I Have My Reasons

backyard chickens cabin fever
Cabin fever makes you do strange things. Today, I shoveled a ten feet square patch of three feet deep snow off of my garden (that's 300 cubic feet of snow! Go me!) I didn't even get down to the leaf mulch layer, but I did make a level area that the chickens can stand on. 

Why, you ask, would I shovel off a section of the garden when there's no chance of growing any vegetables any time soon? I have my reasons:

Reason 1:
The kids and I had just finished reading through our lesson on Napoleon's campaign into Moscow when we heard a crazy cackling right outside the kitchen wall. When we looked out the door, we saw Buxtehude, one of my daughter's guinea hens, sitting in the only patch of grass in the whole yard - right in front of the dryer vent. The other guinea and the majority of the chicken flock were exploring the trails around the yard (my son had run the snowblower around the lawn to make paths for his airsoft wars). The poultry clearly needed somewhere to congregate that wouldn't be in everyone's way (and likely get them shot!)

Reason 2:
I always save our kitchen scraps for the hens, but the only spot other than the paths where I could put them out was right in front of the coop. This means that the hens all hang out in that one spot, leaving their messy (but fertile!) manure there. It would be much better to have that manure, and the compost from any of the scraps they didn't eat, in the garden.

Reason 3:
I need exercise. Cabin fever is definitely setting in. Plus it's a beautiful sunny day, and the thermometer reads 22 degrees (heat wave!), so I need to get outside (instead of staying in and munching on another bag of trail mix . . .)

Reason 4:
Remember that feed pan I mentioned in my seed starting post? It's still out there in the garden somewhere - I should really try to find that . . .

So I grabbed my shovel and went to work. I got my heart rate up, I made a space for the chickens to congregate to eat the kitchen scraps (and fertilize the garden while they're at it) - but I didn't find the pan (oh well; ya win some, ya lose some). It really wasn't something that desperately needed doing, but it was a good excuse to get outside and get some exercise on a sunny day!

And look how happy my chickens are:


Wednesday, March 6, 2019

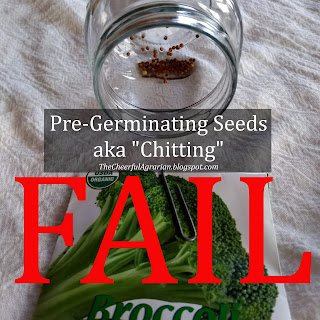
Pre-germinating ("chitting") Your Seeds - Attempt 1 - FAIL!

pregerminating chitting seed starting
I was all set to write this post about how I pre-germinated my seeds before I put them into my soil blocks, and how easy it all was. It was going to be great! It was going to be inspirational! It . . . didn't work.

I read about pre-germinating (aka "chitting" your seeds) a few years ago, and have since been chitting my peas before I sow them in the garden. It works great. The idea is that you soak the seeds in warm water overnight to get them to break dormancy, then once they're committed to growing (they can't go back into full dormancy once they've sprouted) you sow them into your garden bed outside. This way you can start your peas a week or so earlier than they would normally sprout outdoors. With peas this works great - they sprout in about 12 hours and you're ready to go.

Another reason to chit your seeds is that you're also doing a germination test at the same time. When you're starting plants indoors, you don't have as much space as you would outside, so you only want to plant seed that you know will grow. When you pre-sprout your seeds, you know which ones will grow and which ones are duds.

For some reason this didn't work for the broccoli, brussels sprout, and parsley seeds I tried to germinate this week. My house is pretty cold, but I had them on a heat mat, so that probably wasn't the problem. The brussels sprout seed was a few years old, so that might have been an issue, but the broccoli and parsley seeds I bought less than a week ago, so they should have been fine. So my best guess is that either 1) I soaked them too long (I think it was over 24 hours; you're only supposed to soak them for around 8, but I got busy and forgot about them) or 2) I let them dry out too much between rinses. I'm thinking the second was my problem, because it looked like some of the broccoli seeds might have started to germinate but then never sent out a root.

I sprout wheat seeds all the time for my sprouted whole wheat flour, so I'm not new to seed sprouting, but I usually do about two cups of seeds at a time. There were much fewer seeds in this experiment (20 broccoli and just 5 parsley), so my guess is that there just weren't enough seeds to stay damp and so they dried out.

Another issue may be germination time - parsley is in the carrot family, and carrots take up to two weeks to germinate. So it was questionable if this method would have worked at all for them.

I will try this again; probably for my May 1st round of seeds. Hopefully I've leared a bit from this failure so I'll be able to post a happier report at that time.

I want to mention that I first read about this method in Steve Solomon's Gardening When It Counts. It's a great resource, and I highly recommend it, especially if you'd like a more comprehensive explanation of this method (I think he only recommends it with the larger seeds like peas and beans, though. That's what I get for trying to be a smarty-pants and do my own thing!)

Have you ever pre-sprouted your seeds? What do you think I did wrong?


Please note - the links above are affiliate links. If you make a purchase after clicking I will receive a small commission, but your price remains the same. Thank you for your support!

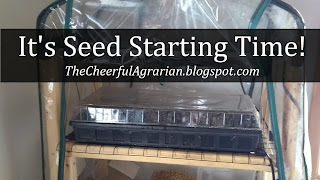
Seed Starting Time!

seed starting gardening
As you may have noticed if you read my 2019 Seed Starting Plan post, this post is about 6 days overdue. The main reason for that is that I was experimenting with pre-germinating seeds (which ended up being a bust - more on that in another upcoming post. I'm considering having a "Friday Fail" series, telling about all of the things I've tried that didn't work out - kind of a "learn from my mistakes so you don't have to make your own" sort of thing. Isn't there a Thomas Edison quote about finding 10,000 things that didn't work? Yeah, something like that . . . I didn't screw up, I made progress!!!)

Anyway, this morning I finally decided to give up on that experiment and just plant like I have in the past. This was liberating - I could just go ahead and do it, no more waiting! I actually got up early this morning so I could get started (that's how excited I am - some people get up early for Black Friday, I get up early for Seed Starting Day!) The first thing I did was get out my mixing pan (I bit the bullet and shelled out $10 for a new one this year - I used my old one for feeding the chickens, and now it's in the garden buried under three feet of snow. It was either shell out the $10 or dig around until I found it. I chose the cash. Three feet of snow is heavy!) I used an old plastic one-gallon pitcher to measure out the soil, then added half that much water and mixed it in. I find this 2:1 ratio works just perfectly to prepare the soil for using my soil blocker. I have to say, I love this tool! I first read about it in Eliot Coleman's New Organic Grower, and have been wanting one ever since. I finally bought one last year, and have been kicking myself for not doing it sooner. I can control what's in my seed starting mix; I have better control of the soil moisture level; and I like the little indentation on top that keeps the seeds in place (with the old Jiffy Pellets I often had seeds slipping down the side and growing from the bottom of the peat pot!)

I punched out my soil blocks into a plastic seed starting tray (the kind without holes - that's very important if you don't want water dripping all over the place). It turned out that my tray could fit about 45 soil blocks - about 24 per gallon of soil, so I ended up mixing two batches - which worked just perfectly for the 37 seeds I wanted to start (you can read my 2019 seed starting plan here). After placing my seeds in their little indentations, I put the tray on a seed starting heat mat and covered it with a plastic cover. In a few days, when the seeds sprout, I'll take off the cover and turn on my grow lights.
It's really very easy when you have the right equipment, but don't be intimidated by the cost. Remember, you'll be saving a couple of dollars per plant, so the equipment will pay for itself very quickly. You can also make homemade versions of some of the items, or find them at yard sales or thrift stores (of course if you're in a hurry and it's not yard sale season, you'll have to just bite the bullet and pay the price - like I did on my mixing pan!)