Monday, July 5, 2021

Strawberry 4th of July Cake (Real Food Version)


Ah, Cool Whip! You look so good, but you’re really so bad! Not only are the first three ingredients water, hydrogenated vegetable oil, and corn syrup, but it only has a miniscule amount of skim milk and less than 2% real cream. Originally it included no dairy at all! So you're not only sacrificing the nutrition found in a real dairy product, but it actually has more calories than homemade whipped cream! 

How’s a real food lover to enjoy her family’s favorite summer treats, which almost always include at least a good dollop of Cool Whip, without giving them a good dollop of corn syrup and hydrogenated vegetable oil?

Food bloggers to the rescue! With just a quick search, I found multiple sources who claimed that if you add a bit of gelatin to good ‘ol homemade whipped cream, the gelatin will stabilize it and keep it from turning into a runny white puddle.

So of course I had to try it - and what better recipe to start with than my mom's Strawberry Fourth of July Cake? It already includes Jello mixed with Cool Whip, so it seemed like an obvious choice. 

The original recipe called for a half recipe of yellow cake baked into a 9x13 pan, then covered with a layer of strawberry Jello mixed with frozen strawberries, with a dish of Cool Whip folded in. 

To make it healthier, I made homemade strawberry gelatin with honey and grass-fed beef gelatin powder, added the frozen strawberries, and then folded in the freshly whipped cream when the gelatin was syrupy and cool. I spread this over the cake base, put it in the fridge, and hoped for the best.

It turned out perfectly – even better than Mom's! Thank God for real food bloggers and their ideas and inspiration! J

Fourth of July Strawberry Cake (Real Food Version)

½ cup milk

1 Tbsp butter

1 cup sugar

1 cup flour

1 tsp baking powder

¼ tsp salt

2 eggs

Heat milk and butter, sift together dry ingredients, and mix all together (will be thin). Pour into 9x13 pan, bake at 350 degrees for 20 minutes. 

Topping:

4 cups juice (strawberry juice if you can find it)

2 Tbsp unflavored beef gelatin

2 Tbsp honey

12 oz frozen strawberries

2 cups heavy cream

While the cake base cools, mix the gelatin into about a ½ cup of juice in a small bowl. The granules will clump and the mixture will look like very thick applesauce.

Heat the remaining juice until almost boiling. Remove from heat and stir in the honey and the gelatin mixture. Stir until completely dissolved. Add frozen strawberries and let cool until syrupy (I pureed the strawberries into the gelatin with my stick blender because I like the texture better, but my mom leaves them whole – feel free to do whichever you prefer).

While the gelatin cools, whip heavy cream. When gelatin is ready, fold in whipped cream and spread over cake.  Chill until ready to serve.

My mom often makes this with raspberries, which is also very good (I just don’t like the seeds getting stuck in my teeth, so I stay with strawberry).

If you try this recipe, please let me know in the comments how yours turns out!

Saturday, March 20, 2021

A sure sign of spring - the egg shelf is overflowing onto the kitchen counter! Here's one of the kids' favorite treats to make when we have too many eggs:

Chocolate Custard
2 Tbsp butter
3 cups milk
½ cup sugar
¼ cup flour
¼ cup cocoa powder
5 egg yolks
1 tsp vanilla
Blend together very well (the cocoa can take a bit to stir in; I like to use my stick blender) and cook, stirring constantly, over medium heat until thick. Pour into bowls and serve chilled.


Friday, March 19, 2021

Starting Over - Again

You may have noticed that it's been quiet on the blog for a while. Part of that is because I've been putting more effort into my Ruth's Homemade business (click the link to see what I've been up to over there), but mostly it's because (surprise!) we moved again. Our last move was only three years ago (just enough time to start to get things humming on the homestead). The log house, though beautiful, ended up needing a lot more money invested in it than we had anticipated, and so one June evening we decided we should try to sell it. The very next day, a friend asked if we knew anyone in the area who was selling a home in the in our area with some acreage! One thing led to another, and in a matter of weeks we had a buyer lined up (after explaining very carefully just what they were getting into! We didn't want someone else to end up unprepared like we were).

Unfortunately, the market that made it easy for us to sell made it more challenging when we were looking for something to buy. "In the country with a little land" seemed to be what everyone was looking for in the summer of 2020 (one house we looked at - on the day it came on the market - had three offers (over the asking price) before we looked at it at noon!) But eventually we found a place with some acreage, a few outbuildings (including a chicken coop and garden shed!), and a house that all seven of us (plus our German shepherd and two cats) could fit into.

We hadn't been planning to move; our first really serious thoughts of selling were on that June evening. So in the spring I had planted the garden, bought feeder pigs and meat chickens, and generally did all of my normal spring homestead planning. When we closed on the house mid-August, all of that needed to be either moved or harvested – which meant that in addition to packing, I needed to do all of the canning, freezing, dehydrating, etc. that a normal garden season required. I didn’t get many tomatoes, but I put up all of the carrots, potatoes, cucumbers, beans, onions, and herbs that I could (I am so thankful for my five helpful teenagers! I don't know how I would have done it without them!) We processed the meat chickens the weekend before the move, but we had to move the pigs to the new farm (that ended up being quite the story! We’d never moved pigs before (we’d always put them down on-farm) so although we’d read horror stories of moving pigs, we didn’t really know what we were getting into!)

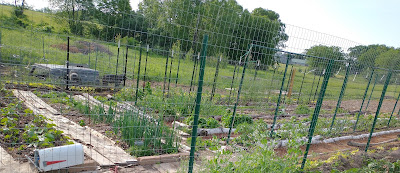
backyard homestead garden

Finally, the closing date came, and whatever we hadn’t harvested had to be left behind. But now we had to put in the perennials we’d dug up to move with us – I had a couple elderberry bushes and an ice cream bucket full of Egyptian walking onions from my brother (the granddaughters of some I’d given him a couple years ago), and my 14 year old daughter had been assiduously tending a few dozen "daughters" from her strawberry plants. So now we had to hurry up and prepare a place for them!

I saved all of the cardboard moving boxes that I could, and a friend had some old, otherwise-useless hay. I used these to cover a 50'x40' patch of grass for a new garden spot. We laid out the basic plan for the new garden beds and put up fencing to keep the chickens out (otherwise they would make a mess of the mulch, not to mention digging my daughter’s strawberries!) By the time the ground froze, we had a good start on the spring garden. We were even able to get in a late planting of spinach!

We spent the winter settling into the house - and of course, planning for spring! We have apple, plum, and pear trees ordered, as well as cherry bushes, blueberries, raspberries, and a mulberry tree. It's hard not to try to replace everything we had built up at our old house right away - we'd like to get our new place producing food as quickly as possible - but we can only afford to do so much.

We're hoping to set up a permaculture food forest, following some of the ideas on Stefan Sobkowiak's YouTube channel (although I still have to sigh every time I realize that even though he's in Canada, he still has a better growing zone than I do!) The east side of the property was planted in field corn when we moved in, leased to a neighboring farmer. He harvested it in November, so now we have almost 5 acres of blank slate to fill up this spring. Only a small part of that will be orchard; we're also hoping to use some of it for pasture and a start to a future woodlot (including maple trees - it broke my heart to sit on the sidelines during maple syrup season this year!) My daughter is planting a corner of the old cornfield into a food plot for the chickens, rabbits, and pigs - and also hoping to keep the local deer population coming around (she put two of them in our freezer using her crossbow this fall!)

And now, ready or not, it's spring - I have eggs in the incubator and trays of seeds coming up under grow lights in the sunroom. My homestead project list is a mile long (which is a good thing - if I wasn't keeping busy with infrastructure work, I'd be planting seeds outside much too early - again!) 

incubator hatching chickens

As much as I hate losing all of the work I put in at the last farm, I'm trying to focus on the excitement of setting up our new place - fresh with no mistakes in it (yet!) I keep reminding myself that each time I start over, I have the chance to make the garden better from the start, with nothing to re-do or fix later. My daughter commented this spring, "This is our best garden ever!" - and it was. It took three years to get it to that point - maybe on this property I'll make it there in two. Sounds like a worthy challenge to me!

Have you ever had to leave a garden behind? What was the first thing you set up on your new place? Comment below and let me know how you made the transition!

Wednesday, April 15, 2020

Making Liquid Hand Soap in a Blender (Just Two Ingredients!)

Liquid hand soap from scratch in a blender
Staying clean and killing germs seems to be on everyone's minds these days, and the number one way to do this is still good old soap. Our great-grandmothers knew how to make their own, and so can we (it's a lot easier now for us than it was for them!) Thanks to blenders, silicone molds, and slow cookers, soap making doesn't have to be an all-day, sweaty job, producing something that could burn your hands. It's a pretty simple process really, and with modern tools and ingredients we can be sure of a safe and effective product.

This is also the best way to know just what's in your soap - if you have chemical sensitivities, or just don't like all of the added colors and scents, making your own is a simple way to know exactly what's going on your family's skin. And if you're into essential oils, you can easily add them to your finished product to give it whatever scent or other properties you desire. I like to add some peppermint eo to mine in the winter, for that candy cane sort of scent (and also because it repels spiders and mice!). In the summer, I use rose geranium eo for its tick-repellant properties (there are a lot of lymes-carrying ticks where we live, and rose geranium is supposed to be one of the most potent natural tick repellants). But feel free to use whatever scents you like (rosemary for better memory? citrus for a cheerier mood?) Or use none at all! You're in total control!

Here's how I make my soap:

You'll need just two ingredients (well, three if you count water), olive oil (NOT extra virgin - for some reason this doesn't work well. You want the cheap stuff, or even pomace grade if you can get it) and lye (for bar soap, you want sodium hydroxide; for the liquid soap we're making here, potassium hydroxide works better).

A word about lye: yes, this stuff is used as drain cleaner. Before saponification (chemically bonding with oil and turning into soap) it is very caustic and can cause chemical burns on skin. In the quantities we're using here, and in the contained environment of the blender, it's usually not overly dangerous, but it's still smart to be cautious, and not to do this around children and pets. If you do spill some on your skin, the best thing to do is to wash it off with soap and water (NOT vinegar). Once your soap is made, there will be no lye left - it will all have turned into soap (that's why all soap recipes should include more oil than lye; that way all of the lye has enough oil available to turn into soap, with a little extra just in case. This is called "superfatting" in the soaping world).

If you're still scared of lye, think of it like this: hydrogen and oxygen are extremely flammable. We all learned in grade school that a fire can't burn without oxygen (that's why candle snuffers work). But if you chemically bond the two, you get water, which we use to put out fires. The properties are completely changed. It's the same with lye in soap. Finished soap won't burn you.

You  also want to make sure that your olive oil is pure olive oil, and not a blend with other oils. Each kind of oil or fat (fat is just oil that is solid at room temperature) has a different ratio for bonding with lye to make soap, so if you have different kinds of oils you need to adjust your recipe to account for this, or you could end up with soap that still contains unbonded lye and can burn your skin.

OK, now that we got all of the safety information out there, I can show you how easy (and safe!) it is to make your own soap.

Here's my recipe:
9.12 oz (258.55g) water
3.04 oz (86.18g) lye (potassium hydroxide)
16 oz (453.59 g) olive oil

It's very important to have an accurate scale (as I said above, you want to make sure you have more oil than lye in your soap). Measure out your ingredients carefully, and if in doubt, err on the side of more oil and water and less lye, just to be on the safe side. But better not to doubt!

1. Measure out your water into a glass jar you won't use for anything else (I just use an old salsa jar)

2. In a separate container, measure out your lye.

3. Pour the lye into the water (never the other way around, it could "volcano" and overflow the jar and burn your hands). I always step out onto the porch for this so that the toxic fumes that are created can dissipate.

4. Let the lye and water mixture sit for 5 minutes, until the mixture looks clear. You can stir it with a metal spoon to make sure everything blends well. Make sure to leave it somewhere where it's safe from children and pets. Also, be aware that this will get really hot! Never use plastic for this (it will melt, and bond with your lye to make something else) and be careful what you set it on.

5. Meanwhile, measure out your olive oil into your blender. Make sure everything is tight and working properly - you don't want it leaking! This is why I also put my blender in a pan; if it does leak, it will go into the pan and not all over the counter top. Lye is particularly hard on butcher block counter tops - ask me how I know!!!

6. When your lye is ready, bring it inside and pour the lye mixture into the olive oil (you might want to use an oven mitt - it will still be really hot!) Cover the blender and turn it on to a relatively low speed.

7. Wait. Soap made with pure olive oil can take 20-30 minutes to blend. Be patient. Remember, Grandma used to have to stir this by hand all day!

You'll know this part of the process is done when the soap "comes to trace". This means that the soap has a thick, pudding-like consistency, and that when you stir it with a spoon it leaves a trace of where the spoon has been, it doesn't just flatten out again like when it's fully liquid.
At this point, you have your soap base. If you wanted to make regular soap bars, you could pour this into your mold and let it sit for 4 weeks to finish saponifying ("cure"). It's not finished soap yet; all of the chemical reactions haven't fully happened.

Or, you can speed up the process with heat, which is what we'll do in the next step.

8. Pour the soap base into a slow cooker. I like to use my Instant Pot, because the stainless steel insert doesn't react with the soap. I've done this in a regular Crock Pot, and the process eventually (after multiple batches of soap) ate away at the enamel and ruined the pot. I don't worry about having a separate pot for soap making, since once it's cooked I have finished soap, just like what I use to clean the pot after cooking.

You'll want to cook the soap base on low for several hours, stirring a couple times just to make sure it's cooking evenly and to see how it's coming along. It will go through several stages; it will start out like pudding, then look something like applesauce, and eventually get to a stage when it looks more like yellow mashed potatoes, with no liquid left. When it's thick like this, it's ready for the next step.
Again, this is a point where you have options. You can pour it into a mold and wait for it to cool to make bars (it's fully soap at this point, so you don't have to wait for it to cure), or you can mix in water to make liquid soap, as I'll show you in the next step.

9. Mix in 5-6 cups of water. This, for me, is the tricky part. Too much water, and you end up with runny soap (which you can cook off; just turn your slow cooker back on and let the excess water evaporate); too little, and your soap is too thick and gloppy and will clog up your pumper (to fix this, just add more water - which is much easier than boiling off excess, so I usually start with 5 cups of water and tweak from there).

Mixing it can also be a challenge; I like to use my stick blender, which does a pretty thorough job, but leaves the soap foamy, so you need to wait for it to settle before pouring it into its final container. A whisk and good old elbow grease will do the job, too, with less foam - but I'm lazy and have a stick blender.

As I mentioned before, you can add essential oils to your finished soap, either to the whole batch when you store it or to the pumper when you're ready to use it. You want to add them at the end, when your soap is cool, since essential oils are heat-sensitive.

And that's it! Kind of putzy, and it does take a while (most of it waiting while the blender runs or the soap cooks), but not really that hard. In only a few hours every month or so, you can keep your family stocked with soap!

Tuesday, March 31, 2020

Our Second Year Making Maple Syrup in Our Back Yard - 2020 Totals

We pulled our taps today and officially ended our 2020 maple syrup season. I was a little sad to see the season end, but with the snow off the garden there's plenty of other things around here to keep me busy.
We did a few things differently this year, the main one being my boiling setup. My husband was never happy with the cheap cobbled-together six block setup I used last year, and started with again this year.
easy backyard maple syrup evaporator
We searched online for better DIY setups, and finally settled on this one: 
$50 homestead maple syrup boiler
Side View
cement block backyard maple syrup evaporator
firebox view
We bought the blocks (thirty-six 8"x8"x16" cement blocks) for under $50 (they just happened to be on sale for 98 cents each at Menard's that week), and it was well worth it for how much easier and pleasant it made the process. The high chimney had a great draw, so once we got everything snugged up, it was almost smokeless for me sitting next to it (you can see steam rising from the pans in the pictures above, not smoke). In our first version, we'd only had the firebox two blocks high, which meant bending almost to the ground to fill (not a big change from my old six-block version). We decided to raise it up another block high to make it easier for me to ladle sap from one pan to another - my back is mostly back to normal after my herniated disc last summer, but I'm not eager to aggravate it again! The taller firebox weakened the chimney's draft, though. To fix this, we filled in the bottom of the firebox up to the level of the first blocks with dirt. We lined the bottom with a piece of stainless steel roofing panel that was lying around (hooray for obtanium!) to keep the wood off the cold, wet ground. This also made it easier to clean out the ashes between boiling sessions (the ashes and biochar were then sprinkled on the garden beds, of course!). 

With the fire more contained, it was also more consistent, which made the boiling much more efficient. Since I could boil more in one sitting now, I was able to put in more taps and gather more syrup each day. We went from 16 taps last year to 23 this year; a couple of those new trees were really prolific, and our production jumped from 3 1/2 gallons of finished syrup last year to 10 gallons this year. 

Another upgrade this year was the purchase of a Brix tester (see link below, or click here to see the one I bought) (I learned about this tool in the book Sweet Maple by Michelle Visser - which I highly recommend! It's full of useful information about all aspects of the maple syrup making process, as well as directions on how to make maple cream and maple sugar - and of course plenty of tasty maple syrup recipes!)

My syrup always seemed thinner than what I'd purchased from the store, and after problems with two inaccurate thermometers, I decided to stop messing around and buy something more exact. It's a little picky to work with, but well worth it in my opinion just for the peace of mind that I was doing it right. It lets you know exactly when your syrup is at the right concentration (66-68% sugar, or "Brix")

If you don't want to spend that much just for peace of mind, I've found that bringing your sap to the point that it sheets off of a spoon is a good non-technical (and free!) way to know that your sap is done (here's a quick 12 second video I took tonight to show you what it looks like, in case you don't know - I didn't!) This is the same as the test you'll see in many old cookbooks for knowing when your jelly or jam will set.

So, here's my final numbers for 2020:
Number of trees tapped: 23
Number of days I boiled sap: 13
Cost of new supplies: $175
     $100 (more taps, bags, and hangers)
     $45 (blocks for new evaporator)
     $130 (Brix tester)
Value of finished syrup (local price $12/quart) $480
                                     Net savings: $305

So my investment that just broke even last year ($150 in supplies for just over 3 gallons of syrup), easily absorbed the cost of the upgrades I made this year and still saved over $300. Not a bad return for a few sessions of sitting around a campfire on a sunny spring afternoon!


Saturday, March 28, 2020

Fast and Easy Ricotta Cheese

homemade ricotta
In the last few months, I've finally gotten back into the habit of making cheese regularly (click here for my basic cheese recipe from way back in 2013). And since I usually make about four gallons of milk's worth at a time, that leaves a lot of whey behind. Being a waste-not-want-not kind of girl, of course I use it to soak my chicken feed (whey contains albumen, a protein that laying hens need for egg development) or add to my garden (whey is a rich source of nitrogen, phosphorus, potassium, and many other micronutrients, and can be applied directly to the garden). But before I use it for either of those, I cook it one more time to make ricotta cheese.

I had read that you could make ricotta simply by heating the whey leftover from making a rennet cheese until a fine cloud of cheese forms just under the surface. Then you simply strain it through a cloth overnight and voila! a lovely dish of creamy ricotta.

While this method does work, the yield is ridiculously low and the process is excessively putzy. The cheese made this way is extremely fine, and quickly clogs up the straining cloth. If you want to keep the whey draining, it's necessary to scrape down the cloth almost constantly (which takes HOURS for this quantity of whey), and even so you end up with only about a cup of cheese (from the aforementioned nearly four gallons of whey).

I was just about ready to give up on making ricotta altogether. It was just too much trouble for so little results. But then, a few days ago, I was re-reading David Asher's The Art of Natural Cheesemaking (you can see my review of the book here) and saw his recipe for "fast ricotta". And just like that, I found the solution to my problem. In his recipe, he not only boils the whey briefly (where the first recipe simply heated it until the cheese started to separate), but he also adds 1/4 cup of vinegar. This made a HUGE difference. From the same whey, in less than half an hour (with no scraping of the cloth), I made a full quart of ricotta cheese.

What a relief! I have to admit, the kids were laughing at me as I did a happy dance around the kitchen. It was so much faster, and so much easier. Manicotti Monday has been saved!

In case you'd like to try this for yourself, here's what I did:

Fast and Easy Ricotta Cheese
Heat the whey leftover from making a rennet cheese; bring to a boil. You don't have to stir; the boiling will take care of that for you. Add 1/4 cup of vinegar (white or apple cider vinegar both work fine) or 1/2 cup of lemon juice and bring back to a boil for a moment. Then turn off the heat and let stand for 5-10 minutes.

Line a colander with a damp cotton dish towel and set into a pot large enough to catch your whey. Scoop out the cheese (or just pour all of it through the towel if your pot is small enough; I have to ladle most of it out before I can lift the pot). Most of the whey will drain immediately, but you can hang it if you'd like it to drain more.

Here's my setup (very fancy, I know)
straining ricotta cheese
When it's drained to your liking, scoop the cheese into a container and refrigerate. Ricotta is a soft cheese, so you should use it within a week.

Wednesday, December 25, 2019

Homestead Holiday Letter 2019

Sunrise over the pasture
It’s the time of year when cards and letters from family and friends start dropping into our mailbox. My favorite letter each year is always from an older couple who have a hobby farm on the other side of town. We don’t see them often, but we exchange letters every year. What I like best about their letter is that it relates what none of our other friends write in their letters – how their garden did, projects they’re working on, and general home-spun humor.

So, in case there’s another crazy farm lady (or guy) out there who thinks the same, here’s my Homestead Holiday Letter for 2019.

grass clippings as mulch for the garden
My 2018 garden - adding more space for 2019
This year was our first full year on the homestead. In 2018 we basically had a smaller version of what we’d left at the old house – our laying hens, a batch of broilers, a couple of pigs, and a little bit of a garden (a few cucumbers, a butternut squash, and just enough tomatoes to keep up with what my daughter would grab and eat when she walked through the garden). Most of my energy was spent on getting settled into the house.

In 2019, with the house a little more organized, I got more serious. The fall before, I’d expanded my garden footprint to about three times its previous size by laying down cardboard and covering it with a deep layer of leaves and grass clippings. I let the chickens run through it all winter, so the soil was well fed and ready to plant in the spring.


seed starting planning
Planning the 2019 garden
I rebuilt my mini-greenhouse (the flimsy metal frame had crumpled under the weight of the squash I tried to store on it over the winter in 2016) and started most of my garden seeds indoors, since I’d learned that transplants are easier to plant into deep mulch. I’d only done this haphazardly before, starting what I guessed would be a good number of seeds about 6 weeks before our last frost date. This year I took some extra time and planned out how many of each plant I needed for each bed, which companion flowers and herbs would benefit each vegetable, and made a seed starting schedule.  (You can see my basic seed starting plan by clicking here). I really think planning made the biggest difference in the garden this year. It may seem counter intuitive, but my work indoors in January had the biggest effect on my harvest in the fall.

backyard maple syrup setup
Making maple syrup in the snowy March weather
With my seed schedule set, starting my seedlings was easy, which left time in March for trying something new. I’d taken a class on making maple syrup, and I’d tagged as many maple trees as I could identify in the fall, so it was time to put that information into practice. I set up a little trial-size boiling station in the garden (hoping the ash from the small fires would help fortify the soil even more) and set to work. It was fun to try something new, and a great excuse to sit around a campfire two or three times a week. When all was said and done, I’d made a little over 3 gallons of maple syrup, which was just enough to cover the cost of the supplies I’d purchased. I look forward to making even more syrup this year - now that I know what I’m doing! And this year, it will all be free, since I saved enough making syrup last year to offset the cost of the infrastructure! (You can read about my maple syrup adventures by clicking here, herehere, or here).

mulch and other garden preparations
Getting the garden ready
Syruping finished up in April, which left a little time for Easter travels before it was time to start garden prep. We needed to mark off the garden beds (I used as many straight(ish) logs from the woods as I could haul over for borders for my beds), scrape the good compost off of the paths and into the beds (it was all one big chicken-scattered bed after the winter), lay down another layer of paper mulch (we’d saved up our feed sacks from the pigs and chickens the year before, so we had a good stash – but even so, we didn’t have as many as we would have liked), cover the paper on the paths with pine needles, and add strips of compost where I was going to be planting seeds (a friend from church brought over a dump trailer full of broken down manure from their beef cattle barn – leading me to wonder what exactly it said about me that one of my most-appreciated gifts of the year was a literal load of crap!)

apple blossoms
Apple blossoms on our one year old tree
May, as always, came with a rush – baby bunnies and baby chicks to cuddle and care for, baby garden plants to be hardened off and planted outside, homeschool classes to finish up and field trips to take. It was a wet spring, and the wildflowers were spectacular (the not-so wildflowers on the apple and plum trees were also wonderful). In the middle of all of this rush, I injured myself (not moving logs or hauling feed bags, but moving furniture to wash the living room floor!) I had a herniated disk in my lower spine, which put me out of commission for most of the summer.

Thankfully, my daughters really stepped up and helped out. My youngest daughter, in particular, took on the bulk of the outdoor responsibilities. She fed the laying hens every day, collected eggs, and raised the broilers pretty much single-handedly (and did a great job – probably better than I’ve done!) 

harvesting wild strawberries
Harvesting wild strawberries
She also took upon herself to forage as much food as she could, hunting out wild mushrooms (after carefully identifying them, of course!), wild strawberries, raspberries, blackberries, blueberries, elderberries, rose hips, and hazelnuts from our property and along the side of our country road.

My oldest daughter decided that she would be in charge of the tomatoes (which only made sense, since she ate most of them!) We had a little under 20 plants this year, and although she didn’t tend them as carefully as I would have, she did a good job and we ended up canning a good amount (read: it’s almost January and they aren’t all gone yet – a new record!)


our new little pigs
My middle daughter took over raising the pigs, which was a major undertaking, since we move our pig pen (four 16-foot hog panels lashed together at the corners, with an old truck topper for shelter) at minimum every 10 days, depending on how much they tear up the ground (toward butcher time it’s almost every day). The pigs ended up a little smaller than usual, but without her help we wouldn’t have had them at all, so I’m very grateful for her efforts!

As you can imagine, with four teenagers in the house (all five will be teenagers this coming year!) we had a busy summer. They discovered sailing, and took their little boats out as often as they could manage. We also took a stay-cation this summer, seeing as much of our little corner of the world as we could fit in over the course of a week. On our last day, a record-breaking storm went through our area, so after our relaxing week we had a week of hard work cleaning up downed trees (a task my husband is still working hard on – turning all of that destruction into firewood!)  

In August, our energy turned to harvesting and enjoying the fruits of our labor. We had enough corn for two big meals of corn on the cob, quarts and quarts of pickles and dilly beans, and just when we thought we could handle the bounty, the apples were ripe. Our own trees are too small to bear (we planted them in 2018 – the first spring we lived here), but friends offered us their surplus and we took advantage of the opportunity. What the kids didn’t eat out of hand we made into applesauce, apple jelly, apple cider vinegar, and apple pie filling  until we ran out of jars, and made the rest into cider. The skins, cores, and wormy apples went to the pigs and chickens to be turned into bacon and eggs.(You can read my post about how many things you can make all from the same apples by clicking here)

carving our giant pumpkins
Our last harvest of the year was our pumpkins. My middle daughter (who also tended the pigs this summer) always claims the privilege of raising our carving pumpkins every year. They must have liked the mulch, because they were huge – too big to reach my arms around – and prolific – we ended up with about a dozen that size! Needless to say, the kids had a great time carving those giants this fall!

Now the garden is all snug under its blanket of snow, waiting for spring so that the chickens can again clean out all of the over-wintered bugs and add their little packets of fertilizer before I shut them out for the summer growing season. I love how God made all of the seasons so different, so that we can enjoy each one as it comes around again. Each has its own challenges and joys, beginning with hope and excitement and usually ending with an exhausted farmer ready to move on to the next thing!

I’d like to wish each of you reading this a Merry Christmas and a Happy New Year – may your harvest be bountiful, your animals stay healthy, and your family grow in love and productiveness!

Drop a line in the comment section below and let me know how your homestead did this year, whether it's a pot of herbs on your windowsill or a farm on 100 acres! I love to hear what everyone is up to!

Tuesday, December 17, 2019

Easy Onion Chip Dip From Scratch

Onion Dip Recipe
One of my favorite snacks as a college student was chips with onion dip. My mom had always made it by mixing sour cream with the powdered Lipton mix, so of course that's what I did, too. Until I started thinking about what might be in that package. Here's what I found on the ingredients list:

Onions (Dehydrated), Salt, Corn Starch, Onion Powder, Sugar, Soy Sauce (Fermented Soybeans, Wheat and Salt), Caramel Color (Sulfites), Maltodextrin, Corn Syrup (Dehydrated), Yeast Extract, High Oleic Sunflower Oil, Disodium Guanylate, Disodium Inosinate.

I don't know about you, but I have no idea what "disodium guanylate" and "disodium inosinate" are*, and what I do know about corn starch, corn syrup, and maltodextrin, I'm not really happy about. So for a while I gave up on my favorite snack, until I found this recipe using simple, healthy ingredients (most of which you could grow yourself, if you wanted!) I like to use organic herbs and spices and organic sour cream - but feel free to use whatever you're comfortable with.

I actually served this dip last Sunday, when we had friends over (who asked for the recipe, and inspired this post! So if you like this recipe, thank Monica for making me share it.)


French Onion Dip

2 Tbsp minced onion
2 Tbsp onion powder
1 1/2 tsp garlic powder
1/2 tsp salt
1/4 tsp each dried parsley, celery seed, and turmeric
16 oz sour cream
Blend dry ingredients and mix into sour cream. Can be served immediately, or refrigerate overnight to let flavors mingle.

*So I googled it, and it turns out disodium guanylate and disodium inosinate are food additives similar to (and often used in conjunction with) MSG, with similar possible side effects. No thank you!

Friday, August 16, 2019

Homemade Sausage Seasoning

Breakfast Sausage Seasoning Recipe
A friend asked me about making sausage from home-raised pigs, and I realized I hadn't posted my breakfast sausage recipe yet! I've been using it for years, so I can readily vouch that it's been well tried and tested!
This recipe makes 2 tablespoons of seasoning, which is enough for about 2 pounds of sausage. Feel free to multiply or divide it as you like - I usually make a big batch so I always have some on hand.


Sausage Seasoning

2 tsp salt
2 tsp ground black pepper
1 1/2 tsp sage
1/2 tsp marjoram
1/4 tsp savory
1/8 tsp ginger
pinch cloves and red pepper

Mix it all together, and it's ready to use! I generally mix my seasonings in when I fry up my sausage, but if you prefer you can certainly mix it in when you grind your meat, too. 

Thursday, August 15, 2019

2019 Chicken Harvest - The Good, The Bad, and The Numbers

Raising Backyard Meat Chickens
I think this was our best year yet raising Cornish cross meat birds (aka "broilers"). The birds grew out well (dressed out weight averaged over 4 pounds per bird) and looked happy and healthy. Best of all, we didn't lose any to predators, weather, disease, or "sudden chicken death syndrome" (AKA "it just died").
As we have for the last few years, we ordered the broilers through our local feed mill, who get their chicks from Sunnyside Hatchery in Beaver Dam, WI (which is about as local as I can get). I've ordered directly from the hatchery before and had them delivered through the post office, but the price is the same, and I like that I can pick up their first bag of starter chick feed at the same time I'm picking up my birds. I bought straight run, which means I get both pullets (girls) and cockerels (boys). Pullet chicks cost less because they don't grow as large or as quickly, which of course means cockerels are more expensive because they produce more meat more efficiently, so straight run seemed like a good compromise between cost and efficiency.  
We kept them in the same old cobbled-together wooden brooder we've used since we got our first batch of chicks years ago (the picture above is of our broiler chicks from last year; the picture below is of our laying chicks from this spring). This year we used wood shavings for bedding instead of the newspaper and paper towels I've used before. It was slightly more annoying because the shavings got into the water fountain and food trough, but not enough to be a real problem. 
At two weeks old, we moved them out into their "halfway house" - an ark-style small chicken tractor a friend gave us a few years ago. This way the chickens had access to fresh air and sunshine in the daytime, but still had a solid wooden covered area for nights and inclement weather. 
At four weeks old the chickens outgrew this pen and went into a rectangular 4'x8' chicken tractor (click here to see how to build your own). This year we switched to white tarps instead of blue, which made my husband happy (apparently blue plastic tarps in the yard look a little too redneck; white plastic tarps are much more classy) 😉. Although these homemade shelters may seem pretty flimsy, we had some major storms in our area this year while the chicks were growing out (there were many, many large trees down across the state from the first storm, and our power was out for five days while the electric company repaired broken power lines and blown-down poles) and even though their only protection from the weather was the tarps (and the fact that their pasture was in a slight depression on our land), the chickens all came through just fine. 
The main difference this year, other than the pine shavings, was that we were able to give them a lot more space to run. We had a 4 feet high by 50 feet long garden fence that wasn't in use, so my daughter claimed it to build a pasture area for the birds.  We moved them to fresh pasture every few days as the grass got beaten down and covered in manure. They still had a chicken tractor in the center of the pasture for protection from inclement weather and for shade from the hot July sun, but for the most part they spent their time outside in the fresh air. This was much more room than we'd been able to give them before (usually we've kept our broilers confined to just two 4'x8' tractors) and it seemed to really make a difference. The birds were much cleaner, and were able to be more active (well, as active as a Cornish cross chickens ever will be . . .)
All well and good, but what about the bottom line? We had happy, healthy chickens, but how expensive was it to raise them this way? Since we didn't have to buy or upgrade any infrastructure (other than the tarps, which were about $2 each), the purchase price of the chicks and the cost of their feed were our only inputs. The chicks cost us $1.40 each, plus a $6 fee for buying less than 50, for a total of $76. They ate 700 pounds in the 8 weeks we raised them, which cost us $380.50, or a little over 54 cents a pound. Those together add up to a total expense of $456.50. Divide that by 50 birds and you end up at $9.13 a bird. They were all right around 4 pounds each when we put them in the freezer, so for an easy estimate let's say that's 200 pounds of meat. A little more simple math, and I figure we're around $2.28 a pound. Not bad for locally-sourced (doesn't get more local than your own back yard!) organic-fed pastured chicken! The closest organic chicken I could find for comparison was over $3 a pound (and that wasn't local or pastured, plus I would have had to pay for shipping). Local, pastured, but not organic chicken was $2.18 a pound. There really is no comparison for meat you've raised yourself, to the standards you want for your family - but it's still nice to know you're not paying much more than you would for second-best!

Wednesday, July 3, 2019

Homemade Sheboygan-Style Bratwurst

Homemade Brat Seasoning Recipe
Independence Day is coming up this Thursday, and in true American fashion, we will be grilling out. And since our great state is Wisconsin, what we'll grilling will be brats. If you love brats as much as we do, but also hate all of the MSG, nitrates, etc. in most brats as much as we do, then I'm here to share the joy I've found with you.

I should note that these are infinitely customizable - feel free to add cheddar, jalapeno, or whatever you like. Our local brat shop - Louie's Finer Meats in Cumberland, Wisconsin - offers a dizzying array of specialty brats featuring everything from onion and garlic to cranberries, blue cheese, and wild rice (my favorites are the blueberry and cheddar and the mushroom and swiss).


Homemade Sheboygan-Style Bratwurst

3 pounds of ground pork or beef (include at least half a pound of pork fat in that total)
1 Tbsp salt
2 tsp ground white pepper
1 tsp dried marjoram
1/2 tsp caraway seed
1/2 tsp grated nutmeg
1/2 tsp ground allspice
1/4 tsp ground ginger
1 Tbsp minced fresh garlic
(2 tsp red pepper flakes optional)
Stuff casings according to manufacturer's direction. Can be frozen, or grill and serve.

My husband also likes to "hot tub" marinade his brats before grilling - he puts the brats in a crock pot set to low, then adds a bottle of beer and a sliced onion.

Enjoy your summer cookouts, and have a happy Independence Day!

Tuesday, July 2, 2019

Our 2019 Three Little Pigs

Backyard Pigs
You can probably tell by the last few posts that I've been very excited to get pigs again this year. Not only are they a source of organic, pastured, chemical-free ham and bacon, but they are a great money-saver for our large family as well. So you can imagine how excited I was yesterday when our "pig guy" called and said he finally had a couple of pigs available for us! Usually we try to get our pigs mid-May, so we're getting a pretty late start this year, but that's OK with me - we'll have more garden produce for them when they really start porking out (meaning we'll save more on the feed bill). We should still have a full four months to grow them out, though, depending on the weather. Our processing date depends on when the heavy frosts set in, since we don't have a heater for their water trough. So when the water starts freezing overnight, it's time to butcher. If we have a normal fall, that will put our processing date in October or maybe even November.

But right now the weather is balmy and beautiful, and we're more than ready to bring some pigs home. We got the call before church, and on the drive home I texted my sister-in-law to ask if she'd like me to pick up a pig for her, too - she'd been toying with the idea of raising a pig, but hadn't decided one way or the other. She didn't text me back before we headed out to pick up the pigs after lunch, so I assumed it just wasn't meant to be for her this year. But when we arrived at the farm, lo and behold, there were three pigs in the pen! A black one, a pink one with black splotches, and a little pink runt. Now, not having heard back from my sister-in-law, and knowing my own weakness, I had only brought enough money for the two piglets I was planning on, plus my emergency $20 I always carry with me. When we got to the pen and I told the kids to pick out the ones they wanted, the farmer said he'd give us the runt for half price. I told him that all I had was the $20 extra, and without a second's hesitation he said, "Sold!" And that's how we ended up with three little pigs instead of two.

Which ended up being a good thing, since I got a text message from my sister-in-law on the drive home saying she'd like one after all! We'll be raising it here with the others, but she'll pay for her pig's feed (plus a little for our trouble) and help with the butchering. My daughter, who's in charge of the pigs this summer, is excited to earn her first "farm money".

So now they're home and all settled in, so we just have to settle on some names! All through lunch the kids were brainstorming names for this year's piggy pair, finally settling on Chris Hamsworth and Tom Piggleston (with my oldest son lobbying heavily for Benedict Baconbatch). The only problem was that when we picked them up, we found out that all three of the pigs are gilts (girls). So of course I suggested that we simply modify the names slightly so we'd have Christine Hamsworth and Thomasina Piggleston (which my daughter would not agree to until I assured her we'll still call them Chris and Tom). The runt has been officially dubbed Eggs Benedict Cucumberpatch (Eggy for short), and is already the family favorite.

And so begins another summer of pig-raising. I have to admit, I've missed having pigs this spring. They're such a useful homestead animal - eating food scraps that are too big for the chickens to manage (not to mention the chicken bones leftover after I make broth), clearing the thorns and thistles out of the pasture, and just generally being their happy piggy selves. Our little farm just feels more complete with them around.

Tuesday, June 11, 2019

Rhubarb Bread Pudding

Rhubarb Bread Pudding Recipe
There isn't too much ready to be harvested yet on my little homestead, but two things I do have in abundance are eggs and rhubarb. This recipe uses plenty of both, and also got a vote of "yummy!" from all of the kids!

You may think that this looks a lot like my recipe for Overnight French Toast Bake, and you'd be right - it's pretty much the same thing, just with the seasonal addition of a thick layer of rhubarb.


Rhubarb Bread Pudding

Cubed Bread (enough to generously fill the bottom of an 8x8 square baking pan)
3-4 cups chopped rhubarb stems
1 tsp cinnamon
1/2 tsp nutmeg (optional)
1/2 cup ground walnuts (optional)

Layer bread and rhubarb; sprinkle spices and nuts over all. In a separate bowl, mix:
6 eggs
1/2 cup maple syrup (or sweetener of choice plus vanilla)
1 1/2 cups milk (either buttermilk or sweet milk both work fine)

Pour liquid over dry ingredients and bake at 350 degrees for an hour. Serve hot or cold.

This can be made ahead: simply refrigerate after adding the liquid ingredients, then bake at your convenience (I often refrigerate this overnight for baking in the morning).

Once you've mastered this recipe, you can easily change it up with whatever seasonal fruit you have available. I've yet to find a fruit that doesn't work!